
When working in Autodesk Revit, efficiency matters, especially when opening large project files. Did you know you can control which view opens automatically when your model loads? Setting a specific starting view not only streamlines your workflows, but can also improve perceived load times and ensure the right information is presented immediately.
Why set a starting view in Autodesk Revit?
By default, Autodesk Revit opens the last viewed screen. While this works in many cases, it’s not always ideal especially for:
- Team environments where consistency matters.
- Client presentations.
- Large projects with heavy 3D views.
- Models that take longer to regenerate complex views.
Setting a lightweight sheet or simplified view as the starting point can reduce regeneration time and present polished project information instantly.
How to set a starting view in Autodesk Revit
Follow these simple steps:
- Go to the Manage tab.
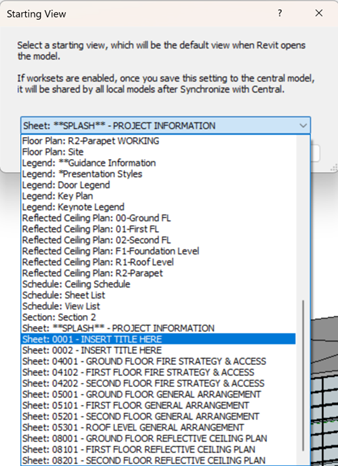
- In the Manage Project panel, click Starting View.

- Select your desired view from the list (sheet, 3D view, plan etc).
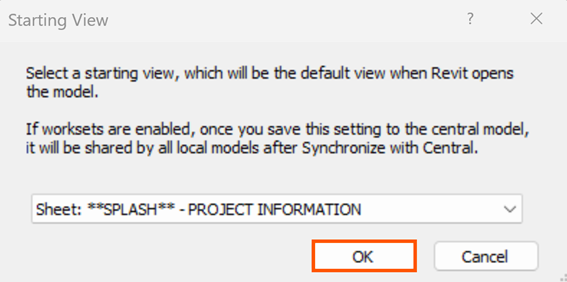
- Click OK.
- Save your project.
- And that’s it! The next time the file is opened, Revit will load directly into your selected view.
Customising your starting view in Autodesk Revit is a small adjustment that delivers big workflow benefits. Whether you’re optimising performance or improving presentation standards, this simple setting helps you take control of how your project is experiences from the very first click!
Still got Questions?
Book Training
Our Revit courses cover everything from the skills required to use the software, to design and share information between project teams, through to creating custom family elements.
Contact Us
We are here to ensure you receive a consistently high service and quality solutions for your business needs. We promise you won’t regret speaking to us, and if we can’t help you, we will try to find someone that can.