


Utilising an underlay in Autodesk Revit allows you to understand how components connect together between levels, for both coordination and construction processes. The benefit with defining an underlay range is that you can turn it on and off freely, to be able to visualise levels above and below the current plan view level that you are working on, rather than affecting how the rest of the view displays, like with a view range.
MEP Example
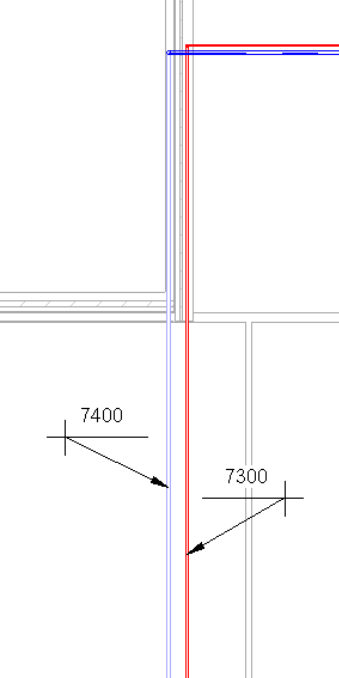
In the example, pipe families for hot (red) and cold (blue) water are connected to two water heaters. On the left-hand side of the view, the elevation of the pipes changes from 3800/3900mm to 7300/7400mm, to traverse from above level 0 to above the ‘plenum/services’ level.
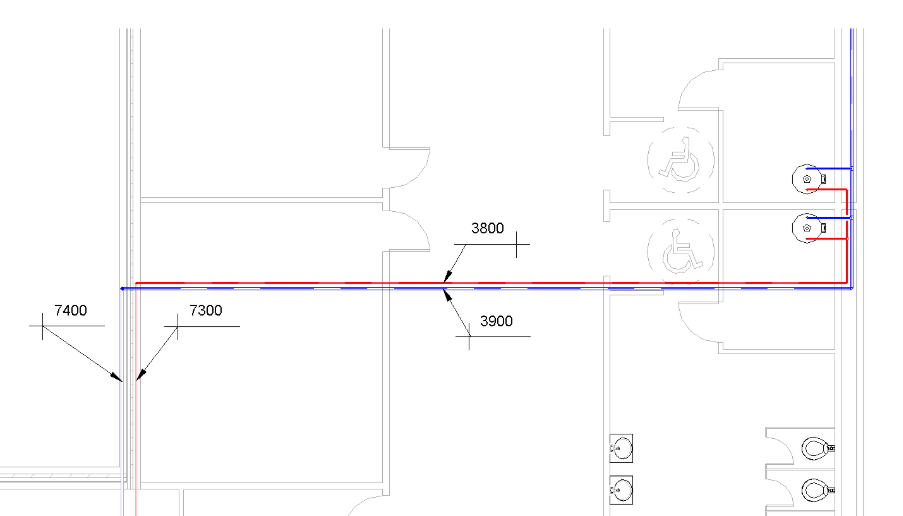
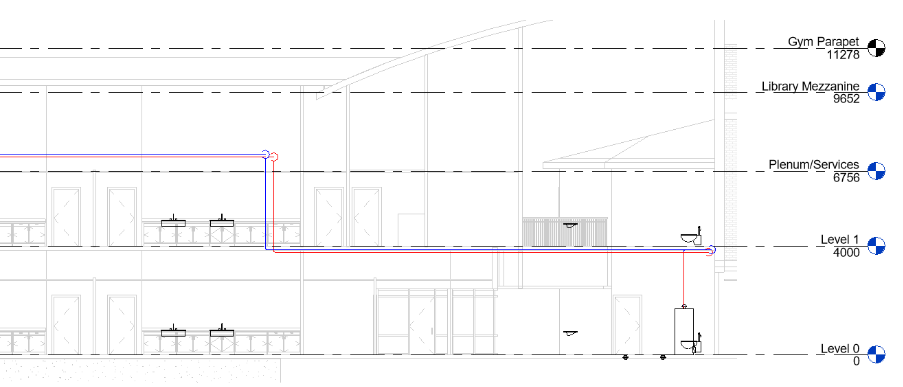
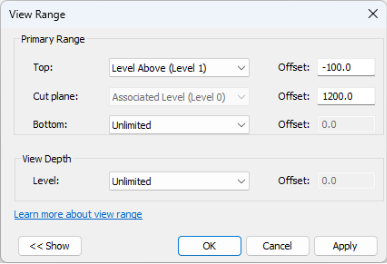
As you can see, the view range ‘Top’ only extends to 100mm below level 1 (offset = 100), which is equivalent to 3900mm – the height of the cold water pipe.
Without affecting this view range, underlay can be utilised to see how this pipe connects at other heights outside of the range, for the purposes of the initial modelling and later coordination workflows.
Without defining an underlay, only the lower-level pipes are shown, as we would expect:
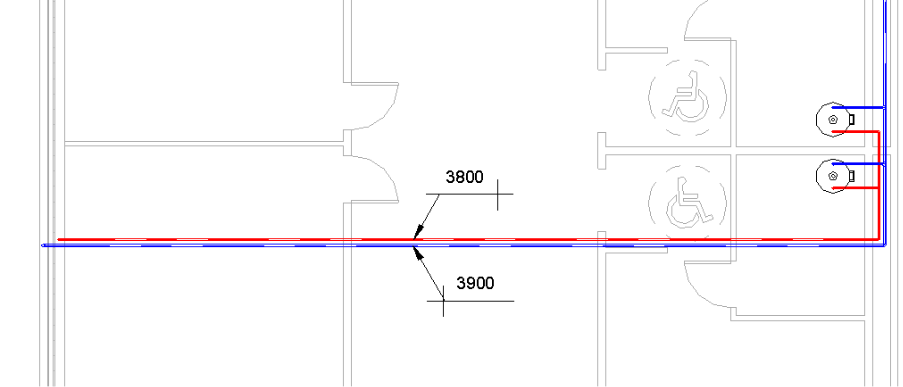
By defining an underlay in properties, which encompasses the higher-level pipes, they appear in the view and are shown in halftone by default.
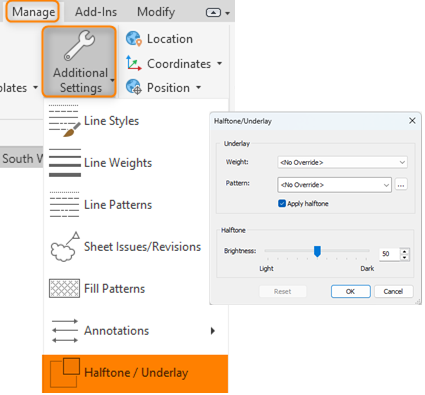
You can change this setting if required in manage tab > additional settings > halftone/underlay.
Utilise ‘Select Underlay Elements’ on the status bar to enhance the workflows, to have the ability to select and modify families properties that are contained within the underlay (this might be turned off by default).

As can be seen, underlays provide valuable context for placing, aligning, and check building components across floors. Whether you’re modelling staircases, walls, structural elements, or MEP systems, using underlays effectively can reduce errors and make navigation between levels much more intuitive.
For a similar blog which goes into work with view range and plan regions in Autodesk Revit – which allow you to define the height that the whole plan view or a portion of the plan view can see – click here.
Still got Questions?
Book Training
Our Revit courses cover everything from the skills required to use the software, to design and share information between project teams, through to creating custom family elements.
Contact Us
We are here to ensure you receive a consistently high service and quality solutions for your business needs. We promise you won’t regret speaking to us, and if we can’t help you, we will try to find someone that can.