
In Autodesk Revit, View Range is a fundamental property for plan and ceiling views that defines invisible horizontal planes (Top, Cut, Bottom, View Depth), to control what elements are visible, how they’re displayed (cut vs projected), and their visual weight – essentially acting as your ‘eye level’ and ‘sight depth’ to slice and see through the model to create clear, accurate floor plans. It dictates which elements appear as thick (cut) lines and which as thin (projected) lines, crucial for differentiating walls, furniture, and other building components at different heights and levels.
Let’s set up a model to work with to explore the View Range.
- Start a new model using an Architecture Template.
- Go to the East Elevation view and create an additional level.
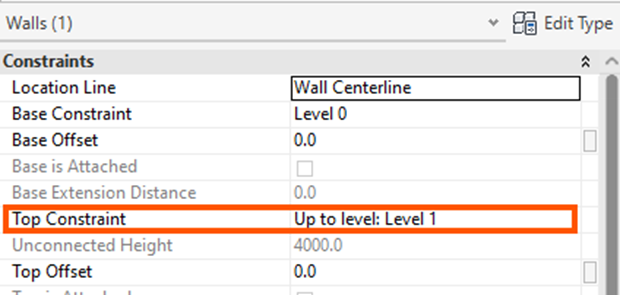
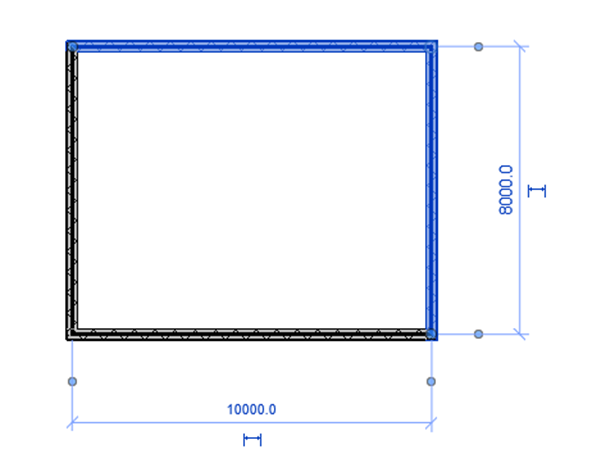
- On Level 0, place 4 walls, measuring 10000mm x 8000mm. Make sure the walls constraints are set in Top Constraint to Up to Level 1, as the image below.
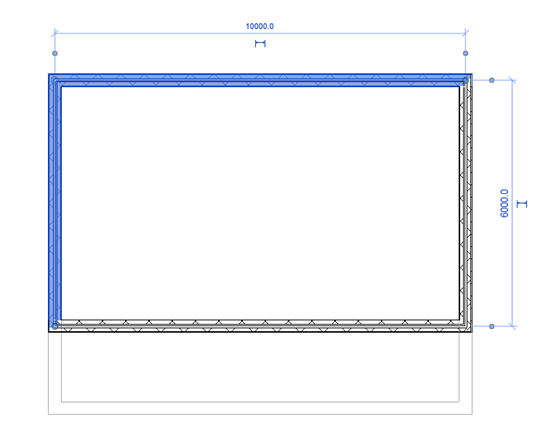
- Go to Level 1, place 4 walls above the walls on level 0, measuring 10000mm x 6000mm. Make sure the wall constraints are set in Top Constraint to Up to Level 2, as the image below.
On level 2, we want to place more walls using the walls below as a reference point. When we activate level 2, we cannot see any of the walls we have just created. Once way is to change the Underlay setting in the properties palette, explained in a previous blog.
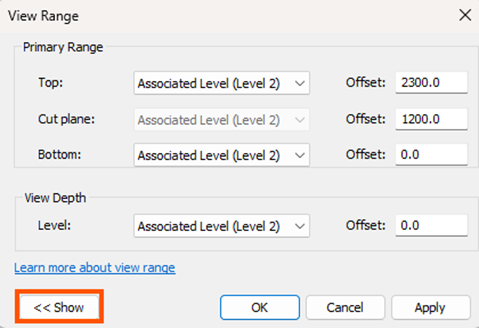
- In the properties palette, under Extents > View Range, select the edit button (you may have to scroll down to find Extents).

- Click on the <<Show button to see more details.
- In the View Depth area, click on the dropdown to see the options available.
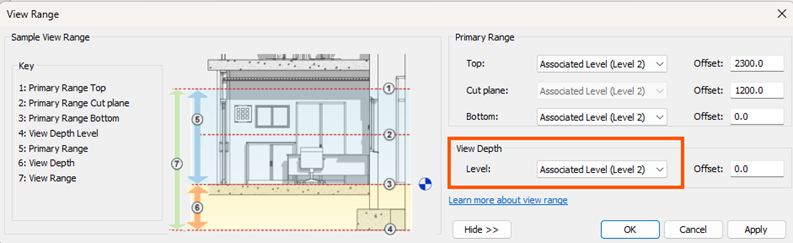
- In the dropdown, we have the below options:
- Associated Level (Level 2): because we are in Level 2.
- Level Below (Level 1): in this case we are in level 2 so level 1 is the below level.
- Level 0: as it says.
- Unlimited: we can get to the lowest level of the model.
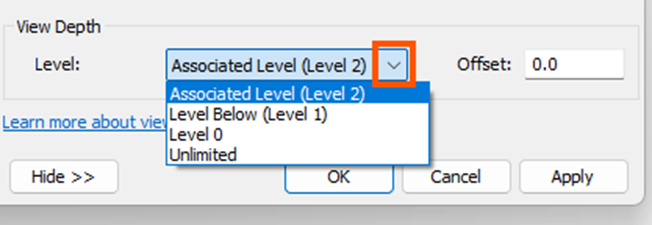
- We can select Unlimited to see all below, but have a look at all the options, select Apply to see the changes. Once you’re happy, click ok.
- At the top of the View Range Edit palette, you can change the default offset values to increase or decrease the view range between the Top, Cut Planes and Bottom.
Understanding the View Range in Autodesk Revit is key to creating clear and accurate plan views. Once you know how the cut plane, top, bottom and view depth work together, it becomes much easier to control what shows up in your drawings and to troubleshoot missing elements. With a little practise, adjusting the View Range will feel simple and your plans will look cleaner and more consistent.
Still got Questions?
Book Training
Our Revit courses cover everything from the skills required to use the software, to design and share information between project teams, through to creating custom family elements.
Contact Us
We are here to ensure you receive a consistently high service and quality solutions for your business needs. We promise you won’t regret speaking to us, and if we can’t help you, we will try to find someone that can.