
The Revit split face tool allows us to split the face of a surface without having to split the element.
For example if I had a wall and wanted to apply paint but for a shorter length of wall I can use the Split Face tool to split the area I wish to paint.
How to use the Split Face tool
- Go to the Modify tab.
- In the “Geometry” group click the Split Face button.
- Select the surface you wish to split.
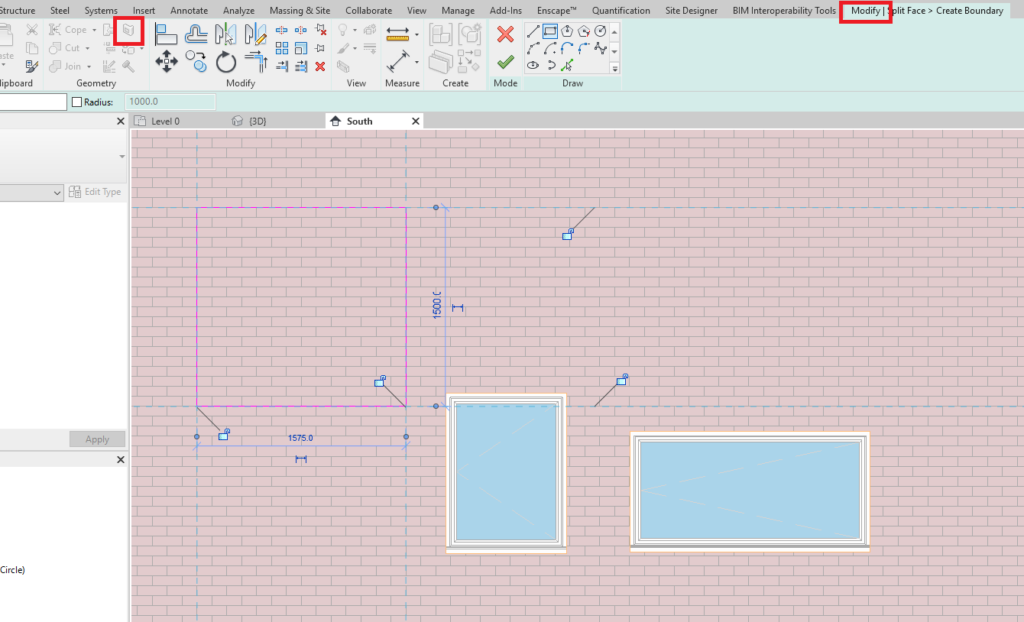
- Using the draw tools draw a boundary around the surface you wish to split.
- Click the green tick in the Ribbon bar to finish.
This region will now be separated from the rest of the surface and can be edited as such.
Conclusion
This tool is extremely useful when used in conjunction with the paint tool which allows you to apply materials to surfaces
Still got Questions?
Book Training
Our Revit courses cover everything from the skills required to use the software, to design and share information between project teams, through to creating custom family elements.
Contact Us
We are here to ensure you receive a consistently high service and quality solutions for your business needs. We promise you won’t regret speaking to us, and if we can’t help you, we will try to find someone that can.