
New in Autodesk Revit 2026 are the latest placement tools ‘Place by Room’ and ‘Place by Segment’, when modelling walls.
As usual, we have the Wall tool which can be found on the Architecture tab on the ribbon bar. Once in the Wall tool, we can now have a group called Placement. This is where the two new tools can be found:

Place by Room
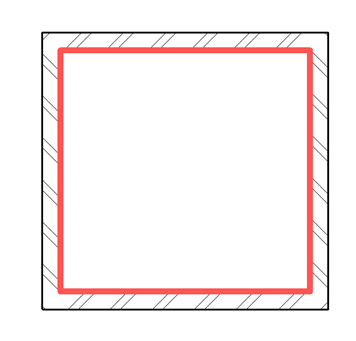
Using Place by Room, we can place a new finish wall in front of the existing walls in the current room. By choosing a wall type to use, a preview boundary line will appear in any room you move your mouse or cursor into. Then when you left click inside the room, a new finish wall will be placed:
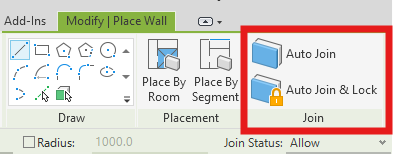
Use the join tool to Join & lock the new finish wall to the existing wall. When this is done, the finish wall will take into account the openings, such as doors and windows.
Place by Segment
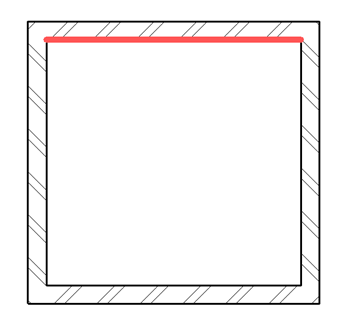
With Place by Segment, we seem something similar to Place by Room, however we can pick individual wall segments on which to add a new finish wall to. By moving your mouse or cursor over an existing wall face, a preview line will appear. When you left click on the wall, it will place a new finish wall segment:
For more information on this blog post, or if you have any other questions/requirements, please complete the below form:
Related Links
Autodesk Revit – Man and Machine
Autodesk AEC Collection – Man and Machine
Autodesk Revit Training – Man and Machine
Autodesk Revit Demonstrations – Man and Machine
Autodesk Revit – Autodesk Platinum Partner – Man and Machine
Autodesk Revit LT – Autodesk Platinum Partner – Man and Machine
Autodesk Revit LT Suite – AutoCAD & Revit LT – Man and Machine
Revit Architecture Training – Platinum Partner – Man and Machine
Autodesk AEC Collection – Platinum Partners – Man and Machine