


If you’ve ever started a new Autodesk Revit project, you’ve already been given two important reference points, even if you’ve never seen them.
Every Revit model contains a Project Base Point and a Survey Point, but both are hidden by default in most templates. Because they’re out of sight, many users don’t realise they exist until then encounter coordinate issues, linked models that won’t align, or confusing spot elevations.
In this blog, we’ll make the Project Base Point visible again and explain why understanding it can save you headaches later.
Turn on the Project Base Point
To display the Project Base Point:
- Open a plan view.
- Press VG (or VV) to open Visibility/Graphics.

- Select the Model Categories tab.
- Scroll down to Site.
- Expand the category if necessary.
- Check Project Base Point.
- Click Apply or OK.
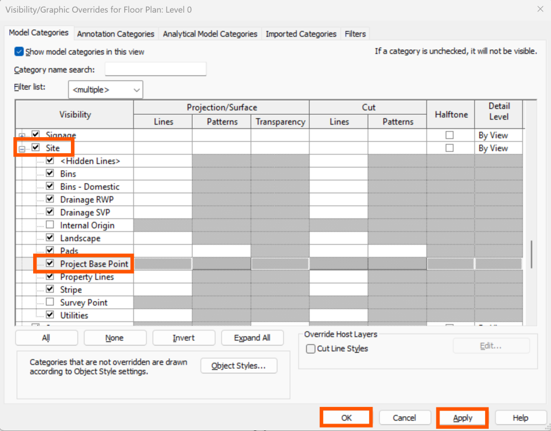
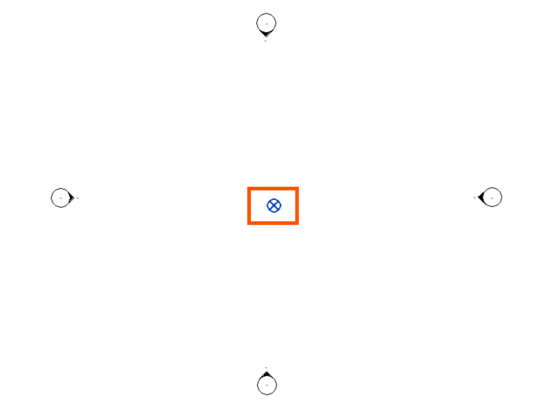
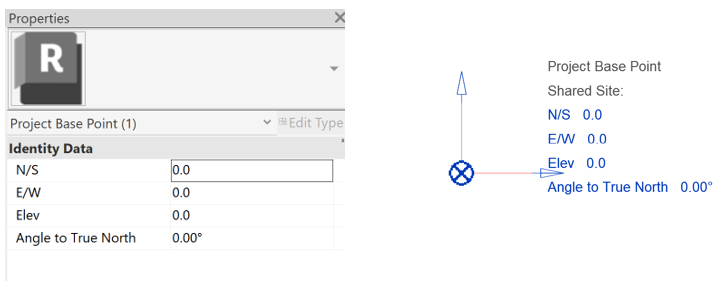
You’ll now see the Project Base Point appear in your view.
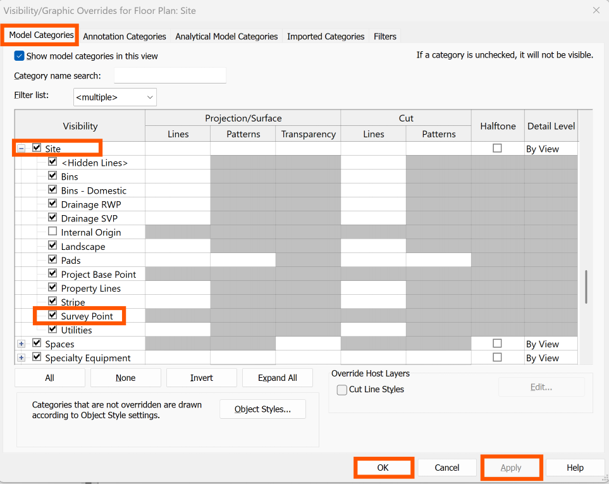
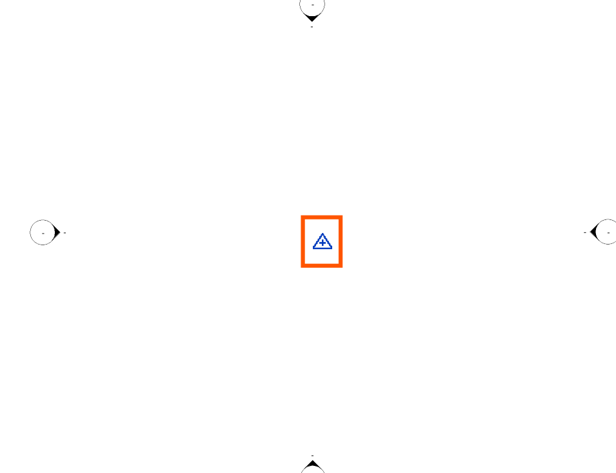
You can also turn on the Survey Point whilst you’re here, if you’d like to compare the two.
What is the Project Base Point?
Think of the Project Base Point as your project’s local coordinate system.
It’s the reference point used for measurements and coordinates within the building model. Instead of working with huge real-world coordinate values, the Project Base Point lets you work with smaller, more manageable numbers that make sense during design and documentation.
Many teams position it at a logical rotation, such as:
- A building corner.
- A grid intersection.
- The main entrance.
- Another agreed project datum.
The goal is to create a consistent local reference for everyone working on the model.
For small projects, you may barely notice the Project Base Point. But as projects become larger, or involve multiple disciplines, it becomes much more important.
A correctly managed Project Base Point helps:
- Keep coordinate values easy to read.
- Improve consistency between architectural, structural and MEP models.
- Reduce confusion when placing spot coordinates.
- Support better collaboration with linked Revit models.
- Make exporting to CAD or other software more predictable.
Ignoring it doesn’t always cause problems immediately, but it often leads to coordination issues later in the project.
Project Base Point vs Survey Point
A common misconception is that these two points serve the same purpose.. they don’t.
The Project Base Point is for your building’s local coordinate system.
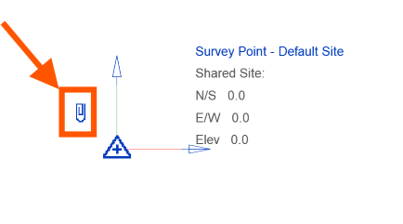
The Survey Point represents the project’s position in real-world using survey coordinates such as Easting, Northing and Elevation. It’s primarily used when coordinating with civil engineers, surveyors, GIS data, or multiple Revit models using shared coordinates. You can lock this position by selecting the paperclip, to avoid any mistakes by accidentally moving this.
A simple way to remember the difference is:
- Project Base Point – where is this point in my building?
- Survey Point – where is this building on Earth?
Even if you don’t need to modify the Project Base Point, it’s worth making it visible at the start of every project. Knowing where it is and understanding its purpose can make model coordination much easier as your project develops.
A few minutes spent understanding Revit’s coordinate system today, can save hours of troubleshooting later.
Still got Questions?
Book Training
Our Revit courses cover everything from the skills required to use the software, to design and share information between project teams, through to creating custom family elements.
Contact Us
We are here to ensure you receive a consistently high service and quality solutions for your business needs. We promise you won’t regret speaking to us, and if we can’t help you, we will try to find someone that can.