
When working on complex building models, clarity and navigation become essential, especially when drawings span multiple sheets. One powerful yet often underused feature in Autodesk Revit is View References. These annotations help guide users between related views, ensuring your documentation remains easy to read and professional structured.
What are View References?
View references are annotation tools that display detail numbers and sheet numbers tied to a specific view. They act as visual signposts, directing anyone reading your drawings to the correct location for additional information.
However, it’s important to note that view references can only be places in certain types of views. They are not available in perspective, schedule or sheet views, but can be used in most other model views.
What is Duplicate as a Dependent View?
When you duplicate a view as dependent:
- All views stay synchronised with the parent.
- Changes to annotations, visibility, or model elements affect all dependent views.
- Each dependent view can have its own crop region to show different areas.
When would you use them?
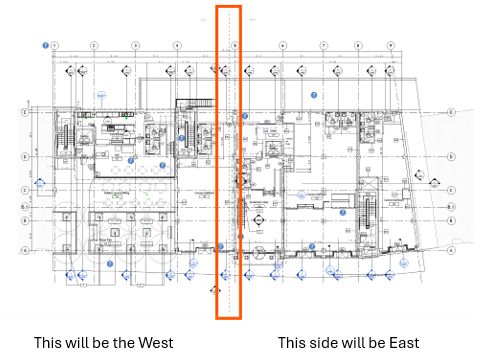
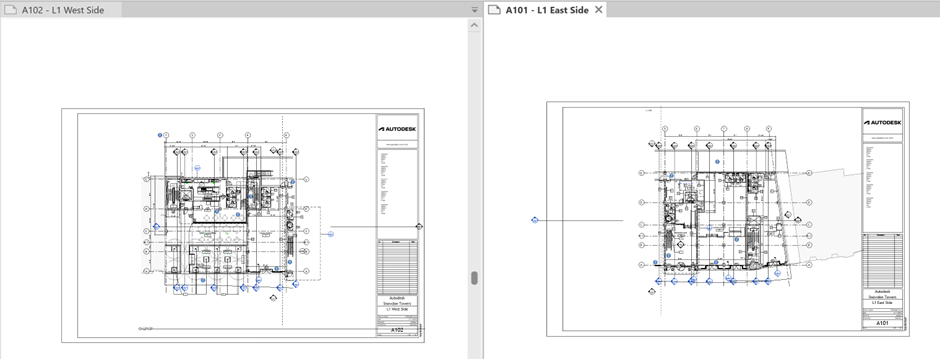
A common scenario involves large floor plans that cannot fit into a single sheet. Imagine a floor plan that must be split into two sections:
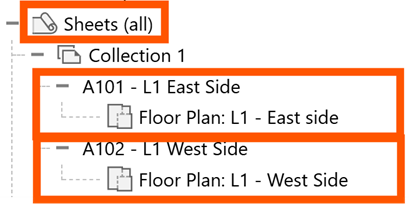
- East side – placed on sheet A101.
- West side – placed on sheet A102.
To achieve this:
- The original plan is divided into dependent views.
- A matchline/view reference line marks where the split occurs.
- Each portion is places on its respective sheet.
This is where view references come in. Positioned near the matchline/view reference line, they guide the reader to the corresponding sheet and view, making navigation seamless.
How to add a View Reference and Duplicate View as a Dependent
Follow these simple steps to place a view reference in your model:
- Open the parent floor plan view (L1 in this example) that shows both sides of the matchline.
- Add a matchline to the parent view. Go to the View tab > Sheet Composition > Matchline. Draw the line down the centre of the parent view.

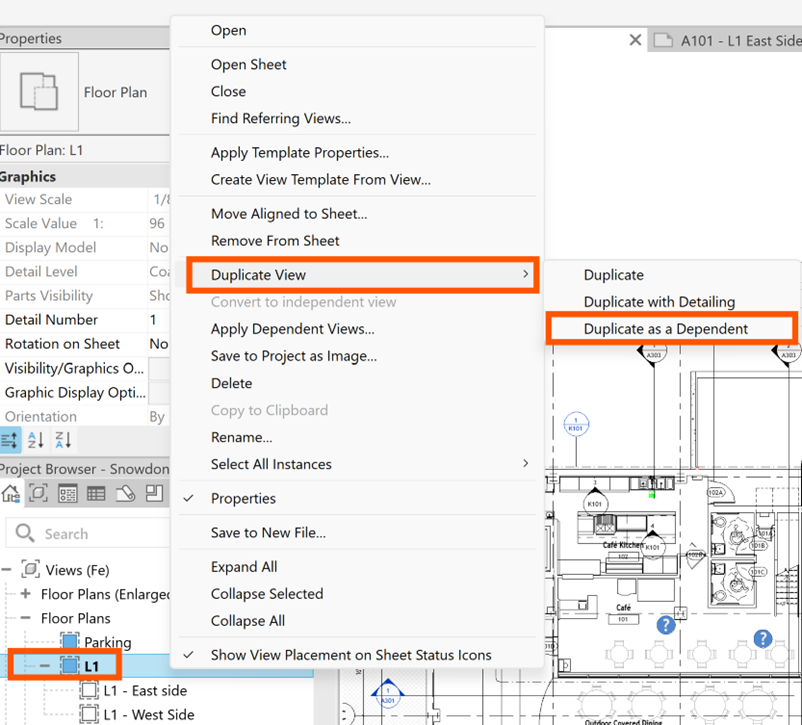
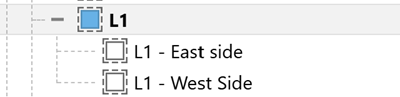
- Right click on the parent plan view listed in the Project Browser (L1) to duplicate with detail 2 views, one for the East and one for the West.
- Create 2 new sheets for these views, drag and drop the view on the corresponding sheets.
- Go to the Annotate tab on the ribbon.
- Select View Reference from the Tag panel.
- Choose:
- The view type (eg, floor plan).
- The target view (eg, the West dependent view).
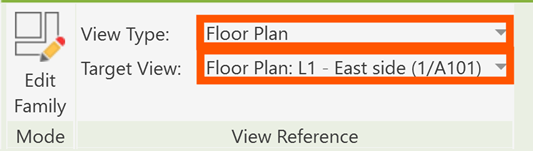
- Click near the matchline on the correct side to place the reference. Once placed, the view reference will automatically display:
- The sheet number (eg, A101).
- The detail number (eg, 1).
Repeat the process to add additional references as needed.
Lastly, crop the corresponding views to show the correct sides, add the corresponding views to the corresponding sheets. If the parent view changes, this will automatically update the related views as they are dependent on the parent view.
View References may seem like a small addition, but they make a big difference in professional documentation. By guiding users between related views, they ensure your project remains organised and easy to understand, no matter how large or complex it becomes.
Still got Questions?
Book Training
Our Revit courses cover everything from the skills required to use the software, to design and share information between project teams, through to creating custom family elements.
Contact Us
We are here to ensure you receive a consistently high service and quality solutions for your business needs. We promise you won’t regret speaking to us, and if we can’t help you, we will try to find someone that can.