
In this blog I will show you how you can very easily create 3D Sections in Revit. What is a 3D section? Exactly what it says, it’s a section but it is in 3D.
The below image is an example of a floor section:
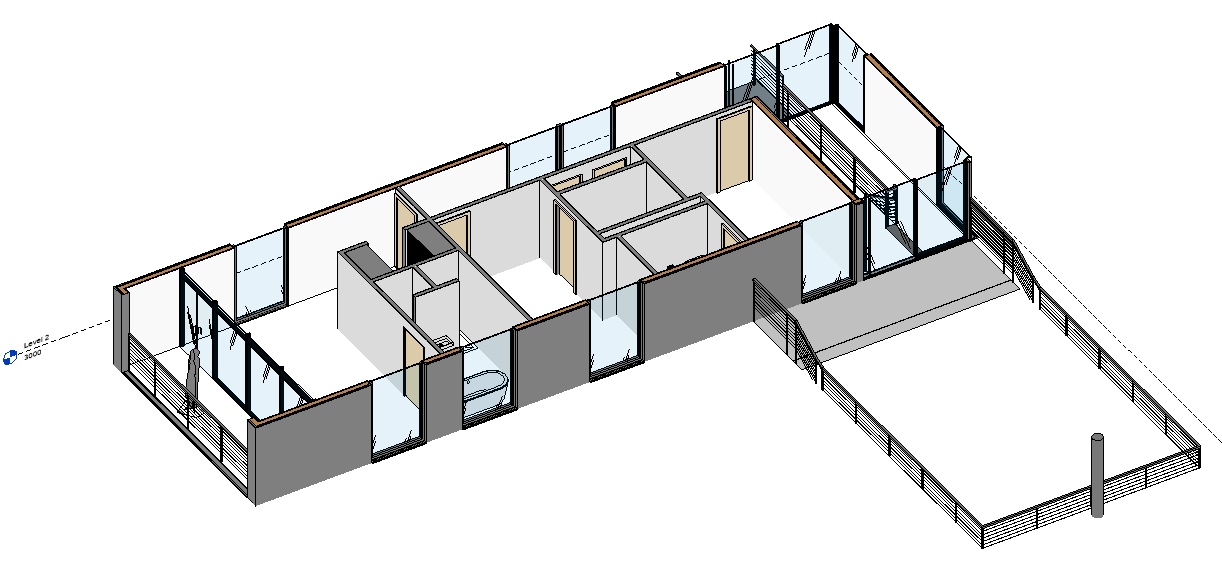
But we’re not just restricted to floors, you can create 3D sections for Floors, Sections, Elevations and 3D Views.
Instructions
1. Open your project in the default 3D view
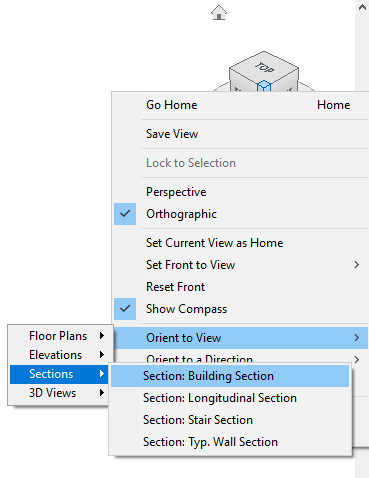
2. Right click on the view cube
3. Find “Orient to View” in the menu and mouse over it
4. When it expands it will give you the following options:
a. Floors
b. Sections
c. Elevations
d. 3D Views
5. Mouse over one of these and you will find any views you have created of this type
6. Click on one and the 3D view will now orientate and will create a section box around the view
7. Save your 3D view
Conclusion
Using this method, you can very easily create 3D views using your existing views. Sometimes placing a section on a floorplan to create a 3D section is a lot quicker and easier than messing around with the section box to manually create 3D sections.
Still got Questions?
Book Training
Our Revit courses cover everything from the skills required to use the software, to design and share information between project teams, through to creating custom family elements.
Contact Us
We are here to ensure you receive a consistently high service and quality solutions for your business needs. We promise you won’t regret speaking to us, and if we can’t help you, we will try to find someone that can.