

While the displace tool has been available in 3D models for some time, Revit 2023 has added this functionality to 2D views also which allows you to create Displaced views for use both on models and in sheet views which can help explain the project to other team members.
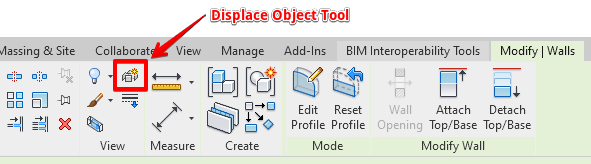
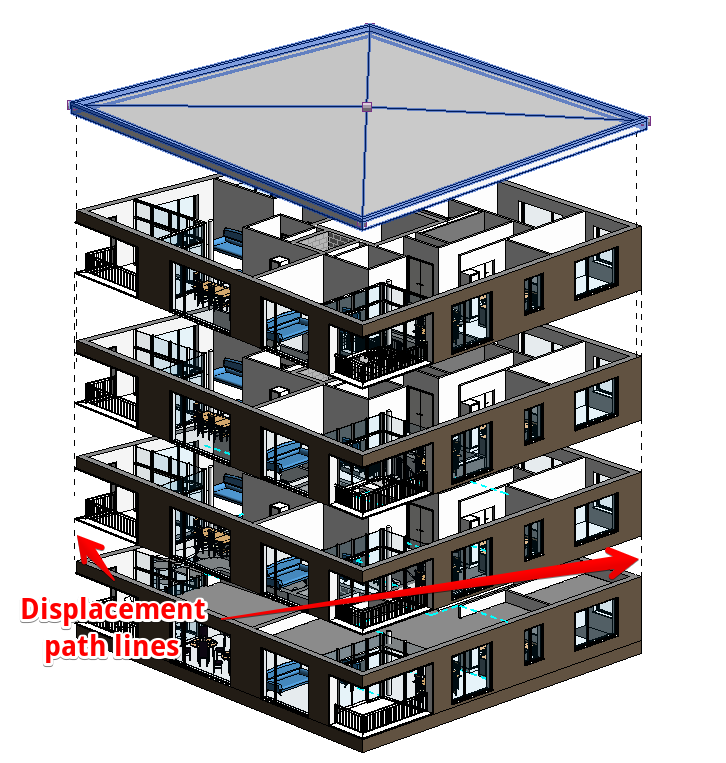
The Displace function has been available in 3D views for some time and can be used to create exploded views in your 3d Models. This can be used to explain how certain elements go together or to illustrate the construction of a building by separating its key levels or components. To do this select an object and pick the displace object button on the toolbar. This doesn’t modify your model, it is a temporary view specific modification which can be reset later.
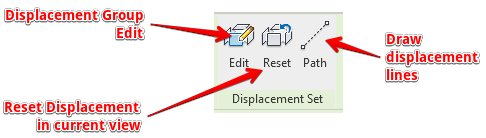
Further to this you can group displacement items to be moved in a single move as well as showing the displacement path of the objects which may be moving in different directions. You can modify elements in X, Y or Z directions or a combination of each direction should you want to. Single axis model displacement views can be added to your sheets after. You can use these in combination with section box limited views to great effect.
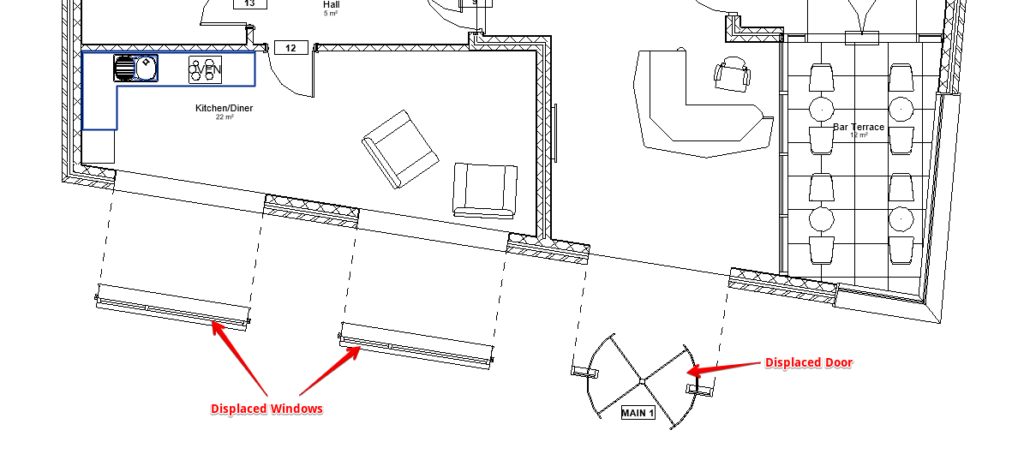
New for Revit 2023 you can now also do this in 2D views such as plans, sections or elevations which will add a new explanatory dimension to your drawings should you need to break an object down on your sheets.
If you want to move these elements back to their original positions in the view, you just need to select them and click reset on the ribbon area for this tool.
Should you require further details on Revit training or learning more about the features of Revit 2023, please contact the team at Man and Machine for further help.
Still got Questions?
Book Training
Our Revit courses cover everything from the skills required to use the software, to design and share information between project teams, through to creating custom family elements.
Contact Us
We are here to ensure you receive a consistently high service and quality solutions for your business needs. We promise you won’t regret speaking to us, and if we can’t help you, we will try to find someone that can.