


Consistency is one of the most important aspects of producing high quality construction documentation, and that’s exactly where View Templates in Autodesk Revit come into play. Whether you’re working on a small residential project or a large-scale commercial development, view templates help streamline your workflow and ensure that every drawing adheres to your office standards.
What is a View Template?
A View Template is a pre-defined set of view settings, such as scale, discipline, detail level and visibility/graphics, that can be applied to standardise views instantly.
Why use them?
View Templates improve efficiency and consistency by reducing manual adjustments. They help ensure uniform drawings, save time, support collaboration and minimise errors.
Plan First
Before creating templates, consider the types of views you use (eg, floorplans, sections, 3D views), and their variations (eg, demolition, furniture). Each variation may need its own template.
Creating Templates
Templates can control visibility, scale, detail level, and graphic display. For example, a demolition plan might highlight removed elements, while a furniture plan focuses on layout.
Best Practices
- Set templates up early.
- Use clear, descriptive names.
- Keep them simple and focussed.
- Update templates centrally to maintain consistency.
Let’s have a look at how to create a View Template in Autodesk Revit. There are 3 main way to create a View Template, outlined below.
Method 1: Create from an existing View Template (duplicate)
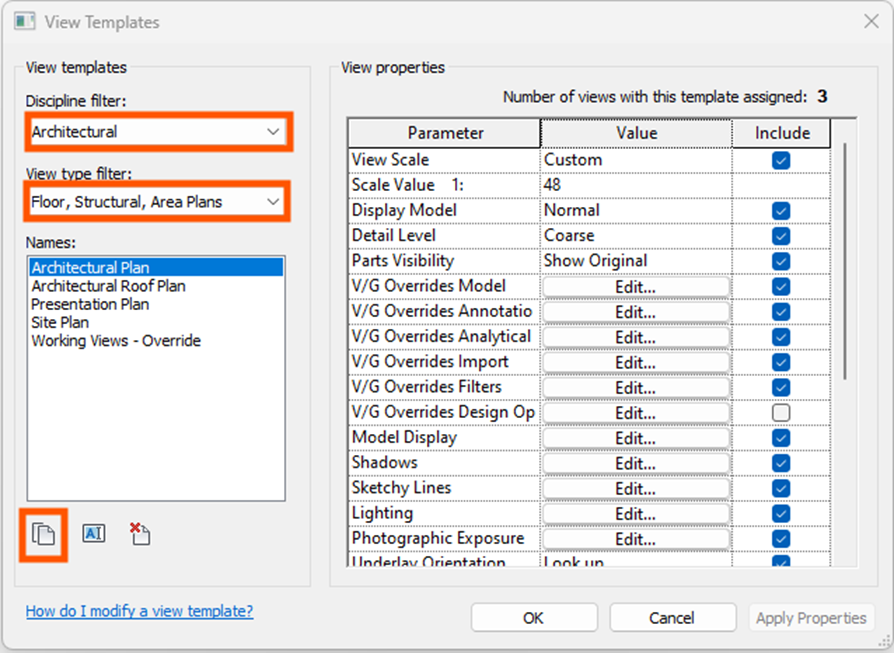
- Go to View tab > Graphics panel > View Templates dropdown > Manage View Templates.

- In the View Templates dialog, use the Discipline filter and View Type filter to narrow down the list.
- Select the View Template you want to use as a starting point.
- Click the Duplicate button.
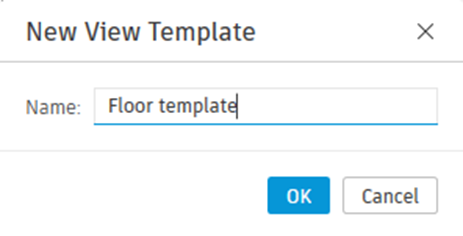
- In the New View Template dialog, enter a name for your new template.
- Click OK.
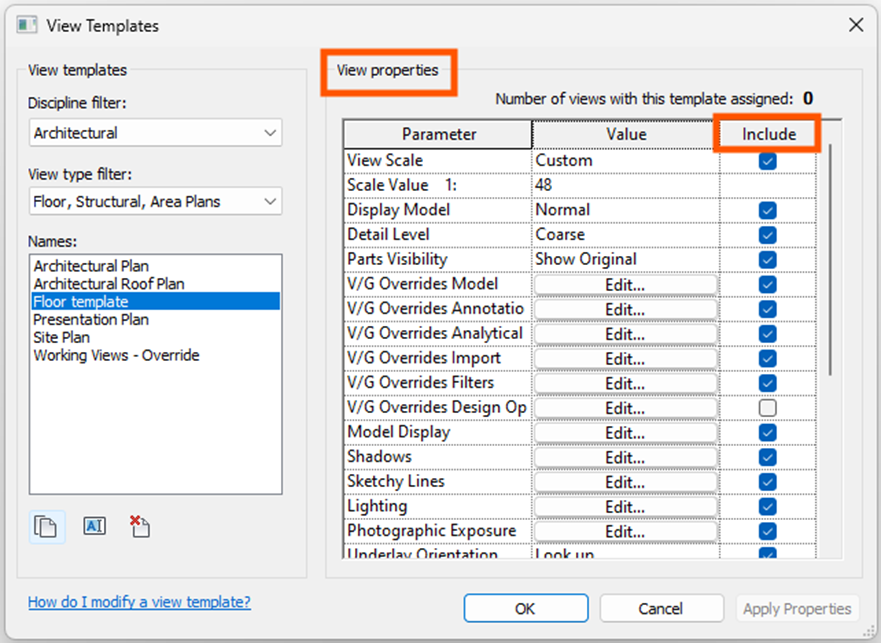
- Modify the view template properties as needed.
- Use the Include checkbox to select which properties will be controlled by the template (unchecked properties won’t be overridden when the template is applied).
- Click OK to save.
Method 2: Create from a Project View
- In the Project Browser, select the view you want to base the template on.
- Go to the View tab > Graphics panel > View Templates dropdown > Create Template from Current View.
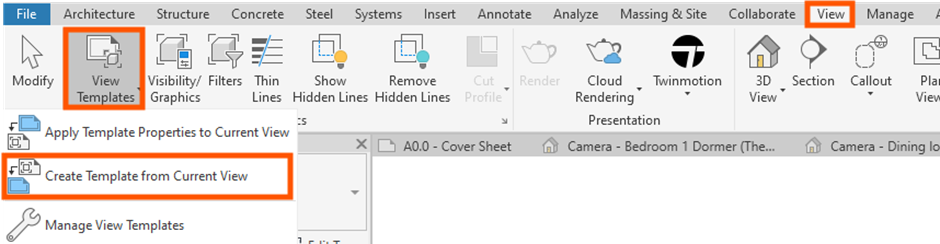
- Or right-click the view and select Create Template from View.
- In the New View Template dialog, enter a name for the template.
- Click OK.
- When the View Templates dialog opens, modify the properties as needed.
- Use the Include option to control which properties are part of the template.
- Click OK to save.
Method 3: Create from Graphic Display Options
- In an open view, on the View control bar click Visual Style > Graphic Display Options.
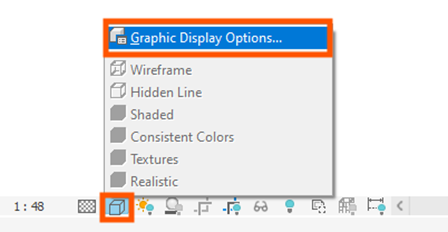
- Define the graphic display options as desired.
- Click Save as View Template.
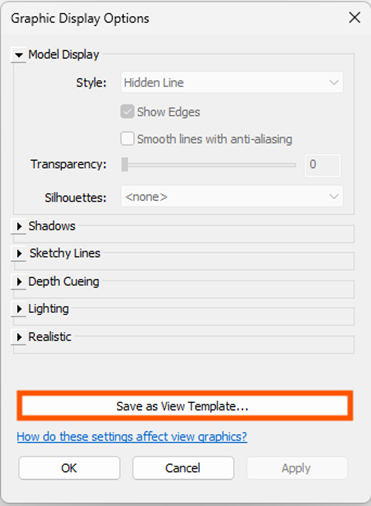
- Enter a name for the template and click OK.
- Modify additional properties in the View Templates dialog if needed.
- Click OK to save.
View Templates are a powerful tool for maintaining quality and efficiency in Autodesk Revit. By planning ahead and creating templates tailored to your workflow, you can dramatically improve both the speed and consistency of your documentation. If used effectively, they become the backbone of a well organised project, ensuring every view looks right, every time.
Still got Questions?
Book Training
Our Revit courses cover everything from the skills required to use the software, to design and share information between project teams, through to creating custom family elements.
Contact Us
We are here to ensure you receive a consistently high service and quality solutions for your business needs. We promise you won’t regret speaking to us, and if we can’t help you, we will try to find someone that can.