
Revits Visibility settings are quite simple once you understand them, which is what I intend to do here.
There are a two concepts we first need to understand:
The hierarchy and categorisation of elements.
Revit has a simple hierarchy for most elements, Instance -> Type -> Family -> Category. You could have an instance of a chair, lets call this Chair number 24. Chair number 24 will be a particular type, maybe a wooden chair of which there may be 30 in the project. This belongs to a family. As well as the wooden type there may be a metal type available too. And finally the Family belongs to a category, which in this case would be Furniture.
View & Project Settings
We can control the extents of appearance changes at two levels. Firstly we can change the default appearance for the entire project, this is the standard appearance unless over ridden.
We can also change it at a view level. The changes we make here will only effect the view and will not override the appearance of the entire project.
Changing Visibility Settings
There are three levels we can change visibility at:
- Project Wide
- View Level – This will override the project settings
- Element Level – This will override project and view settings.
Element Level:
At Instance Level the visibility changes will override the Project settings and the View settings.
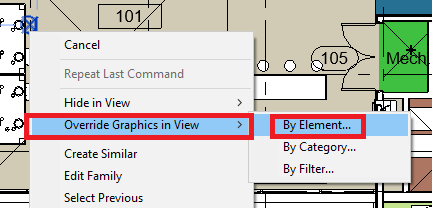
Select a element (or multiple elements) and right click on it. In the context menu which appears, go to “Override Graphics In View” and select “By Element”.
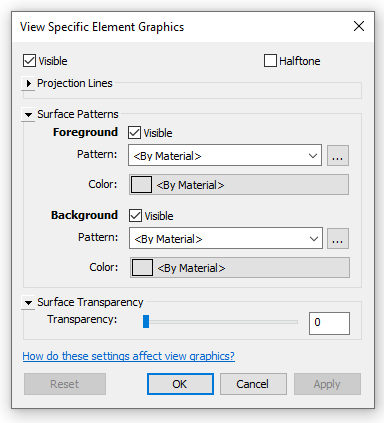
This will give us the “View Specific Elements Graphics” Window. Here we change the appearance of the Element such as whether its visible or not, halftone, its colour and hatch pattern.
View Level
At view level we can control the visual settings for the categories components belong to in the view. For example if I have chairs and tables, I can turn off the category Furniture which they both belong to.
We can change this in the Visibility/Graphic Overrides via the views properties:
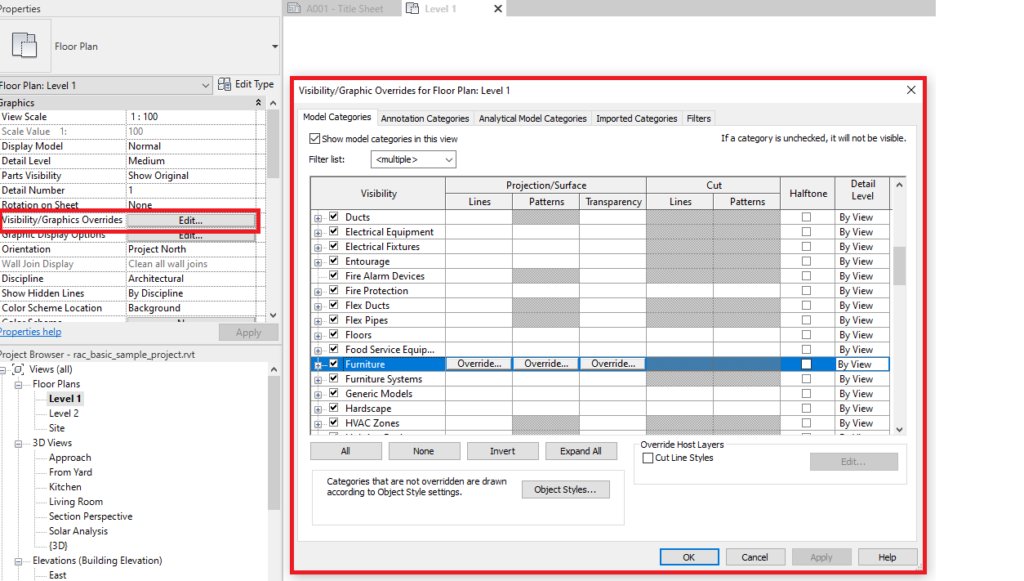
Simply unticking or ticking a category in the list will turn it on or off.
Furthermore you can customise the appearance of lines and patterns using the overrides.
Categories are split into model and annotation as per the tabs at the top of the window and you can filter the lists by discipline.
Project Level
At project level we can set the appearance of categories just like at a view level, however this will effect the entire project. This is in effect the default setting before you override at view and element levels.
You can access this via the Manage tab using the Object Styles tool.
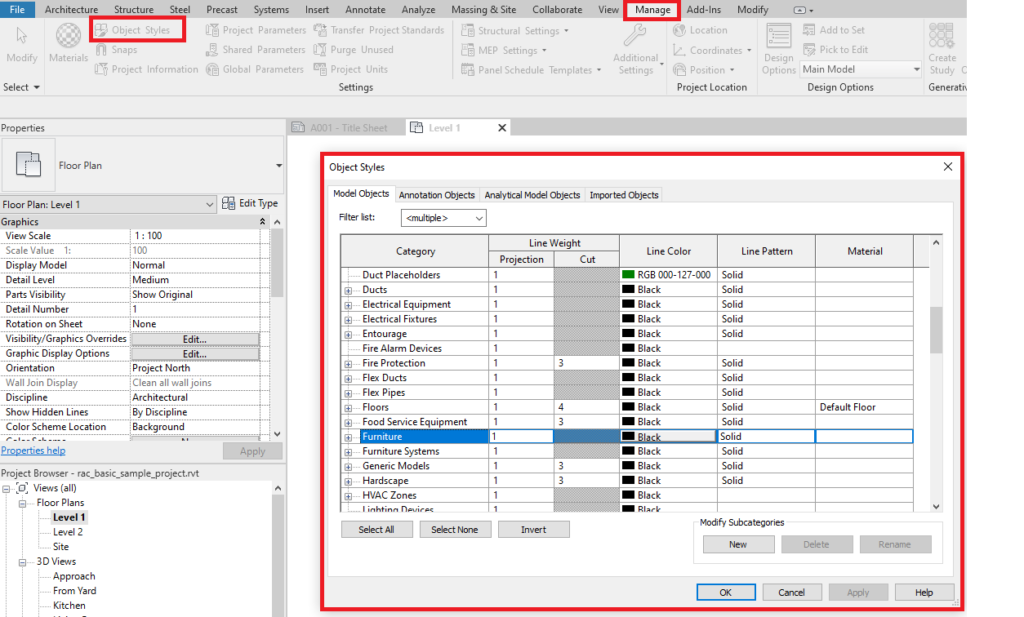
You will notice the Object Styles window is almost identical to the Visibility/Graphics Overrides window for views. It works in exactly the same way, ticking & unticking turns categories off/on and you can adjust the lineweights, colours, patterns etc.
Again categories are split into model and annotation.
Still got Questions?
Book Training
Our Revit courses cover everything from the skills required to use the software, to design and share information between project teams, through to creating custom family elements.
Contact Us
We are here to ensure you receive a consistently high service and quality solutions for your business needs. We promise you won’t regret speaking to us, and if we can’t help you, we will try to find someone that can.