
Would you like to know how to save your Revit custom system families? In this blog post I will explain how we can save system families as a Revit file and how we can easily load them into other projects.
What is a System Family
Firstly you need to understand that in Revit there are two types of families, most people will be familiar dealing with normal families such are Windows, Doors, Chairs, Plants, so on and so forth. These Families can be created and modified in the Revit family editor and can be saved to a file on your computer. These can then easily be loaded into projects and saved out if needed.
System Families are items such as walls, curtain walls, floors & roofs. These items exist within a Revit project and although can be customised they cannot be loaded into the Revit family editor and can’t be save to your computer as a family.
Can we Save a System Family?
We can’t save these as a family in the traditional sense but what we can do is save them as a group. In Revit we can group single items or multiple Items together, these groups can be given a name and the group can be saved to your computer as a Revit file.
We can load these groups into other Revit projects and although the steps are different they are just as easy to use as normal Revit families.
How do I Save a System Family?
Here I will show you step by step how to save a custom wall to a group, save it as a file to my computer and then insert into a new project.
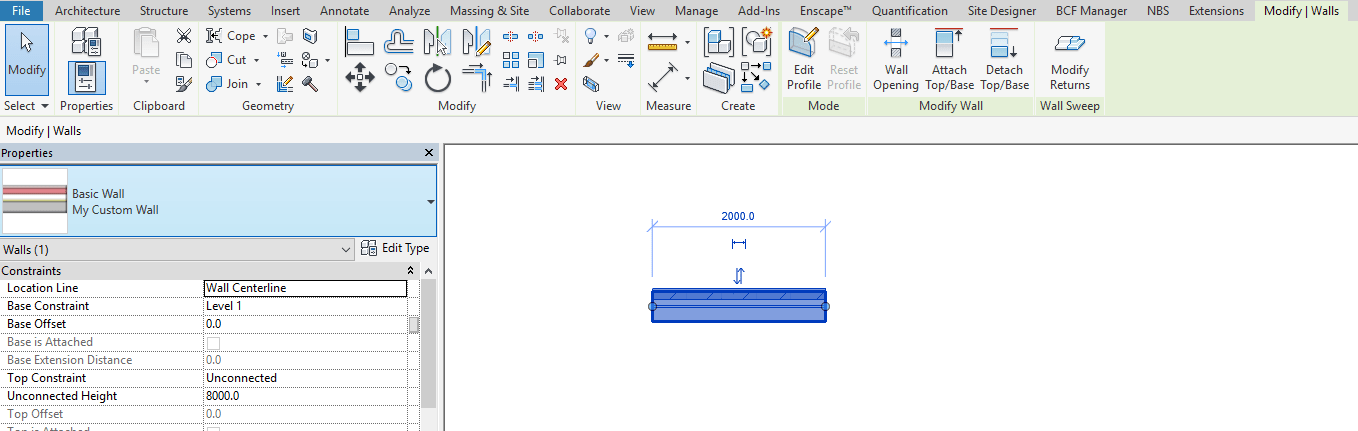
1. Place a single instance of the system family on the project and select it.
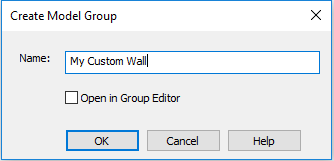
2. From the ribbon bar in the Modify tab click the “Create Group” button. ![]()
3. You will be prompted to name the group, although this isn’t the name of the file we will be creating, give it a sensible name.
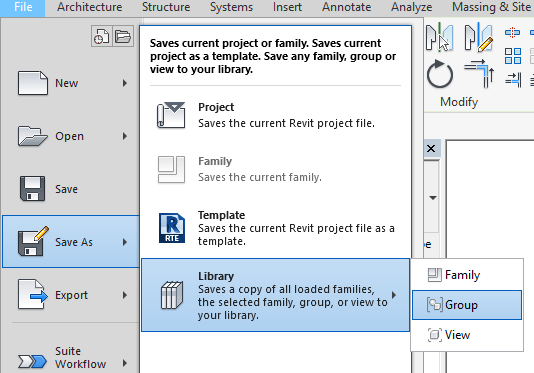
4. With our group now created, we can save this as a file. To do this go to “Save As” from the main menu and then go to “Libraries” and select “Group”.
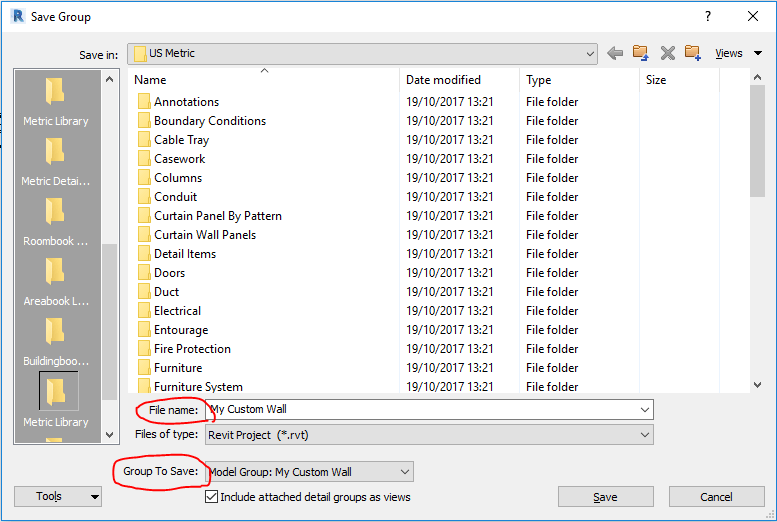
5. This will open a “Save As” window. In “File Name” we can specify the name of the file and then from the “Group To Save” we can choose the group we want to be saved.
We have now saved our system family to our computer as an .rvt file which can now be loaded into other projects.
This is useful if you will be using the same system families on multiple projects or if you want to send these system families to someone.
How to insert a system file into a project
Now that we have covered how to save your system family to a file next we will look at how to load a system family into a new project.
1. In your project go to the “View” tab in the ribbon bar and select “Load as Group”.
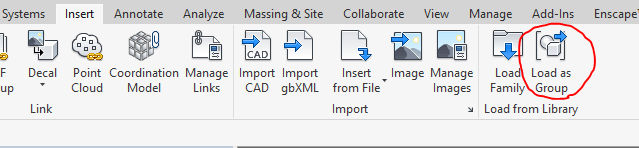
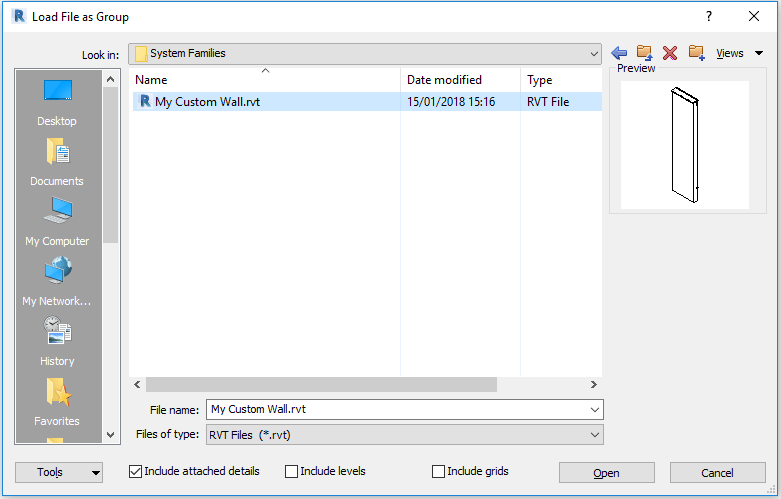
2. In the Open dialog box navigate to your saved system family and select it, then click Open.
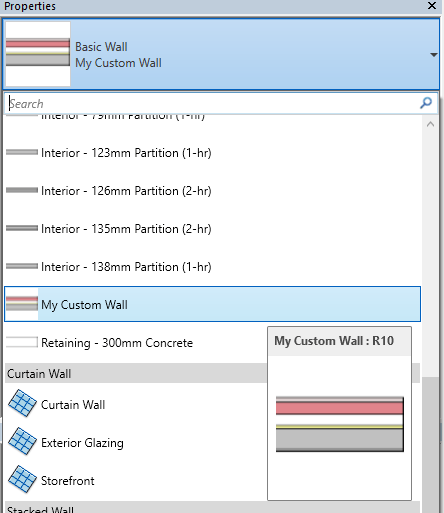
3. Now your custom system family is loaded into the project and ready to use.
Conclusion
Although the process for modifying, saving and loading in system families is different, the steps involved are no more difficult than a normal Revit family. Following the above guide you can now easily store your custom system families. This is useful as simply creating a project template doesn’t give you the level of control that you may need.
Still got Questions?
Book Training
Our Revit courses cover everything from the skills required to use the software, to design and share information between project teams, through to creating custom family elements.
Contact Us
We are here to ensure you receive a consistently high service and quality solutions for your business needs. We promise you won’t regret speaking to us, and if we can’t help you, we will try to find someone that can.