
Using the Enscape plugin for Revit, I will show you how you can quickly produce high quality Revit renders using Enscape. Enscape is a 3D immersive plugin for Revit which allows you to visualise your Revit project live and it has a Virtual Reality option. As well as all these live features, we can also create Renders in Enscape and best of all, its fast.
In this blog post, I will show you how you can produce a render and either export it as an image file or to add it to the project browser in Revit as a render.
How to get Enscape?
Enscape provides a free 30 day trial in which you can test the feature of the Enscape plugin. You can download the trial from the Autodesk App Store.
Regarding licenses please contact Man and Machine.
How to produce a Render
In this section I will show you how to produce a Render using Enscape out of the box. If you would like to know how to change the settings associated with the quality of the render please read the section towards the end of this blog on “Advance Settings”.
Once you have Enscape installed you will find a new tab added to the ribbon bar in Revit.

To start Enscape all you need to do is click the “Start” button on the left hand side of the Enscape tab.
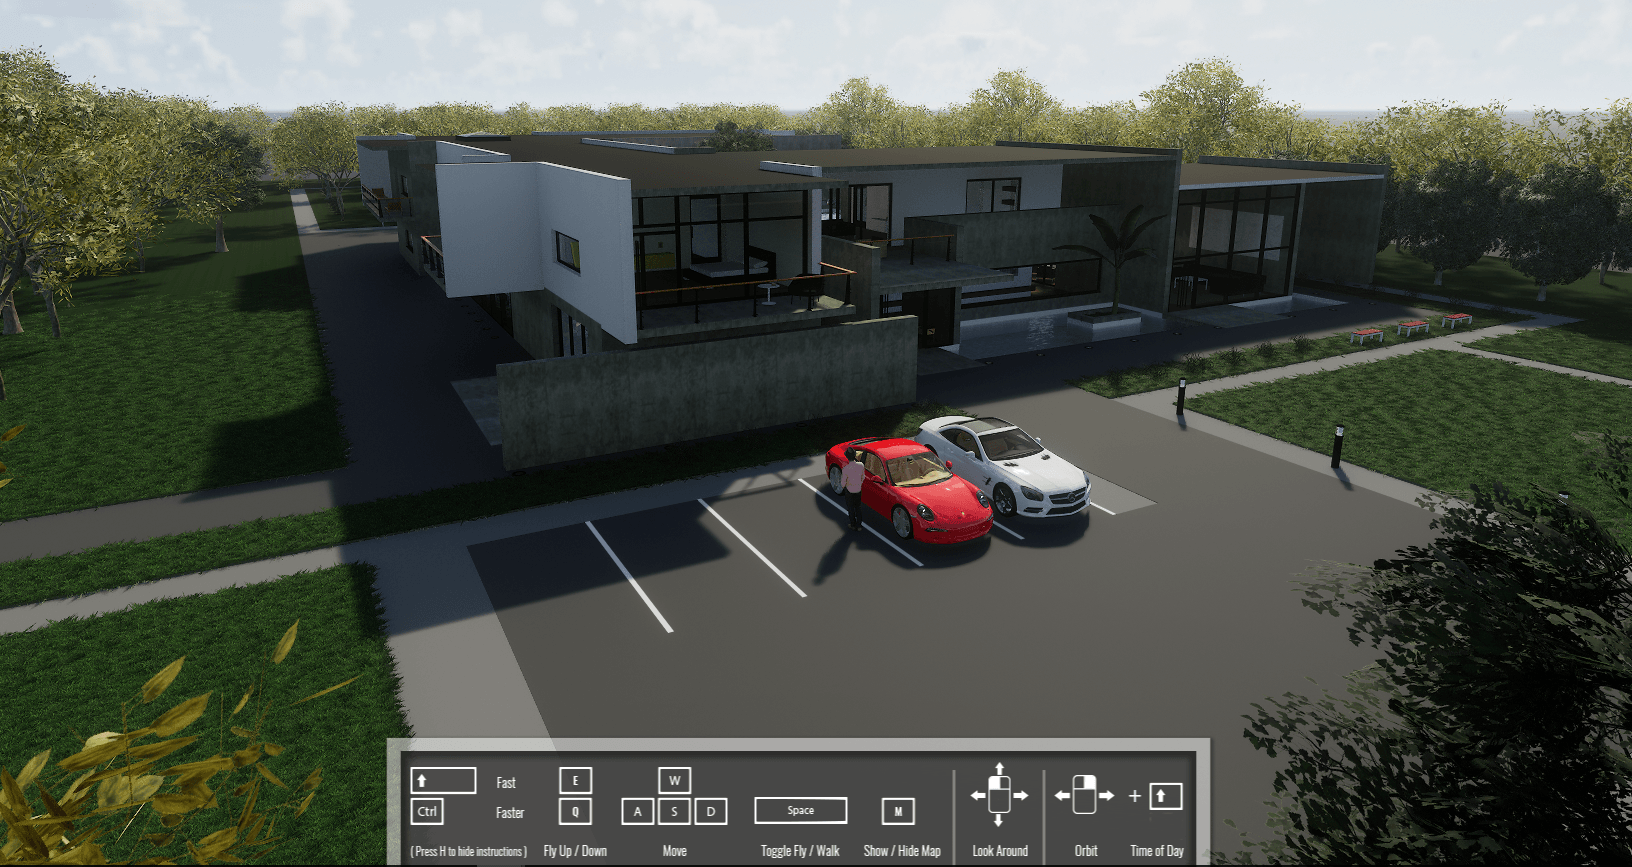
Once Enscape has loaded, navigate to the view which you would like to create a render of (Enscape displays the controls at the bottom of the window for navigating).
When you hare happy with the image displayed in Enscape for your render, simply switch back to Revit.
From the Revit tab click the “Screenshot” button, this gives us two options:
- Screenshot (To File) – this will allow you to save the render as a JPG, PNG, BMP, TIFF or TGA file.
- Screenshot (As Render) – This will save the render in the Project Browser within Revit.
If you choose the “Screenshot (To File)” option, Revit will prompt you to choose a save location and to name the render. If you chose the “Screenshot (As Render)” option, Revit will automatically add it to your project browser under “Renderings”.
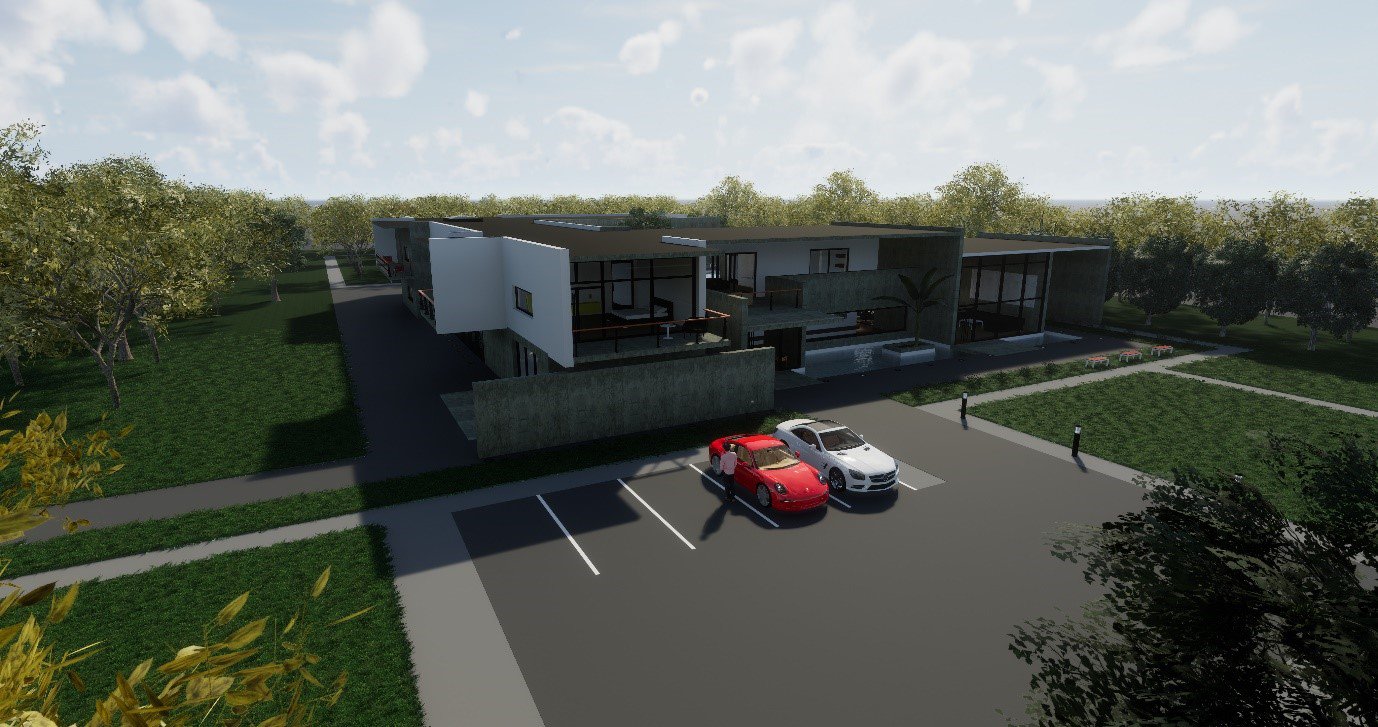
Here is the Render I have created using the “Screenshot (To File)”:
Advanced Settings
Now you know how to create a render using Enscape we can customise the quality of our Renders.
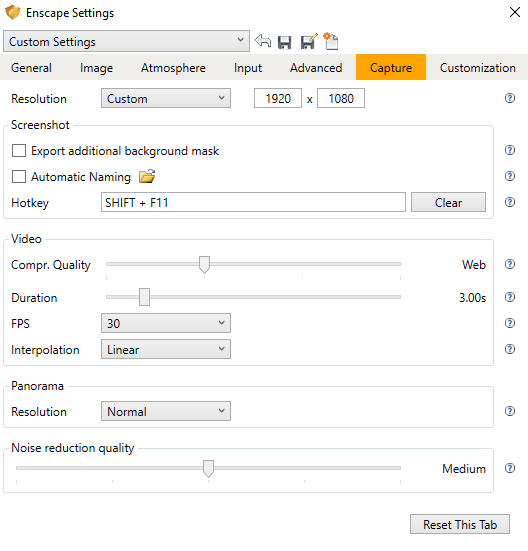
In Revit on the Enscape tab we have a button called “Settings”, clicking this will open the settings window for Enscape.
Most of the settings in here are going to control how things look within Enscape, for example you can change how cloudy or sunny it is. But to control the quality of the resolution we need to head to the “Capture” tab.
In the Capture tab we can adjust the resolution of the Render, the higher the resolution, the higher the quality of the image produced. Enscape comes with some preset resolutions such as 4k or 1080p but you also have the ability to create your own custom resolution. This allows you to create some really high quality, sharp renders.
Conclusion
Enscape is a very versatile tool and when it comes to render, it allows you to create high quality renders very quickly. If you’re looking to balance quality and speed then Enscape certainly fits the bill.
Enscape also gives you a lot of control when it comes to rendering your Revit projects such as lux levels, two-point perspective and atmospheric settings. With a free 30 day trial I would recommend that you take a look at the ease of use, speed and quality of Enscape.
Check out Enscape’s website to read more about 3D Rendering in Autodesk Revit.
Still got Questions?
Book Training
Our Revit courses cover everything from the skills required to use the software, to design and share information between project teams, through to creating custom family elements.
Contact Us
We are here to ensure you receive a consistently high service and quality solutions for your business needs. We promise you won’t regret speaking to us, and if we can’t help you, we will try to find someone that can.