
In this blog, we will be covering Inventor’s BIM Content tool, which allows you to export your Inventor part or assembly files as Revit Families (RFA), IFC, or Autodesk exchange files (ADSK), to be used in other products in Autodesk’s environment, such as AutoCAD MEP or Revit. More and more manufacturers are being asked to provide BIM models of their designs to be used in the construction industry, which this tool can do for you.
For this example, we will focus on converting a standing desk assembly we have created in Inventor and exporting it to an RFA file, which can then be used in Revit projects.
Using this workflow we leverage Inventor’s powerful modelling capabilities, along with its fabrication creation tools, whilst still being able to provide a BIM model that we can share with customers and collaborators to use in their Revit projects.
To access the BIM Content Tool, open the file you want to convert, click the Environments tab, and then select BIM Content.
There are 4 phases when creating BIM Content:
- Simplify the design.
- Add MEP connectors.
- Author Building Components.
- Export Building Components.
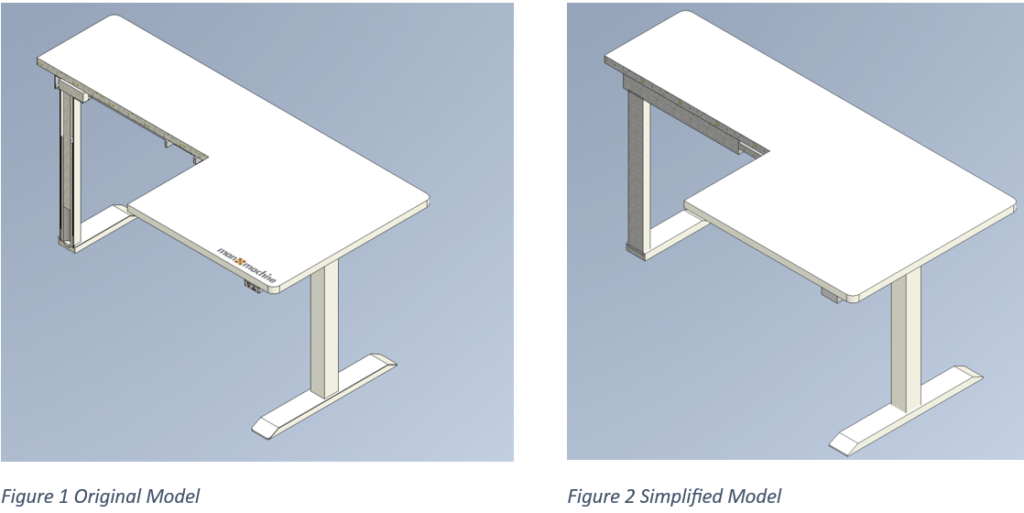
1. Simplification
The first thing we need to do is simplify our design. Revit families do not require the same precise level of detail that a fabrication model designed in Inventor requires. Depending on the job requirements, a simple bounding box may suffice if the objective is to make sure that the component will fit into the required space, such as an air conditioning unit in an office building. The simplification tools allow you to specify the required level of detail to export our model out. We have written an in-depth blog on this subject, that covers each category of the simplification tool.
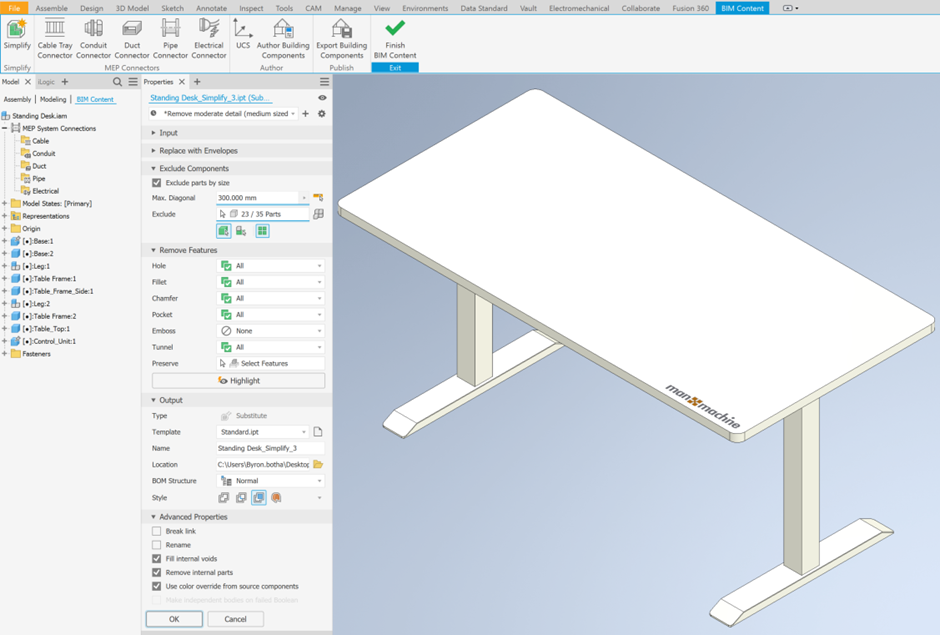
For our standing desk example, we have removed all secondary features, listed in the “Remove Features” drop down menu in the picture above. We have also excluded parts by size, which will remove all fasteners from our design, however we have kept the control panel that was removed automatically and preserved the fillets on the tabletop. We have also removed the internal mechanism that drives the table and filled the voids, which protects our intellectual property and provides a much lighter model that can be used without worrying about reducing the performance when working in Revit.
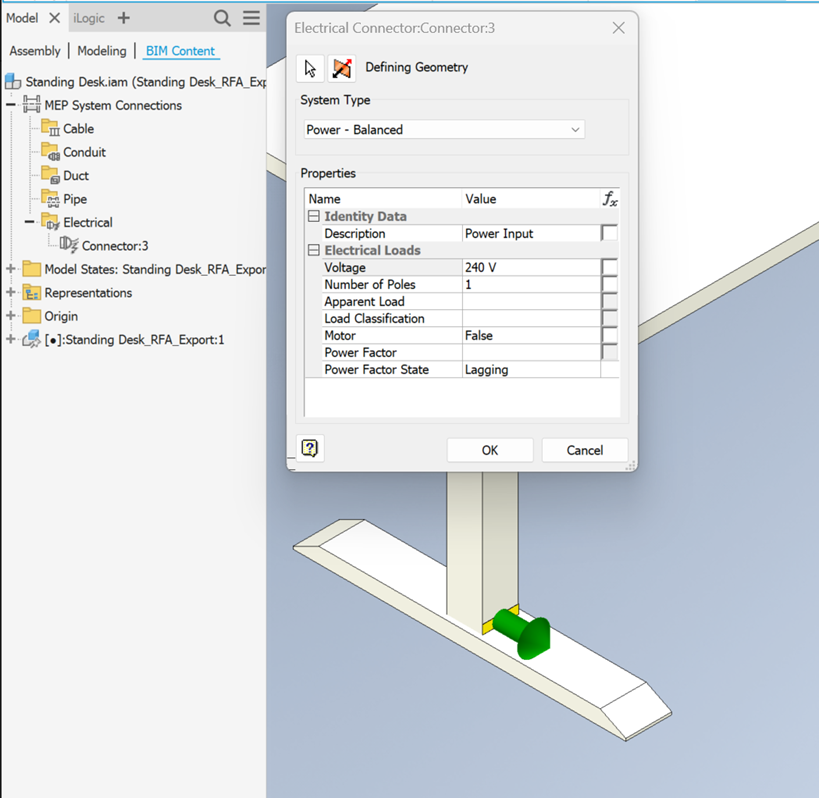
2. Add MEP Connectors
Connector objects are used in MEP applications to define associations between equipment, such as HVAC building systems. There are 5 types of connectors: Cable, Conduit, Duct, Electrical and Pipe.
We have extruded a face on the leg of the table, which we can use to add an electrical connector for our actuator. We can also see that this connector has been added to our model tree under the Electrical folder. You can add multiple different connections to a design, depending on the BIM requirements.
3. Author Building Components
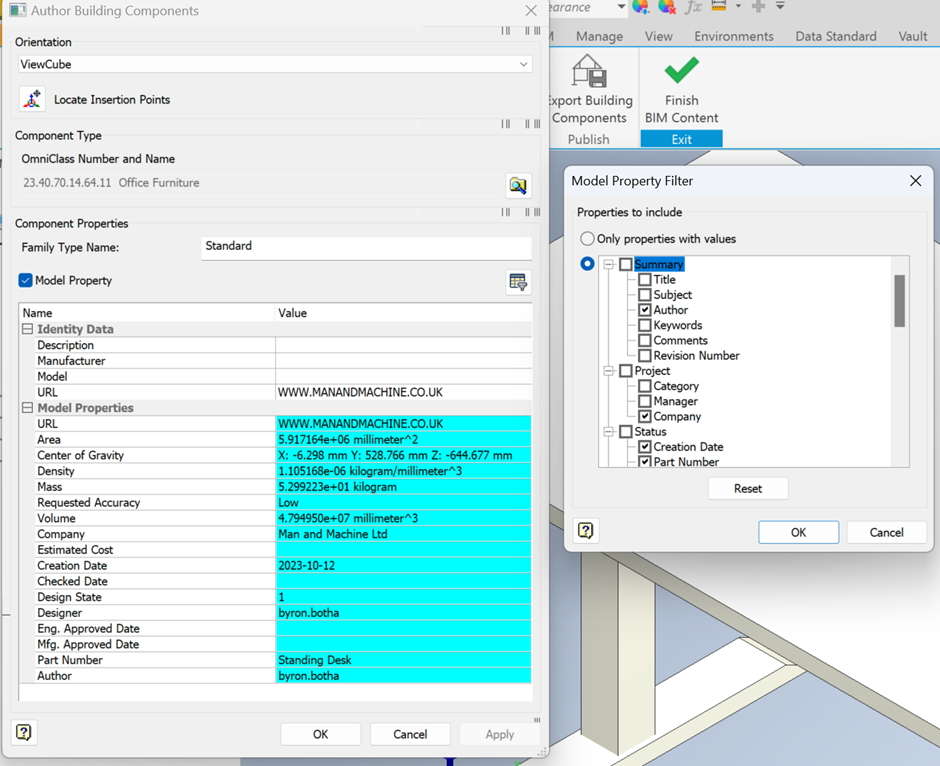
The Author Building Components tool allows you to specify an OmniClass Construction Classification System. This standard is widely used in the North America; however, it is still useful for people in Europe or the rest of the world, as it allows us to specify a Revit category for our BIM content.
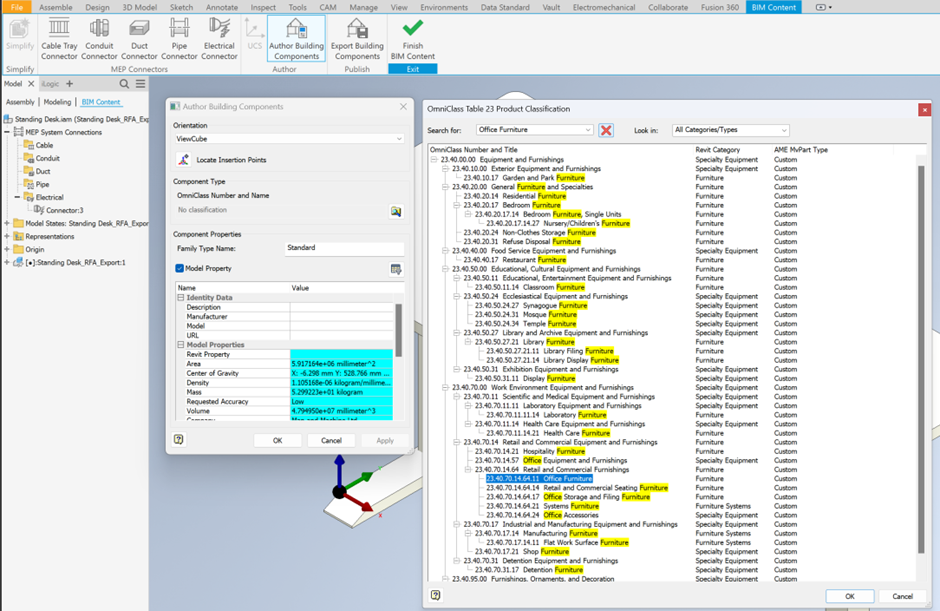
You can specify the OmniClass number and name by pressing the magnifying glass icon under Component Type. This brings up a searchable list of categories. We have specified the Office Furniture Revit category for this standing desk.
We can also specify Model Properties to transfer into the Revit Model, such as the manufacturer name, warranty information or physical properties. The values highlighted in cyan are pulled directly from the iProperties, however these can be edited later in Revit. You can choose to only include properties with values or select the properties you require from a list. If you require more information on what properties are required for the type of equipment you create to be BIM compliant, please reach out to us and we can help you with that. We also have a great BIM for Manufacturing video that covers this topic which you can find here The m Word Episode 11 – BIM for Manufacturing! – YouTube.
4. Export Building Components
We have now simplified our design, added our MEP connectors and included properties required to transfer over. All that is left to do is export the file out to the correct format and specify a save location. We have chosen to export the file out as a Revit Family File (RFA). Once the export process is complete, you have the option to view a translation report to see if any components failed to export correctly.
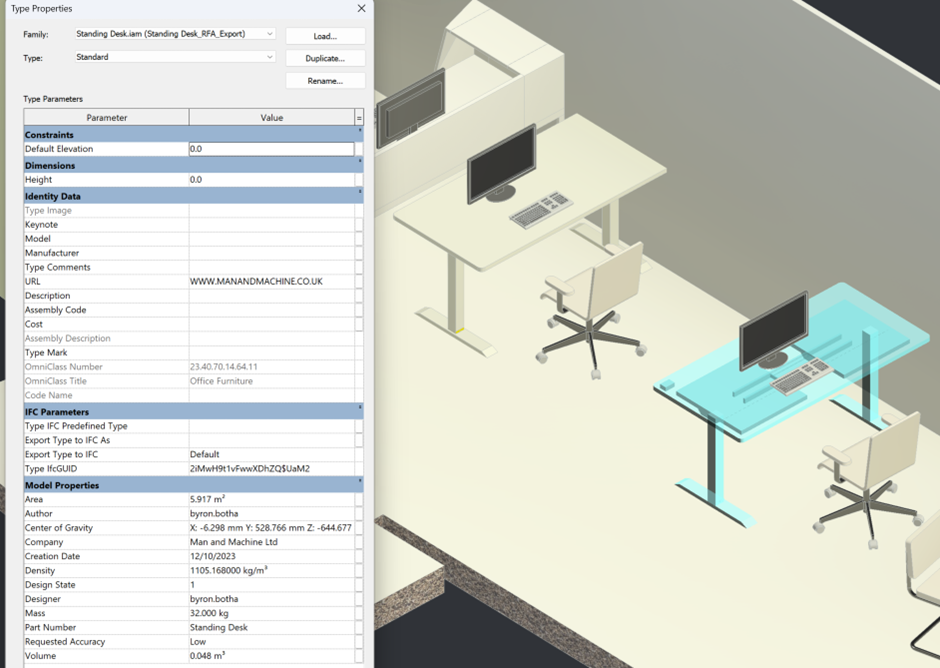
We can now use our exported RFA model in Revit, where we have a nice looking, simplified standing desk and all the BIM Information has been transferred over.
We also have the capability in house to automate this process for you if you require. You can find more information on our automation consultancy here:
Using Inventor iLogic and Vault Professional to Automate BIM File Outputs – Man and Machine
If you would like to learn more about BIM Workflows, we have a great video on our YouTube channel that covers this in depth. The m Word Episode 11 – BIM for Manufacturing! – YouTube
Still got Questions?
Book Training
Our range of Autodesk Inventor training courses will teach you how to create production-ready parts and assemblies through hands-on learning experience. Make sure you contact us to find out which course is best for you.
Contact Us
We are here to ensure you receive a consistently high service and quality solutions for your business needs. We promise you won’t regret speaking to us, and if we can’t help you, we will try to find someone that can.