
When working within the Revit environment, you need to provide 2D exports of sheet files or elements of your model to other team members or companies, to aid with the production of their outputs. This can be achieved using the export to DWG function in Revit however, what many users are often not aware of are the multitude of options that sit in the background to help standardise or coordinate your 2D delivery, in line with your digital requirements or to help other teams.
The options dialogue for this can be accessed in a few different ways. Either through the file drop down menu, and navigate to Export. Then at the bottom we have options with Export Setups for DWG/DXF, or we can get to the same dialogue option through the Export DWG dialogue, by clicking the 3 dots next to Select Export Setup drop down.
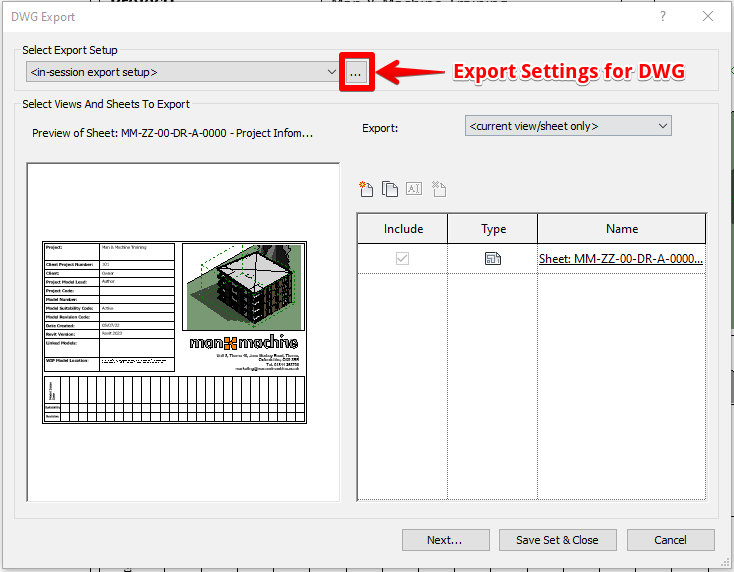
Within the Export Options Dialogue you have several settings where you can create and save different export functions for your drawings.
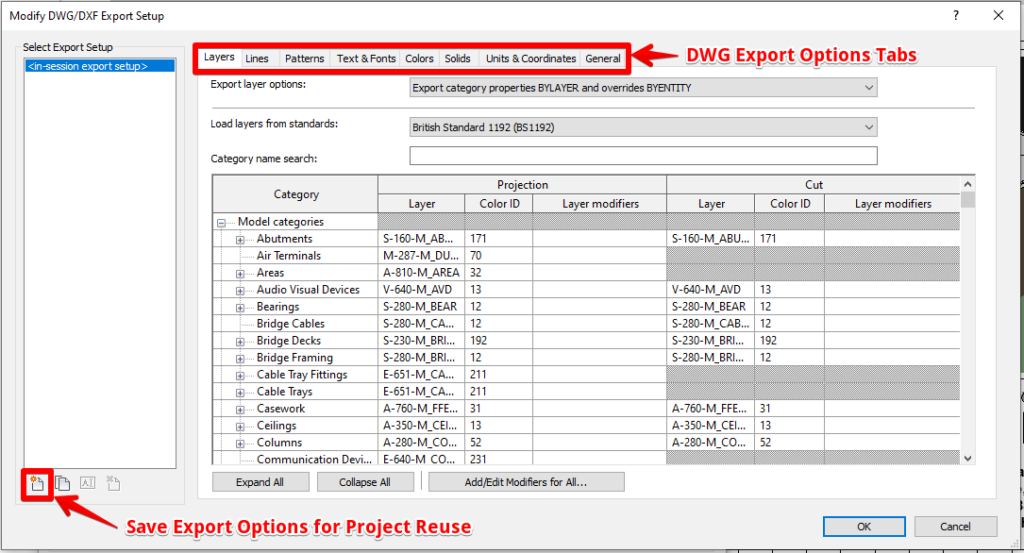
The tabs at the top of this dialogue will allow you to do the following:
Layers – Arrange your export layers from Revit categories to AutoCAD layers using either industry standard or organisation customised. Note that the in built UK Standard is BS 1192 and not BS 13567-2 as noted in ISO 19650-2 National Annex. This may change in future releases.
Lines – Exported Line patterns aligning to an AutoCAD line style text file or custom line types.
Patterns – Export hatch patterns to AutoCAD pattern test file or custom hatch types.
Text & Fonts – Switch text and font mapping to alternative fonts on export.
Colours – Include standard export colours to 255 colours or true colour RGB values for object styles or set to a specific Revit view.
Solids – Export objects as polymesh solids or ACIS solid objects.
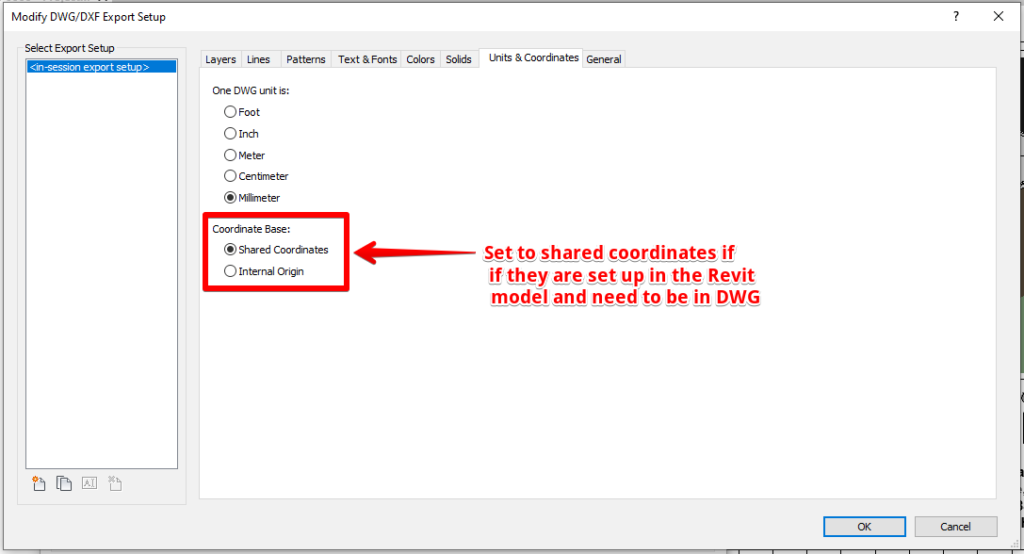
Units & Coordinates – Specify export units (metric or imperial) and also associate coordinate systems to your AutoCAD file from Revit shared coordinates.
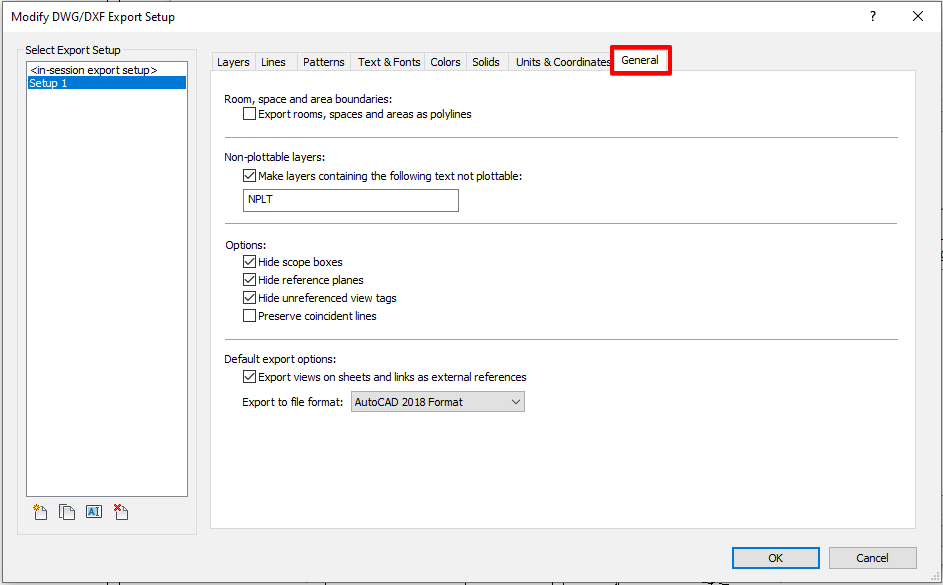
General – A variety of additional settings including room boundaries, non-plottable layers, export function options and export file formats.
You can save these export options to your model file for re-use and if you want to export this to be used in another file you can use the Transfer Project Standards option and check mark the DWG/DXF Export Setup Settings. This will transfer any saved setups from this dialogue.
Can I use Shared Coordinates?
The only way to add coordinate systems in your export is through this dialogue. It does rely on shared coordinates being included in your Revit file in the first instance. As default the coordinates are set to Internal Origin, so if you do not set this there will be no association between your Revit model and AutoCAD DWG files.
Should you require further details on Revit training, BIM Interoperability tools or learning more about the features of Revit 2023, please contact the team at Man and Machine for further help.
Still got Questions?
Book Training
With our range of AutoCAD courses we can teach you best-in-class 2D and 3D design skills. This includes drawing, taking measurements, producing templates and everything required to create your designs.
Contact Us
We are here to ensure you receive a consistently high service and quality solutions for your business needs. We promise you won’t regret speaking to us, and if we can’t help you, we will try to find someone that can.