
This is going to be an overview on showing Revit Options in BIM 360 Docs, which may be useful when communicating initial design to customers or clients. This will be useful to Revit users who are using BIM 360 or potentially on the journey of implementing it and want to know perhaps some tips and tricks to better use some of the functionality of BIM 360 Docs. Either way you may find it important to be able to show different options of your Revit model to clients, and those clients may not have Revit. This is where BIM 360 Docs can help.
This is going to require an understanding of Revit and a mild understanding of BIM 360 Docs or at least access to it to allow you to upload your models.
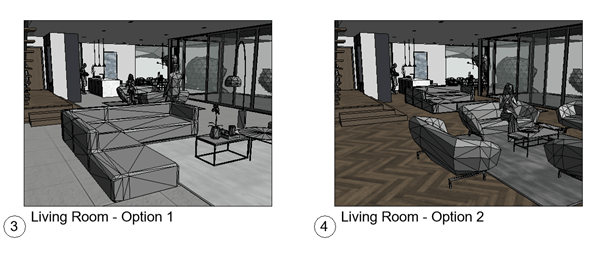
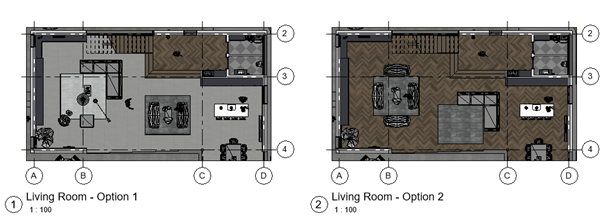
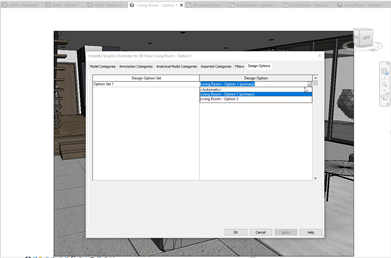
First of all and most importantly we need to set the views up we want to communicate, seen below we have two options in this project. To choose the option a particular view shows, you need to head to visibility graphics > design options tab and choose the option you want to show, by default it will show whatever you have your global settings set to.
Once you’ve created your options and the views associated with them you would typically put these on sheets, you may also have views you want to share that will not go on sheets, perhaps a 3D model. To set what will upload to BIM 360 and be available for people to view, we need to use the “Publish Settings” which can be found in Revit under the collate > manage models > publish settings. This is going to allow us to create sets of views (a little tip, you can use these sets when you print to PDF so can be useful even if you are not using BIM 360 Docs).
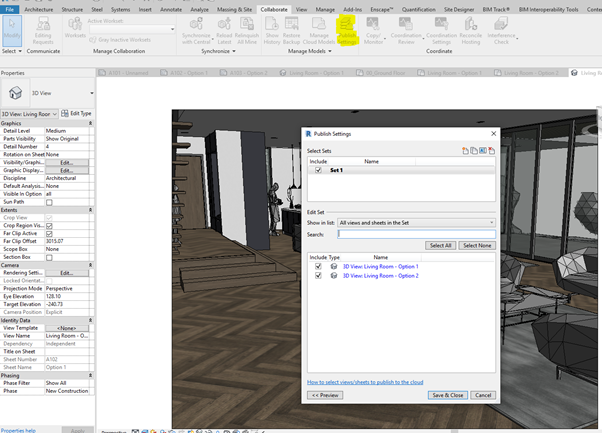
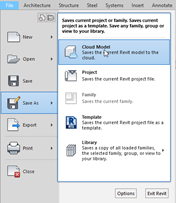
Now all I need to do is save as a cloud model to BIM 360 Docs, by doing this, those drawings and views I have included in my published sets will be viewable for anyone who has access to the model to view in BIM 360 Docs.
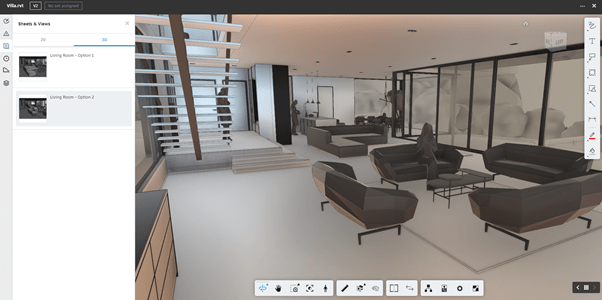
Once the model has uploaded I can see the three 3D Views in the list of available sheets and views. Using the side by side viewer I can actually view them both in 3D at the same time and easily compare differences make mark-ups and create issues in relation to these two options.
So to conclude if you have clients who like to have options and you need to be able to communicate them in a way that makes it easy for a client to review those options without needing software, BIM 360 Docs could be a great solution.
Still got Questions?
Book Training
Our Revit courses cover everything from the skills required to use the software, to design and share information between project teams, through to creating custom family elements.
Contact Us
We are here to ensure you receive a consistently high service and quality solutions for your business needs. We promise you won’t regret speaking to us, and if we can’t help you, we will try to find someone that can.