
When placing a view on a Revit sheet, attached to this placed view is a label called a View Title. As part of this label we have various automated features, one being the extension line. Now, I don’t know about you, but I like things in order. Visually I’ve always taken time to make my drawings look just right from all the way back in my early drawing board days, with First & Third Angle Projection, to today, where a lot of the manual draughting time has been automated with packages like Revit.
In this example, Revit extends our extension line to the extents of our sheet views, which is great, thanks Revit… But then we have lots of different lengths of view titles & I’d go around making them all the same length (that’s just me!).
Default extension lines adjusted to view scale:
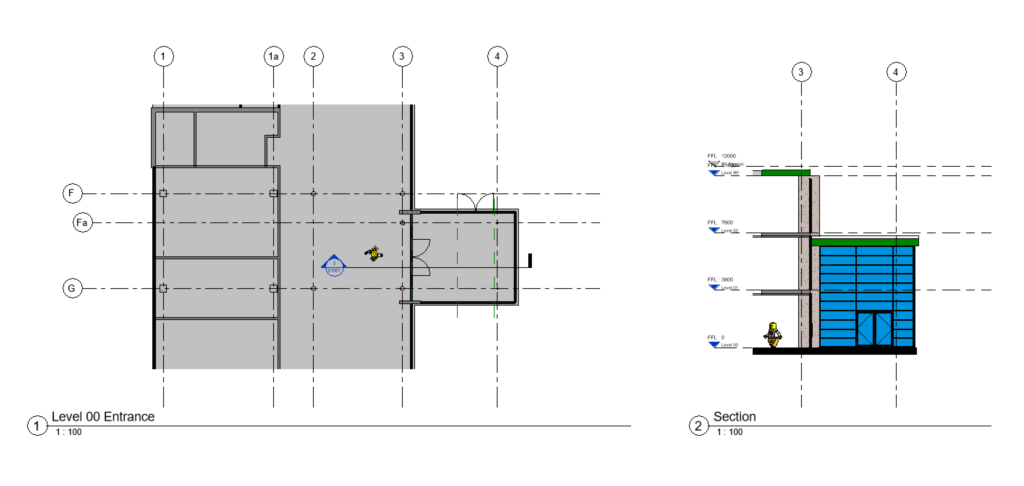
Manually amended view titles:

It doesn’t sound much does it, grabbing the grip on the extension line & shortening to make them all match.. but imagine you have a large project, thousands of drawing sheets with each drawing coming under scrutiny by hoards of client QA representatives, whose sole existence is to check drawings against a strict criteria. Yep, I’ve worked on projects where this has happened & drawings have been rejected purely on a cosmetic basis regardless of the technical brilliance of the engineering on display in the drawing.. view titles were different lengths & didn’t line up, drawing package submission rejected.
Here’s a little workaround I want to share with you that sort of helps (I’ll let you decide). A quick solution would be to get rid of the extension line, then underlining the view title text which gives a very similar outcome but with the ‘line’ now only going to the end of your title text, instead of being controlled by the width of the associated view.
View Titles – Customising the Automation
Show Extension Line
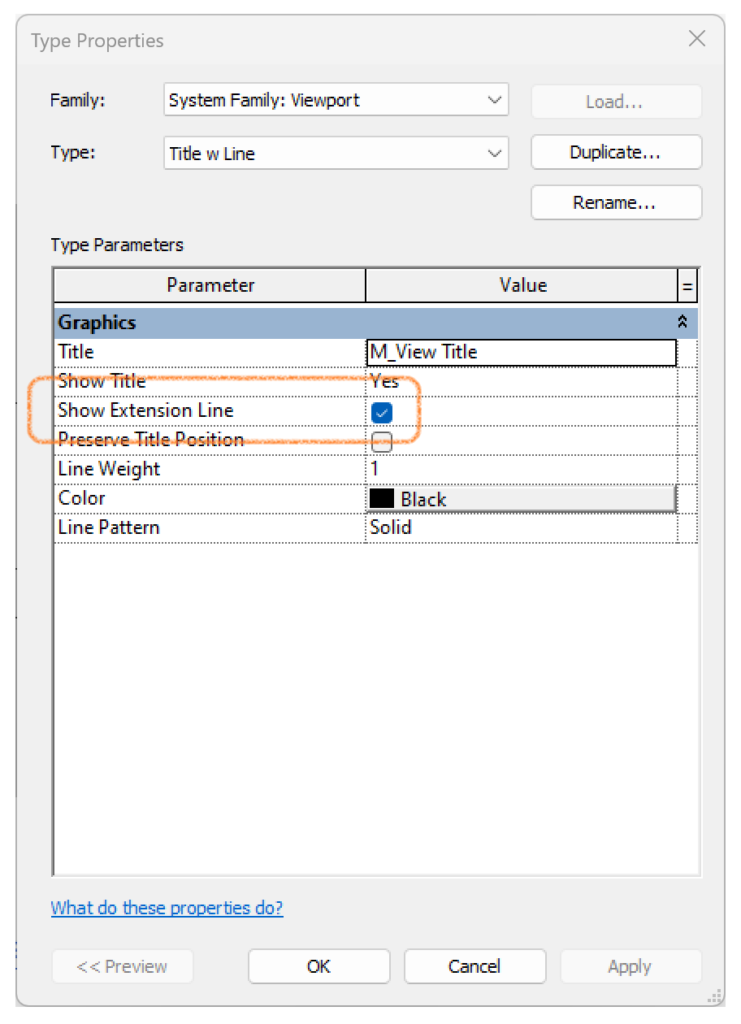
First by selecting any view on a sheet we can then go to Edit Type in properties, showing the various tweaks we can get to. We can see on the left here, the family is a System Family named Viewport with a type named Title w Line.
Moving down the dialogue, we have our view title named as M_View Title & highlighted here is a tick box for Show Extension Line.
Unchecking this tick box you’ll notice now in your Revit session that any placed views on sheets using this view title now won’t be showing the extension line.
Editing the View Title Family – Underlining the Title Text
Now that we’ve removed the extension line, we can show something similar by underlining the view title text itself , by editing the view title family. Looking in our Project Browser under Annotation Symbols, right click, then edit on our family named M_View Title.
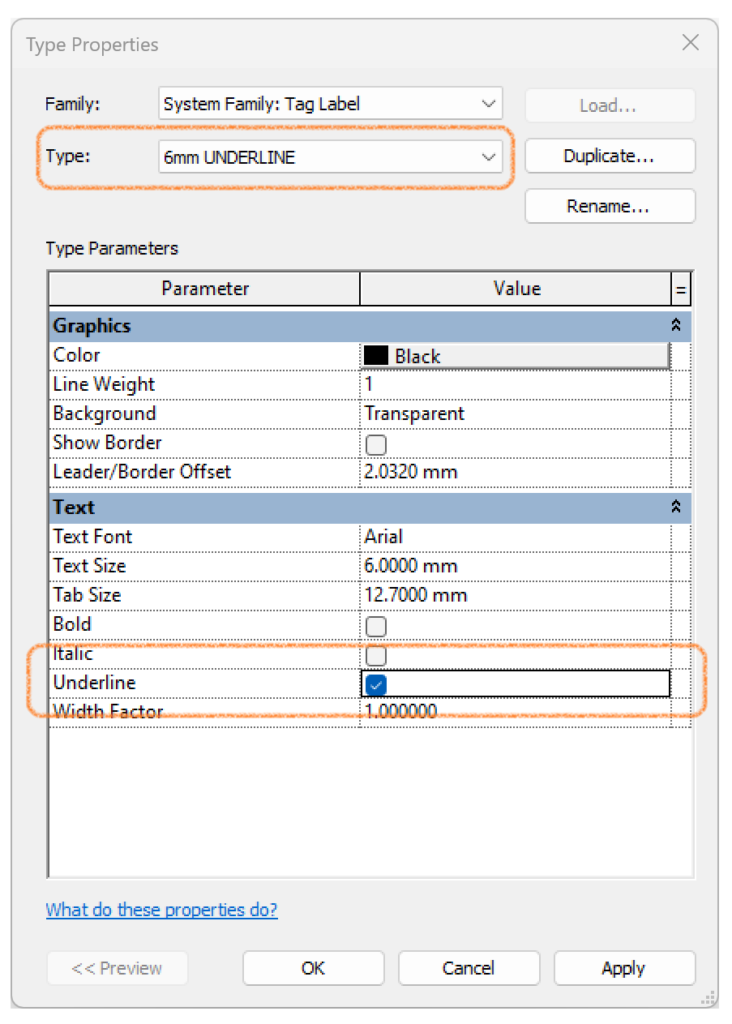
We need to change the text type first, so clicking on the view title label, we edit the type & create a new type to incorporate the underlined version, checking the tick box for underline:
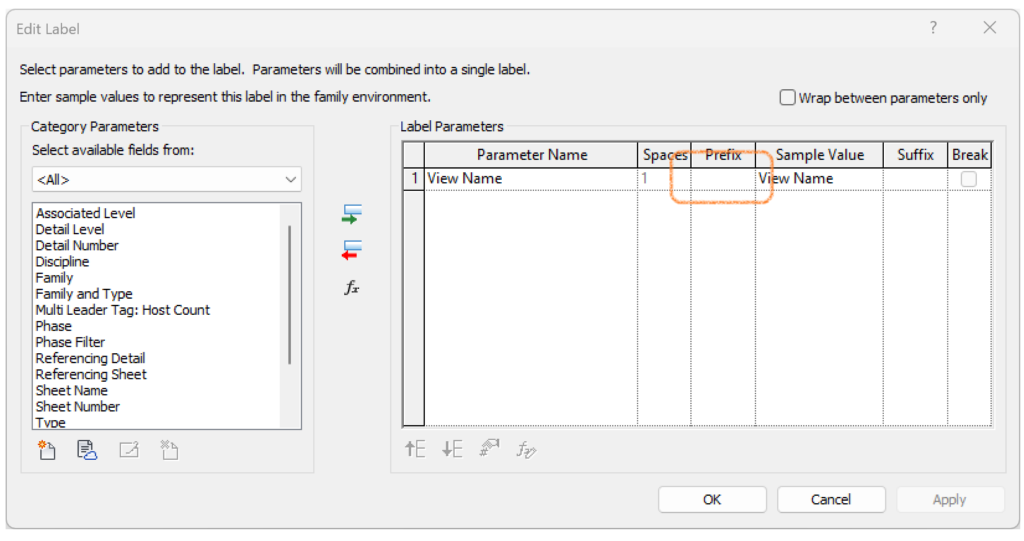
Next we need to edit the label and add a few spaces in the prefix column before the Sample Value. This will add some underlined blank characters before the text field & give the appearance of an extension line:
Finally, you might need to have a play around a little with positioning of the labels. For the finished version on the right I’ve moved the labels to line up where the text starts, added a few more spaces in front of the view name label and moved the labels down so the underline starts from the quadrant point on the view number circle. I’ve also thickened up the arcs that make that view number circle, by choosing a thicker lineweight in Object Styles for that linetype:

Earlier I said I’d let you decide.. personally I prefer this style of view title but it still isn’t perfect, the length of the line now is controlled by the much shorter text length, and yes, the length of that line will still vary but that variance is a lot less compared to before from all the different spans across the different views… much better I think.

Still got Questions?
Book Training
Our Revit courses cover everything from the skills required to use the software, to design and share information between project teams, through to creating custom family elements.
Contact Us
We are here to ensure you receive a consistently high service and quality solutions for your business needs. We promise you won’t regret speaking to us, and if we can’t help you, we will try to find someone that can.