
Revit makes converting 2D plans into 3D models easy. In this blog, we will look at how to import a 2D DWG floor plan into Revit and how to add 3D components such as walls and doors to the model.
First of all what’s covered…
- Importing DWGs
- Creating 3D new component types
- Modelling over the DWG
Importing DWGs
Your floorplan may exist in many formats such as PDF or RVT. Here, we will look at importing a DWG.
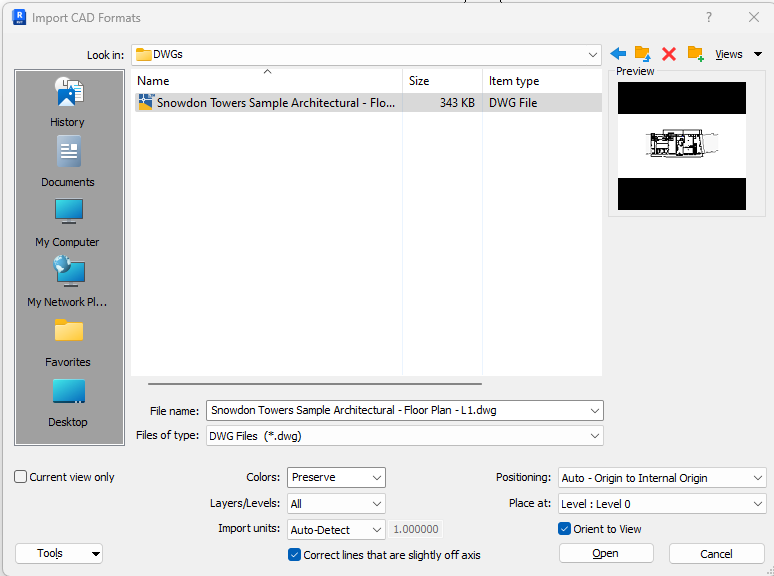
First, in your project go to the Insert tab, then click the Insert DWG button and navigate to the DWG file.

You may need to check the settings at the bottom of the window but for this example we will stick with the default settings and click OK.
Once loaded, the DWG is automatically pinned into place to stop it from moving. This is very important, as once you start modelling you will not want it to accidently move at any point.
Creating 3D new component types
Next, we will want to create the components needed for the 3D model. We will keep this simple and duplicate the existing components and adjust the dimensions to suit.
For this example, we will duplicate a wall and a door type.
On the architecture tab click the Wall button. In the properties window at the top choose a type of wall similar to what we are creating to save us time. Then click the Edit Type button and in the top right of the window click Duplicate and name the new wall type.
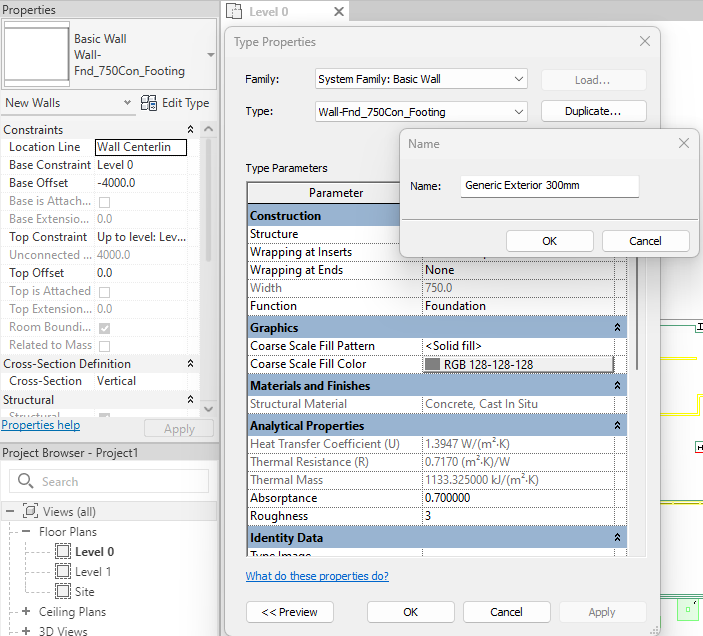
Now we have a new wall we can edit the Structure of the wall to suit.
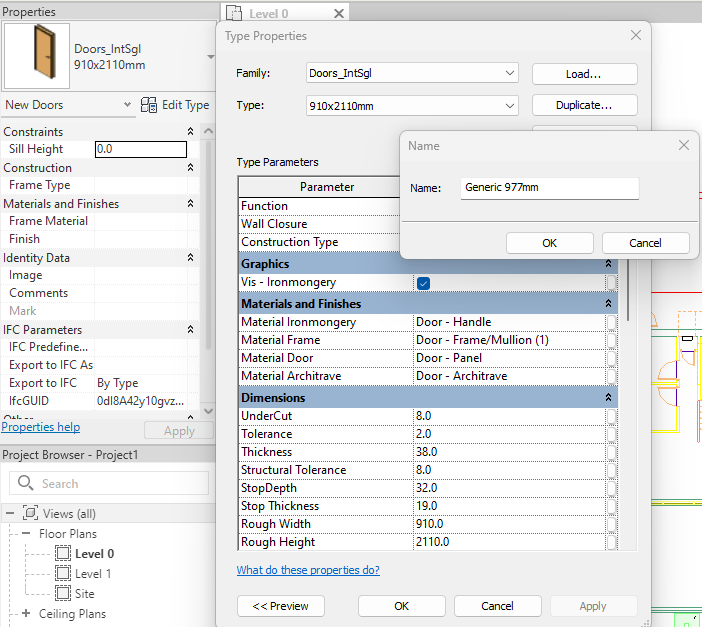
Next, we will duplicate a door. On the Architecture tab click the door button and again select a door type and duplicate in the Edit Type window. Once named, edit the properties of the door, such as its height and width.
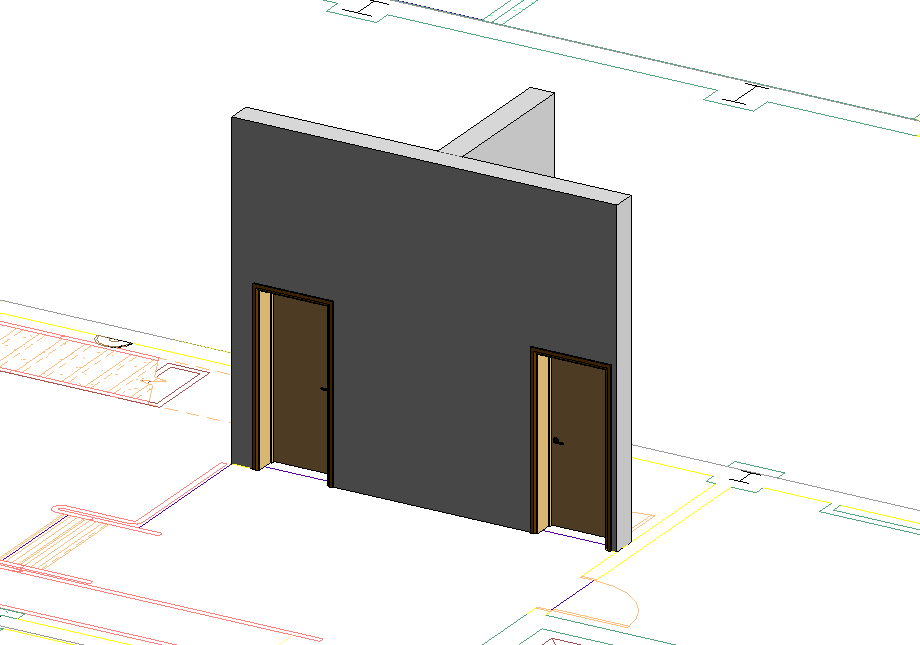
Modelling over the DWG
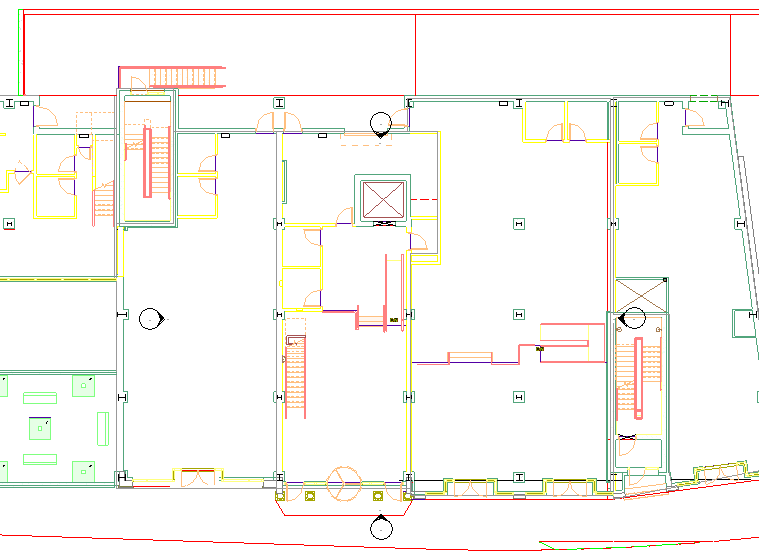
Now that we have a few components to use we can simply trace over the DWG floor plan.
For the wall, we will change the location line to Finish Face Exterior and use the Pick Lines draw tool. Now we can go around the floorplan clicking on all the lines for the exterior wall faces. Although we are working in 2D we are now building a 3D model so we will also need to consider the height of the walls which can be set in the properties window.
Now that we have walls, we can place the doors. To do this, simply click on the walls where the door needs to be placed. For accurate placement I would recommend using the Move or Align command to accurately locate the door after placing it in the wall.
Conclusion
From here we just need to continue modelling using the DWG as a guide for placing the 3D components such as furniture, ceilings, stairs, and roofs. For more detailed models, additional work may be required in the family editor to design more bespoke components. However, with Revit, we can quickly start to convert a 2D floor plan into a 3D model.
Still got Questions?
Book Training
Our Revit courses cover everything from the skills required to use the software, to design and share information between project teams, through to creating custom family elements.
Contact Us
We are here to ensure you receive a consistently high service and quality solutions for your business needs. We promise you won’t regret speaking to us, and if we can’t help you, we will try to find someone that can.