

Inside of Revit, it is quick and easy to pull information from different elements within your model, especially using out of the box parameters that come in by default. Functionality such as scheduling, tagging, and other information based workflows can be extended to be even more productive if you link this to custom data that is stored against your projects and components.
Firstly, it is important to note that this workflows will generally work with most versions of Revit. Whilst the examples and screenshots given in this blog are for Revit 2024, you will find that the same steps are true for pretty much any recent version of Autodesk Revit, including Revit 2020, Revit 2021, Revit 2022 and Revit 2023.
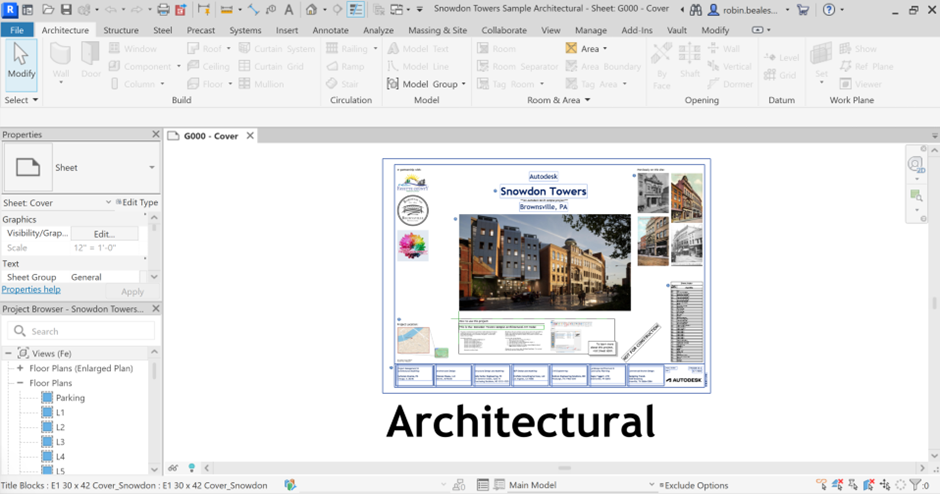
For this example, I will leverage the new sample file to come pre-loaded with Revit 2024:
“C:\Program Files\Autodesk\Revit 2024\Samples\Snowdon Towers Sample Architectural.rvt”
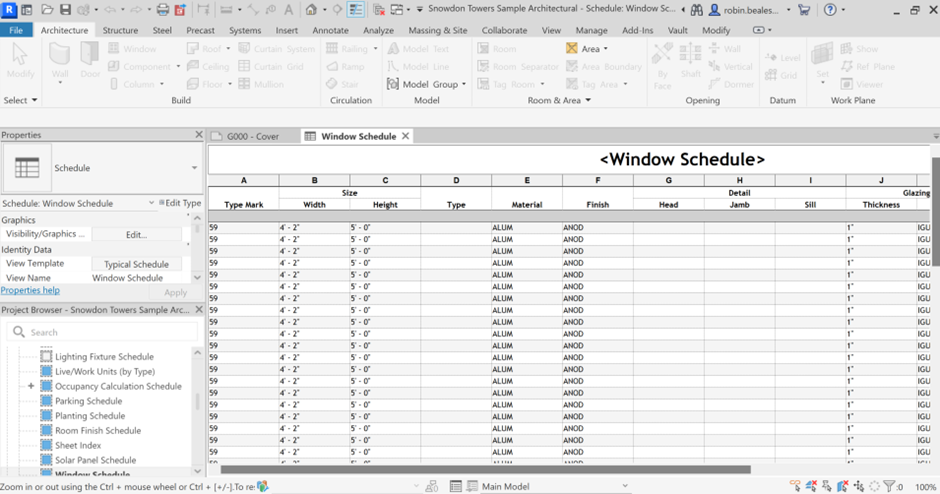
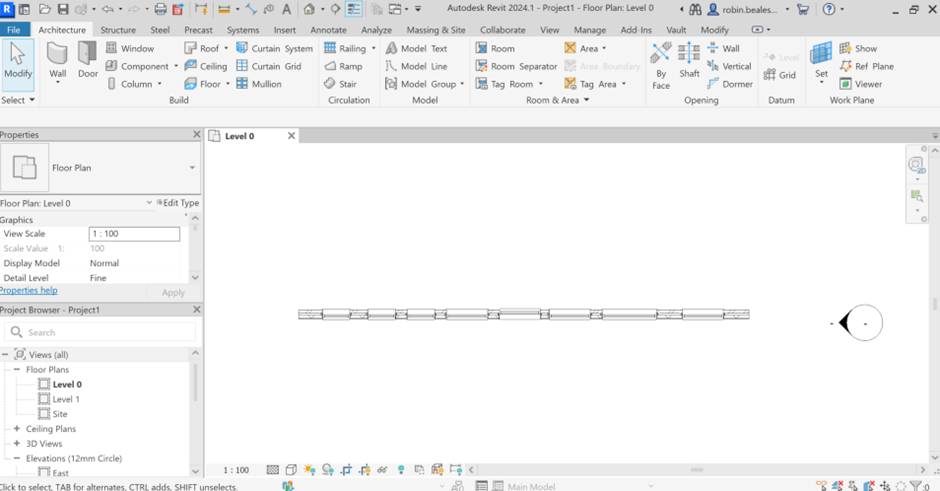
If we take a look at the Project Browser on the lower left hand side of the screen, you will see that inside this sample file we already have a number of example schedules for both typical, and more working based outputs. Let’s open the Window Schedule, as this will be straight forward to example what we are looking at here. With the Window Schedule open, you will note that the author of this design has used some “off the shelf” window properties such as Type Mark, Width, Height and Material. You will also note that there are some properties that you may not recognise, such as Head, Jamb and Sill. Whilst these do not have values currently, they are listed and ready to accept information:
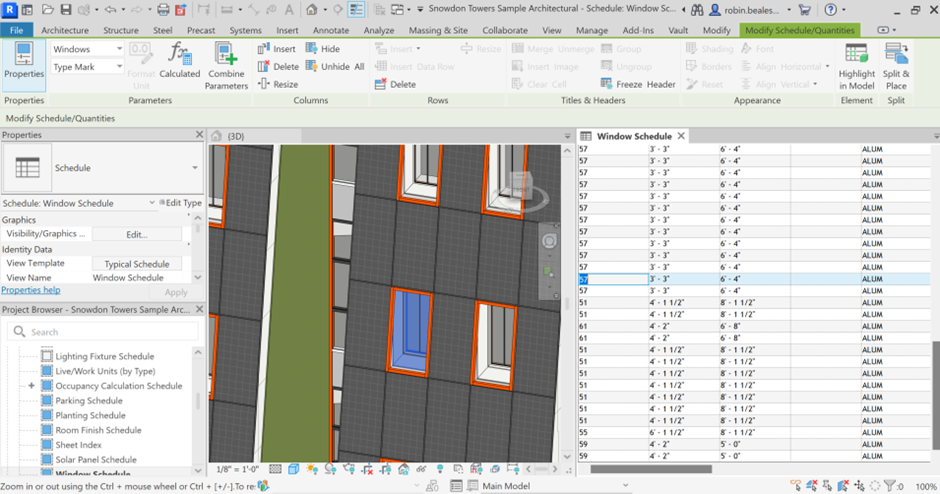
Let’s open the 3D view, and hit WT on your keyboard to split your view. Select one of the windows in the 3D model view and identify which row has been highlighted on your schedule, associated with that selection.
Note, you may need to use “Tab” on your keyboard to cycle through your selections if you are using the same model as me in this example. You can reverse the process and select a line item in the schedule to highlight the object in the 3D view if you find it easier.
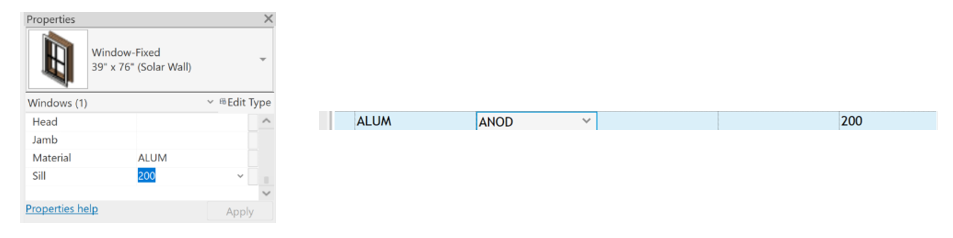
You can see the custom properties, which are instance based in this example, here in the properties palette. Give these a value to see the values populated in the schedule:
So how do we get parameters that exist next to component, but are non-standard to appear in our schedules? Let’s strip this back and build up an example from scratch with a brand new Revit Project. I will use an architectural example using the default construction template, but the same process will work with any discipline example, using any template.
To keep things simple, I am going to draw a single wall and place several standard window components into the wall. Make sure to use several different types of the same family:
Next, head over to the Manage tab, and click Project Parameters: 
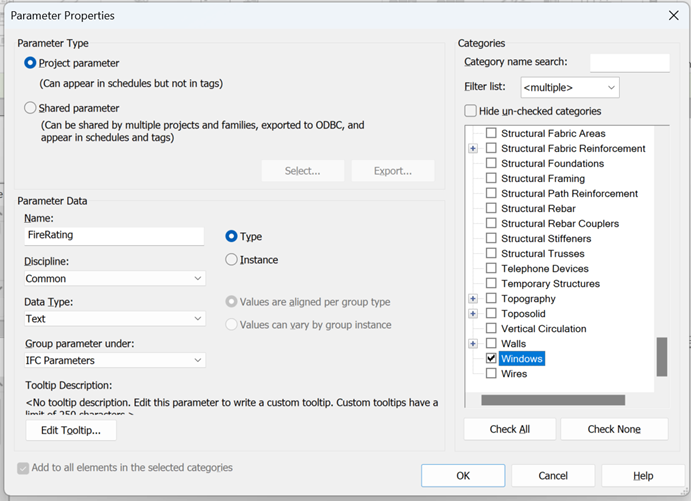
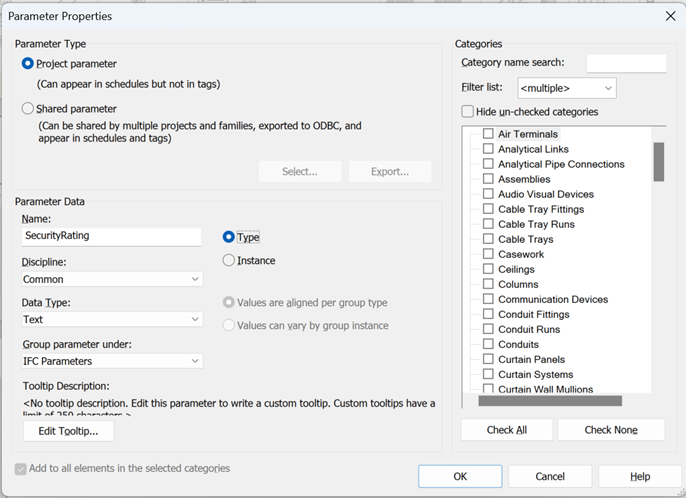
From here you will be able to add a number of different parameters to your project, and tell Revit which categories of component you would like to have them associated to. Let’s create two, one for FireRating and another for SecurityRating. These are non-standard properties in Revit, but regularly called for on Digital Construction projects, especially when using the IFC file format.
Click “New Parameter” at the bottom of the window: 
You will be displayed with a form to define your parameter. As we are creating a parameter manually in this example, we will use a simple Project Parameter. These can be used in schedules, but do have limitations. If you want your parameter to appear in tags and other functionality in Revit you will need to use a shared parameter, which we will cover in another blog post later – they are really simple to use, but require you creating and using a shared parameter text file. Simply put, you centrally define parameter names and use them in several locations.
Complete the parameter form as shown, paying close attention to the fact that we are creating a type parameter, defining it’s data type and sorting it under IFC Parameters on the family. Choose the best settings for your own example, before choosing which Revit Categories you wish to have the parameter appear in on the right hand side. This list can be searched and filtered if you need to:
Once you are done, your two parameters will be listed – note that these can be modified using the relevant button on the dialog box should you need to:

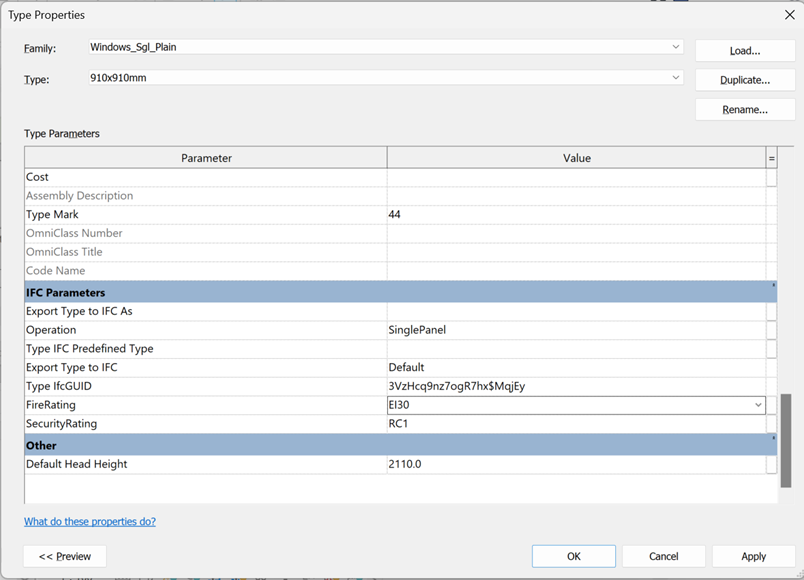
If you go and select one of your windows now, you will note that under Type Properties you will have both FireRating and SecurityRating parameters listed under the IFC Parameters property set. Let’s give them a simple value for this type:
Let’s now create a quick schedule from the View tab, schedules button:
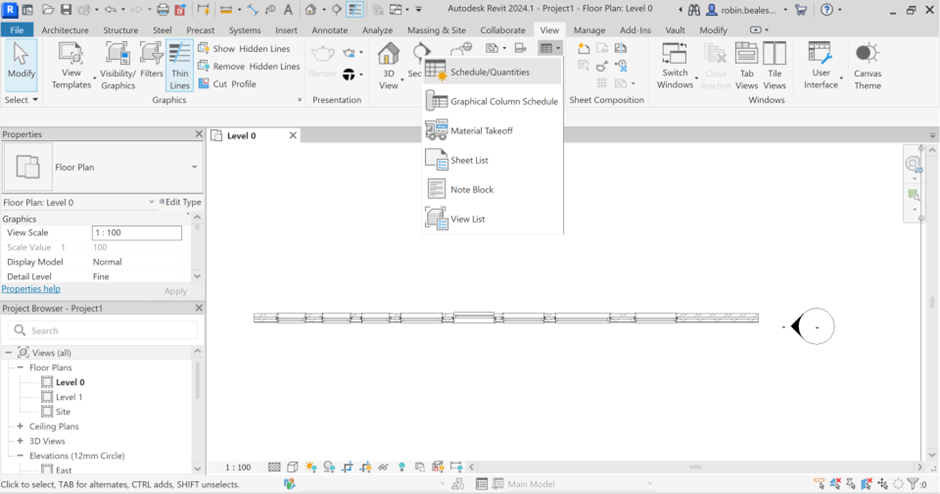
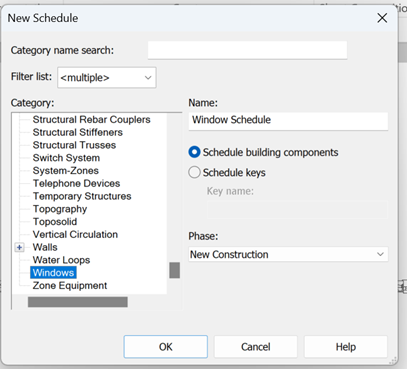
Choose to create a Windows category schedule:
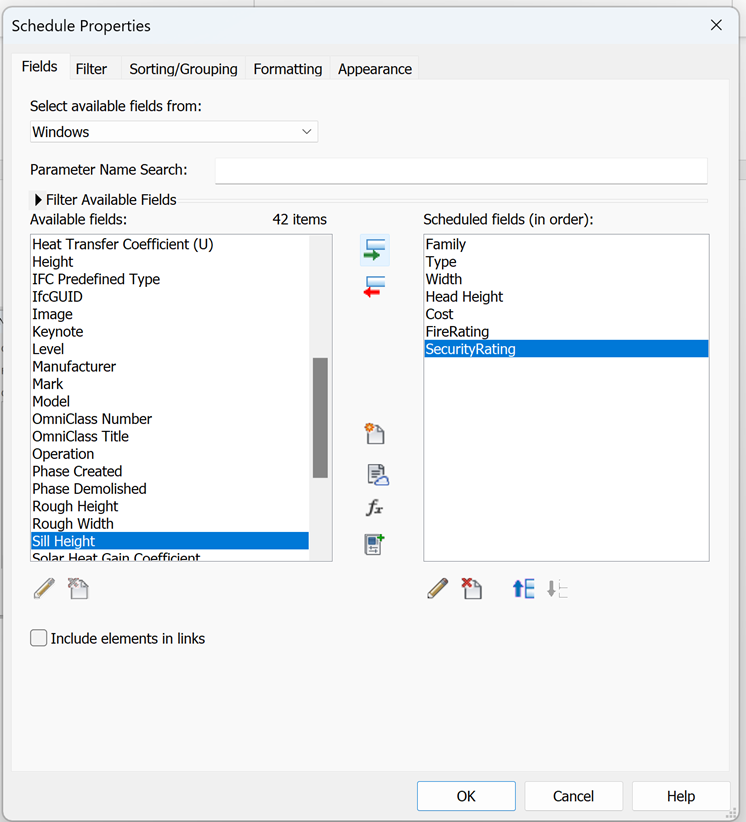
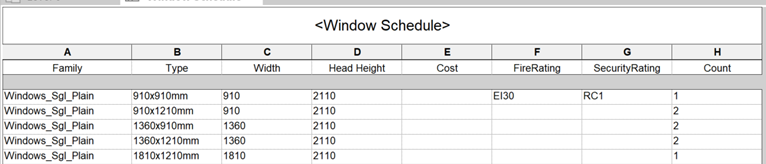
Straight away, you should notice your custom parameters are listed. Add them to your schedule with some other relevant data before pressing OK:
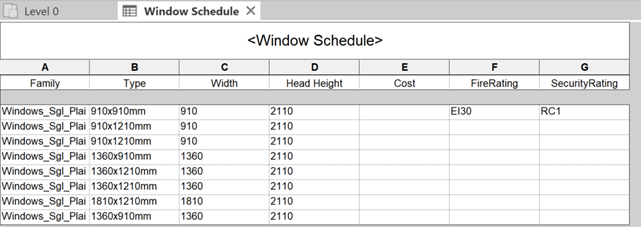
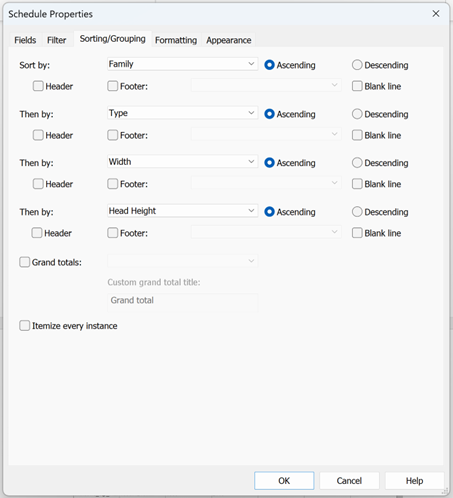
Finally, let’s modify our schedule to make it a little more refined. Using some sorting options, and turning off itemising every instance:
In my example, I have also added the “Count” field to the end of each row:
And that’s it! You now know how to add custom parameters to your component inside Revit at a project level. Best of luck, and happy Reviting!
Still got Questions?
Book Training
Our Revit courses cover everything from the skills required to use the software, to design and share information between project teams, through to creating custom family elements.
Contact Us
We are here to ensure you receive a consistently high service and quality solutions for your business needs. We promise you won’t regret speaking to us, and if we can’t help you, we will try to find someone that can.