
In Revit it may be necessary to create openings in walls, floors or roofs for example. There are a number of ways you can do this and each way will have different behaviour’s and constraints. In this blog we will take a look at the 3 most popular ways you can create opening within Revit.
1. Opening Tools
The first of the three methods is to us the opening tools, these can be found on the Architecture tab in the Openings group. There are 5 different opening tools:
- By Face
- Shaft
- Wall
- Vertical
- Dormer

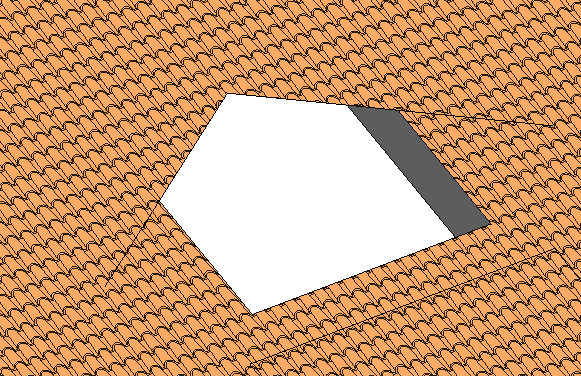
For example. if I wanted to add a dormer to a roof, I can model the dormer and then use the dormer opening command to create an opening on the roof for the dormer. This is automatically constrained to the dormer so any adjustments to the dormer and the opening will adapt.
2. Edit Profile
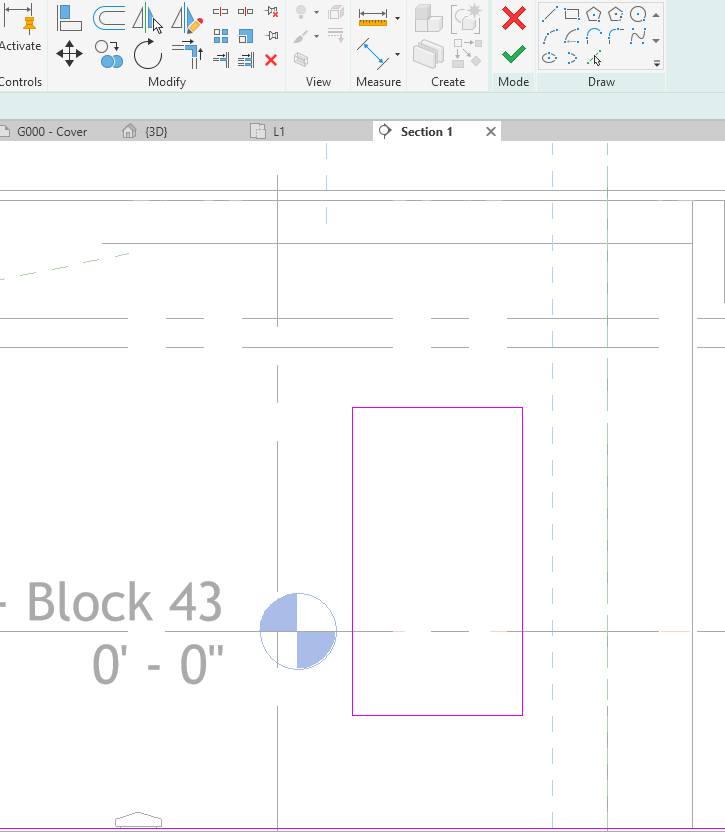
I could simply edit the profile of an element such are floor or roof and manually create the opening. Selecting a wall for example, in an elevation or section view, I get the option to Edit Profile on the modify tab with the wall selected. This then takes me into sketch mode where I can edit the foundry of the wall. If I draw a new foundry within the extents of the wall this will act as an opening.
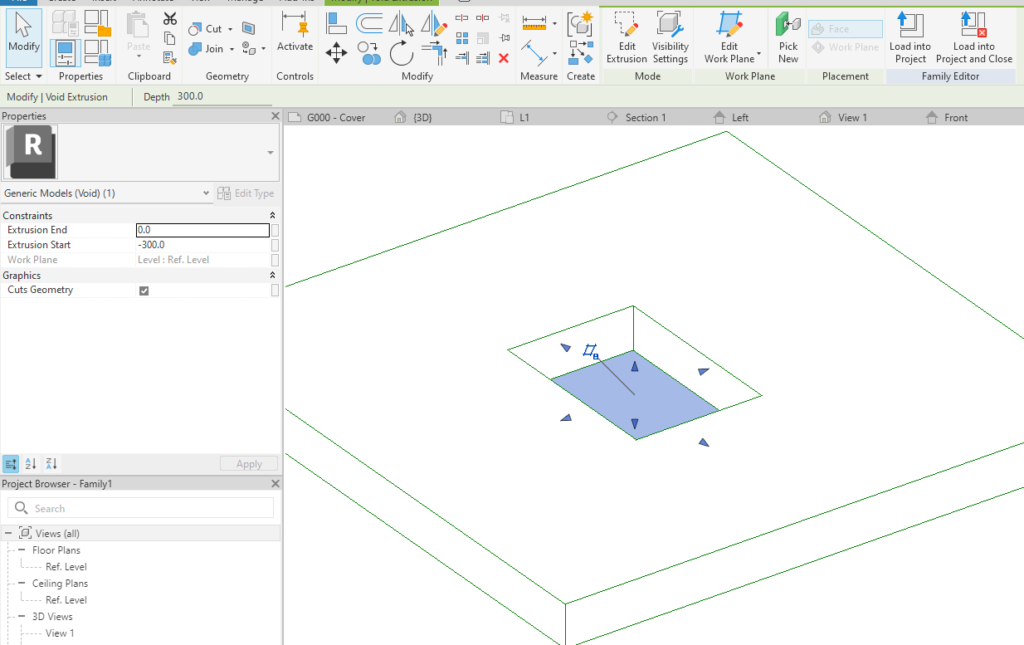
3. Void Family
And finally you could create a family which consists of a void. For example I could create a new family using the Metric Generic Model Floor Based template, and then add a void to the floor. I could make it smarter and add some parameters to control the dimensions of the void but essentially thats all I would need.
I can now load the family into any project to start creating opening.
Conclusion
There are many ways of creating openings, there is no wrong or right way but some have advantages over others such as the shaft tool can cut multiple floors roofs and ceilings where as if I used a family I would have to place multiple instances.
Still got Questions?
Book Training
Our Revit courses cover everything from the skills required to use the software, to design and share information between project teams, through to creating custom family elements.
Contact Us
We are here to ensure you receive a consistently high service and quality solutions for your business needs. We promise you won’t regret speaking to us, and if we can’t help you, we will try to find someone that can.