
Many of you will be familiar with the installation of Autodesk Suites whereby you would have one install file for all the software included in your license. Since the move to the Collections though, each product needed to be installed separately, until now…
Autodesk have introduced the Custom Install option, where you can select multiple products that you would like to install and create a deployment-type install package for the products. This is great if you have teams within your company who require access to different combinations of software. Once set up you can leave the executable file in a network location and have your users run the installs from there. Eliminating the chance of users installing the wrong software while saving time by not having separate installs for each product.
To get started, simply sign into the Autodesk Management Portal manage.autodesk.com.
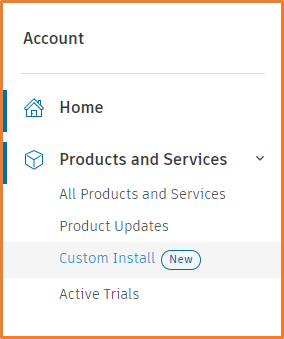
Under Products and Services on the right, there will be an option for Custom Install.
Here you will be given a list of products which are available for the Custom Install. Depending on your license type, you may need to select either Serial Number (Single User) products and Network (Multi-User) products. Currently there are only a few here, but as the 2022 software is released more products will begin to fill this list.
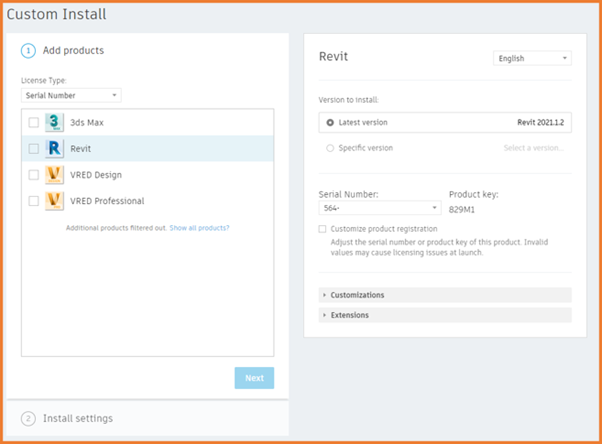
When you select each product you will be given further options where you can choose the install language, version to install, and the serial number that will be used.
You will have further options for customizations and extensions depending on the product you have selected.
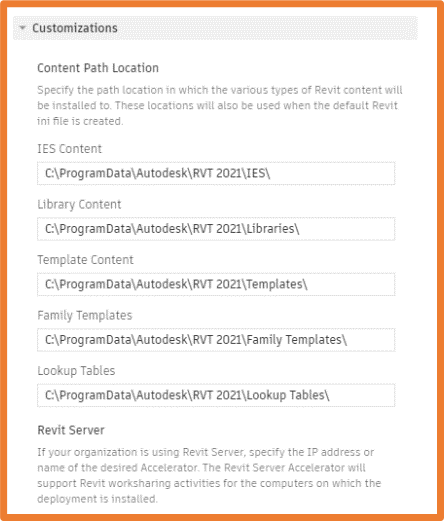
Customization will give you the option to further configure the installations settings before it is installed, For example with Revit you can set the IES, library and Template content locations, as well as setting the Revit Server Address.
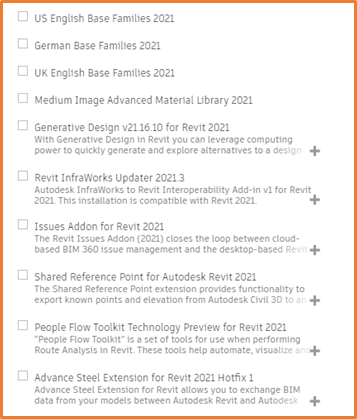
Extensions will include options for any updates or add-ins that would generally be selected during the installation, or added after the install.. again this will depend on the product selected.
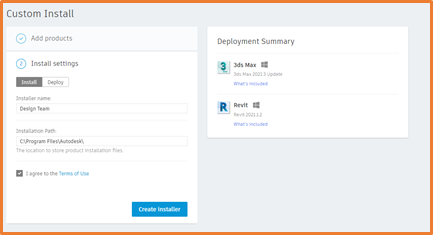
Once you have configured the products, you can adjust the Install Settings. From here you can decide whether you want this as an Install or a Deployment, each will give you different options. If you would like more information on creating deployments, we have published a blog on this here.
Using the Install option will require an Installer Name where you can give it a recognizable name for users to select. Installation Path which is where the install files will be kept, by default this is either C:\Program Files\Autodesk\ or C:\ Autodesk\
From here all that is left is to create the installer, let it download, and save this to an accessible location. This will save an executable file which can be run by the user who needs the software, and it will install the configured programs on the desired machine.
Still got Questions?
Buy Software
Autodesk is a global leader in software for architects, builders, engineers, designers, manufacturers, 3D artists and production teams. Contact us now to find out which software is right for you.
Contact Us
We are here to ensure you receive a consistently high service and quality solutions for your business needs. We promise you won’t regret speaking to us, and if we can’t help you, we will try to find someone that can.