Autodesk’s Product Design and Manufacturing Collection (PDMC) now comes with an embedded nesting utility for Inventor, and it’s fantastic. Part of the economy of sheet metal manufacturing comes from the ability to cut component parts out of a single sheet of… well, sheet metal. In order to minimise wastage, it is important to maximise the use of this sheet by efficiently nesting the parts to be cut. This is where the Autodesk Nesting Utility comes in handy. Read on to learn how to get started with this great new tool!
Prerequisites and Installation
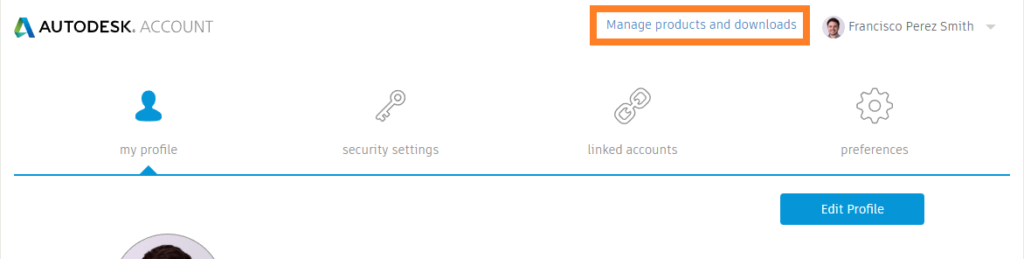
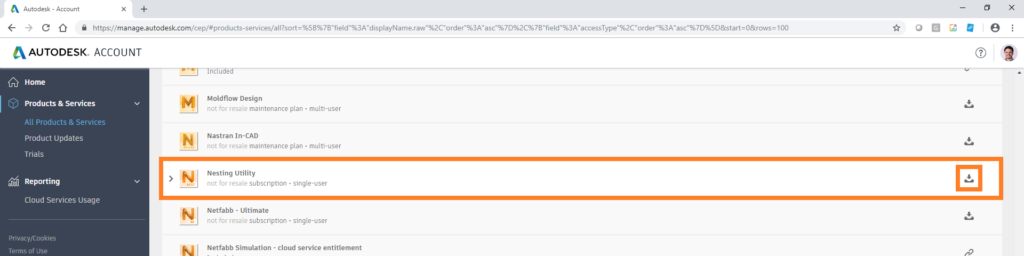
Firstly, it is important to note that the Nesting Utility is only available to those on an Autodesk PDMC subscription. If you are a subscriber, then you can download the installation files from your Autodesk account (https://accounts.autodesk.com/). Once you have downloaded the installation files, you can shut down any Autodesk programs you have open and begin the installation.
Ensuring Installation was successful
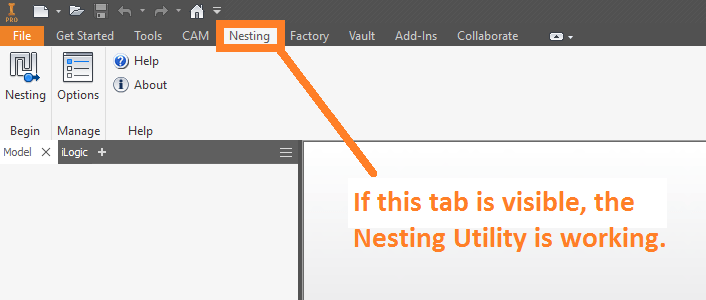
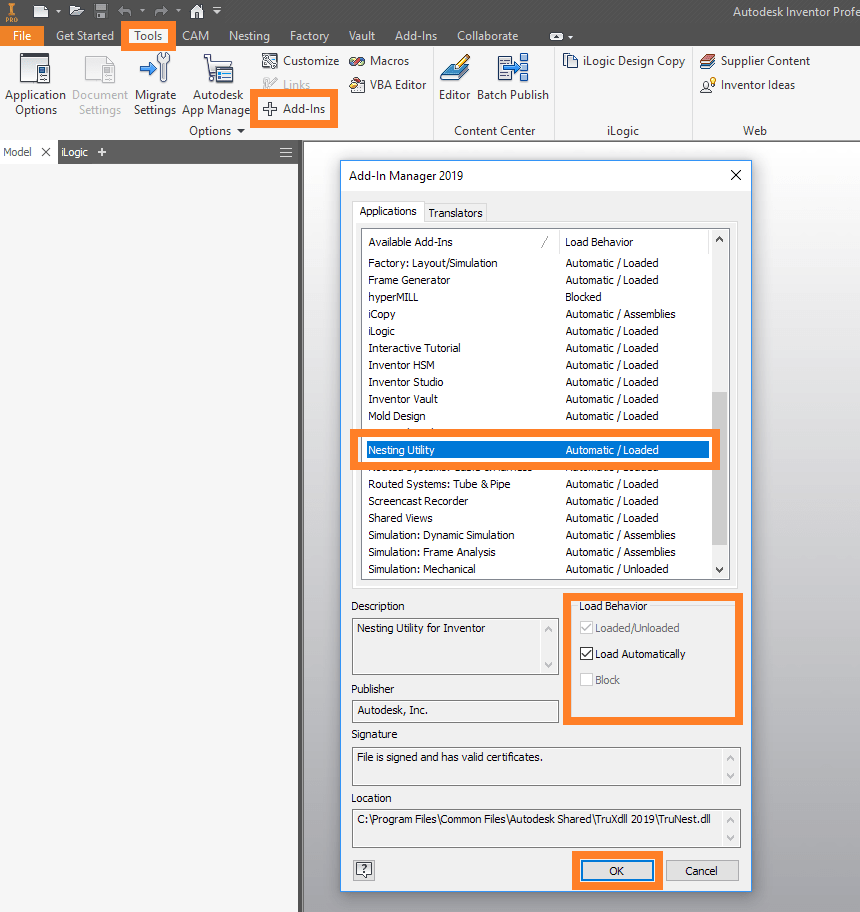
The Nesting Utility exists as an add-in for Inventor, and is therefore accessed via Inventor. Following installation, you should see a ‘Nesting’ tab at the top of your user interface. If you do not see this tab, then you may need to enable the add-on. This can be done by going to:
Tools -> Add-ins -> Nesting Utility -> Tick ‘Loaded/Unloaded’ and ‘Load Automatically’
Now, you’re good to go!
The Nesting Utility
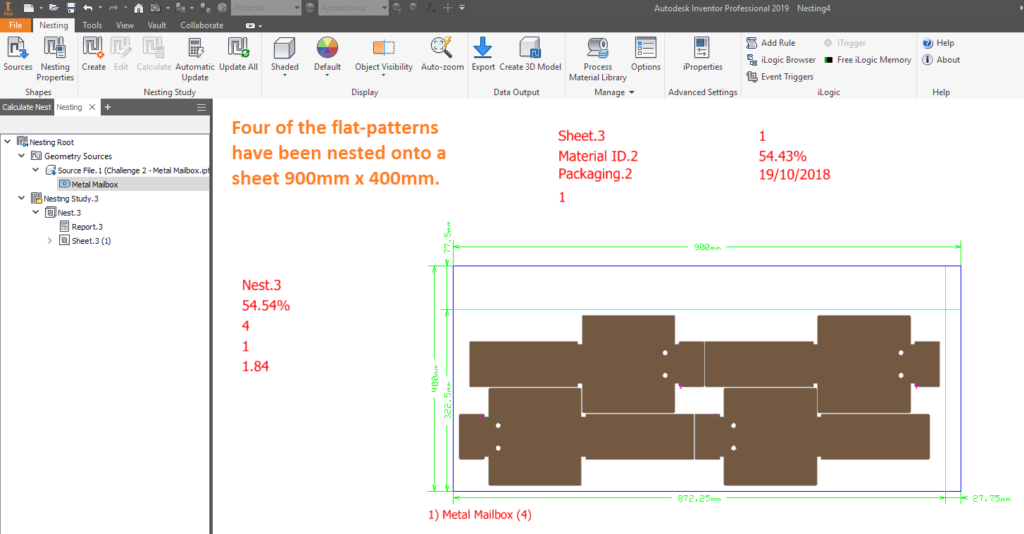
So what can the utility do exactly? And what does it need? In a nutshell, the Nesting Utility works by accepting the following inputs:
- The profile(s) to be nested,
- Conveniently,
these can be provided in a wide range of file formats, including Inventor
parts, sheet metal parts, assemblies, DWGs and even DXFs! - Sheet
metal parts will automatically be flat-patterned for nesting.
- Conveniently,
- The desired quantities of each profile,
- The orientation and spacing rules that the govern
the nesting, - The dimensions of the sheet (length, width and
thickness).
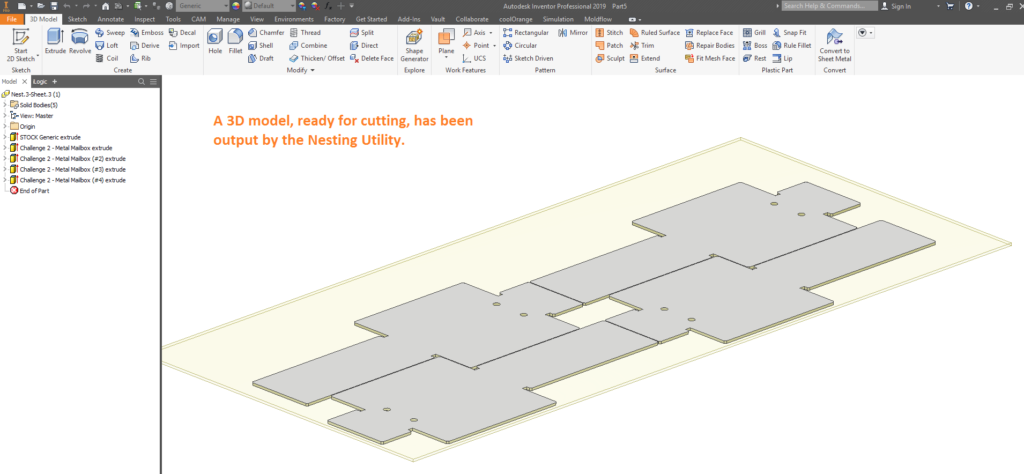
From these inputs, the utility can then compute an optimised nesting strategy, and output a nested layout as a 3D model, 2D drawing, MSI or DXF file.

Training
We hope you found this introduction useful. If you are interested in learning how best to drive Inventor’s Nesting Utility, please don’t hesitate to get in touch with us as Man and Machine. We love all things CAD and CAM, and would be delighted to get you up to speed with these amazing tools!
For more information on this blog post, or if you have any other questions/requirements, please complete the below form:
Related Links
Autodesk Inventor – Man and Machine
Autodesk Inventor Training – Man and Machine
Autodesk Inventor CAM Training – Man and Machine
Autodesk Product Design and Manufacturing Collection – Man and Machine
Inventor Training – Solid Modelling Introduction – Man and Machine
Autodesk Inventor – Autodesk Platinum Partner – Man and Machine