Introduction
Have you ever wanted to set up a render farm for your Autodesk products? Well you’ve had the power the entire time, in the form of Autodesk Backburner. Backburner is a bundle of programs that allow users of 3ds Max, Maya, Flame, Flame Assist, Flare or Lustre to use multiple computers in order to speed up the rendering process. This quick guide will explain each of the programs in the Backburner bundle, and how to set up a render farm.
Downloading and Unpacking Backburner
Begin by downloading the Backburner bundle via the Autodesk App Store.
App Store:
Direct Link to App:
https://apps.autodesk.com/MAYA/en/Detail/Index?id=3481100546473279788&appLang=en&os=Mac
Unpack the bundle’s installation files by running the downloaded .zip file.
Installing Backburner
Backburner must be installed on each computer in the render farm, including the one which is to issue the rendering jobs. This is done by copying ‘setup.exe’ to each machine and running it.
By default, the Backburner bundle is installed to:
C:\Program Files (x86)\Autodesk\Backburner\
Installing 3DS Max/Maya/Flame/Flame Assist/Flare/Lustre
3DS Max/Maya/Flame/Flame Assist/Flare/Lustre must also be installed on each machine in the render farm. Note however that the programs simply need to be installed and run once; they do not require individual licenses.
The Backburner Bundle Overview
The Backburner bundle installed consists of three distinct programs, each serving a different function. These are described below:
- Manager.exe
This is the ‘master’ program. It accepts jobs from 3DS Max/Maya/Flame/Flame Assist/Flare/Lustre and issues them for render. It runs on one of the computers in the farm.
- Server.exe
This is the ‘slave’ program. It runs on a machine with 3DS Max/Maya/Flame/Flame Assist/Flare/Lustre and actually performs the rendering.
- Monitor.exe
This program allows you to control and monitor the jobs being processed. It can run on every computer in the farm, but only the first to be booted can control the jobs; the rest become read-only.
It is possible to run both Manager.exe and Server.exe on a single machine – that is, the machine which issues rendering jobs can also be used to render.
Setting up the Render Farm
After installing Backburner and 3DS Max/Maya/Flame/Flame Assist/Flare/Lustre on all machines in the render farm, perform the following steps to set up the render farm:
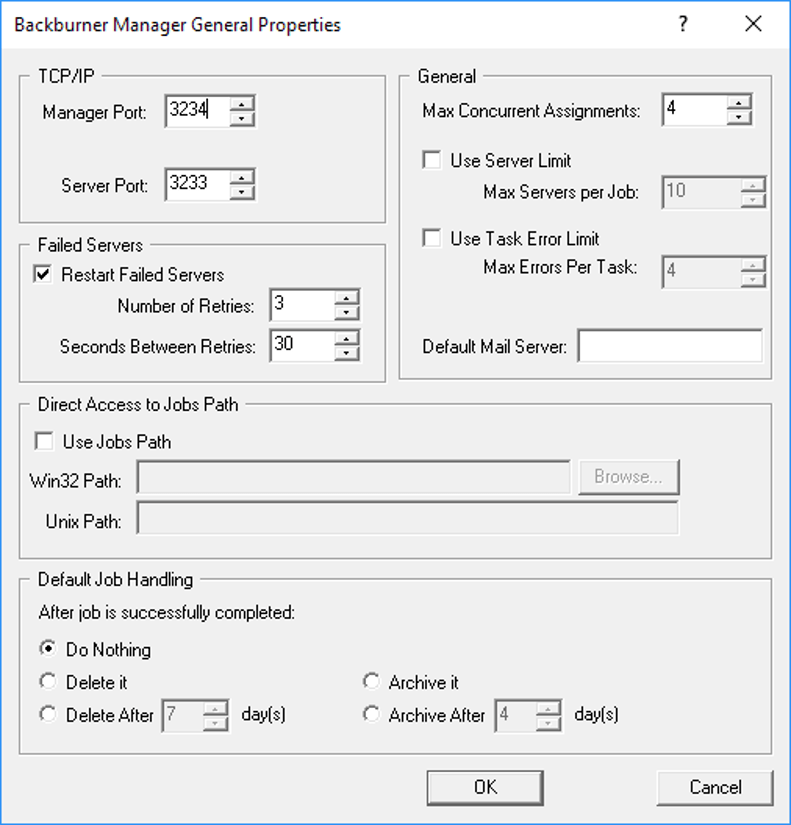
- Run Manager.exe on the machine that is to issue rendering jobs.
- Open Windows’ firewall ports listed at the top left of the form (defaults 3234 and 3233).
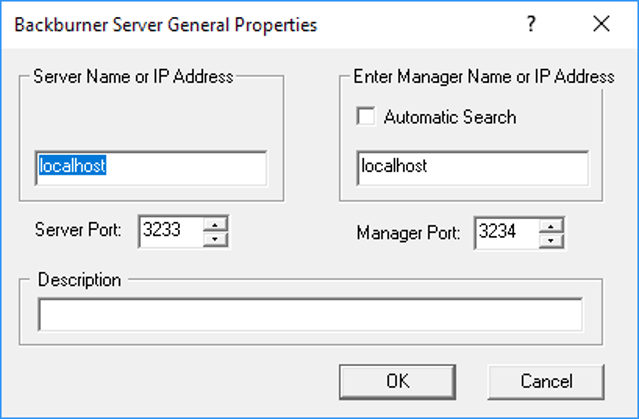
- Run Server.exe on all machines that are to perform the rendering.
- Untick ‘Automatic Search’, and input the name of the machine issuing rendering jobs (by default, this is ‘localhost’). Adjust Server Port and Manager Port if these were adjusted in the master machine (i.e. the one running Manager.exe.)
- Open Windows’ firewall ports listed at the top left of the form (defaults 3234 and 3233).
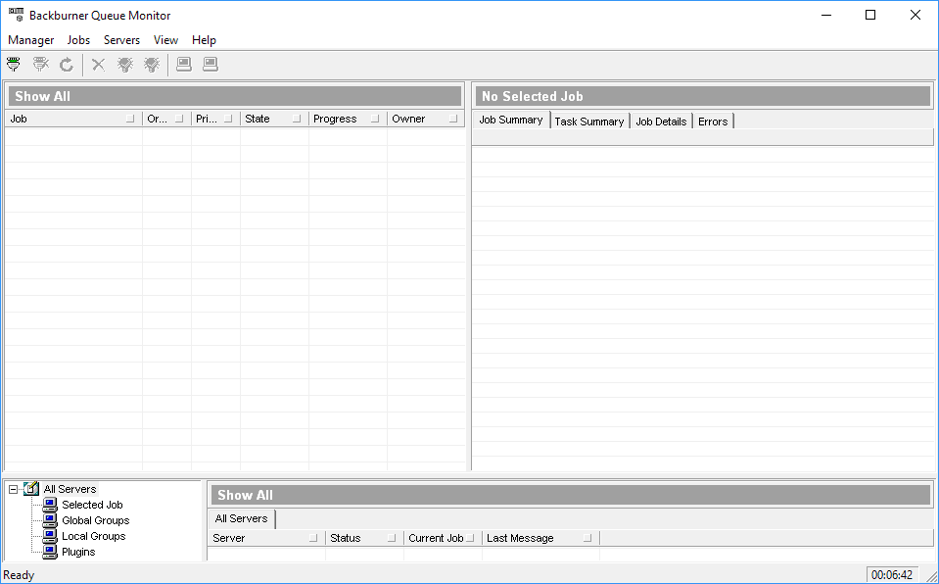
- On one of the machines, run Monitor.exe.
- Click Manager à Connect.
- Enter the name of the master machine (i.e. the one running Manager.exe.) Adjust the port as required and click ‘OK’. Note: you may need to include the master machine’s domain.
- Open 3DS Max/Maya/Flame/Flame Assist/Flare/Lustre and enable network rendering. In 3ds Max, this is achieved by clicking Rendering à Render Setup à Common Tab à Tick ‘Net Render’.
Conclusion
And that’s it! Your render farm is now set up. Jobs are created and distributed amongst the machines, and now you can harness their collective power in your rendering work. If you found this guide informative, please don’t hesitate to get in touch with Man and Machine. We live and breathe Autodesk, and will have you up to speed with your Autodesk products in no time!
For more information on this blog post, or if you have any other questions/requirements, please complete the below form: