
Filters are a view specific element that allow you to control how certain objects will display according to set conditions or criteria.
For example you may need to show each door type as a different colour based on its type, size or function. You can create filters to control how different objects will display. See How to Create Revit Filters.
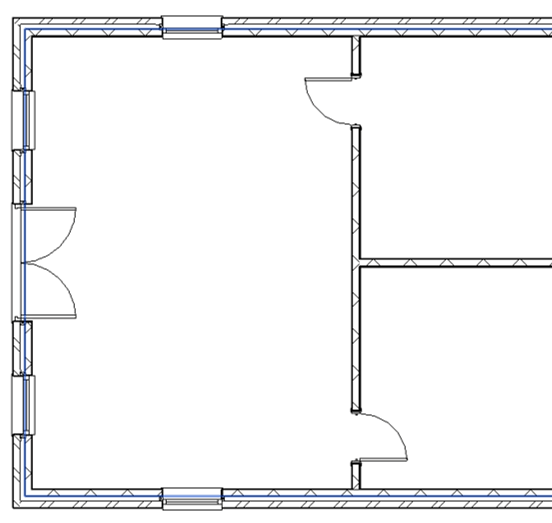
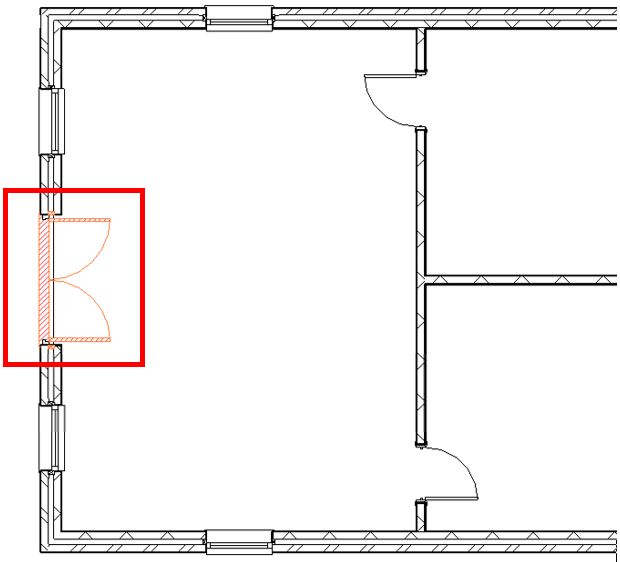
I will show how we can control the appearance of the double doors by adding a filter and some graphic overrides.
To Apply a filter to a view
Go to the View tab, Graphics Panel and hit the Visibility Graphics button. This will take you to your visibility graphic overrides dialogue box. Click on filters tab on the right hand side.
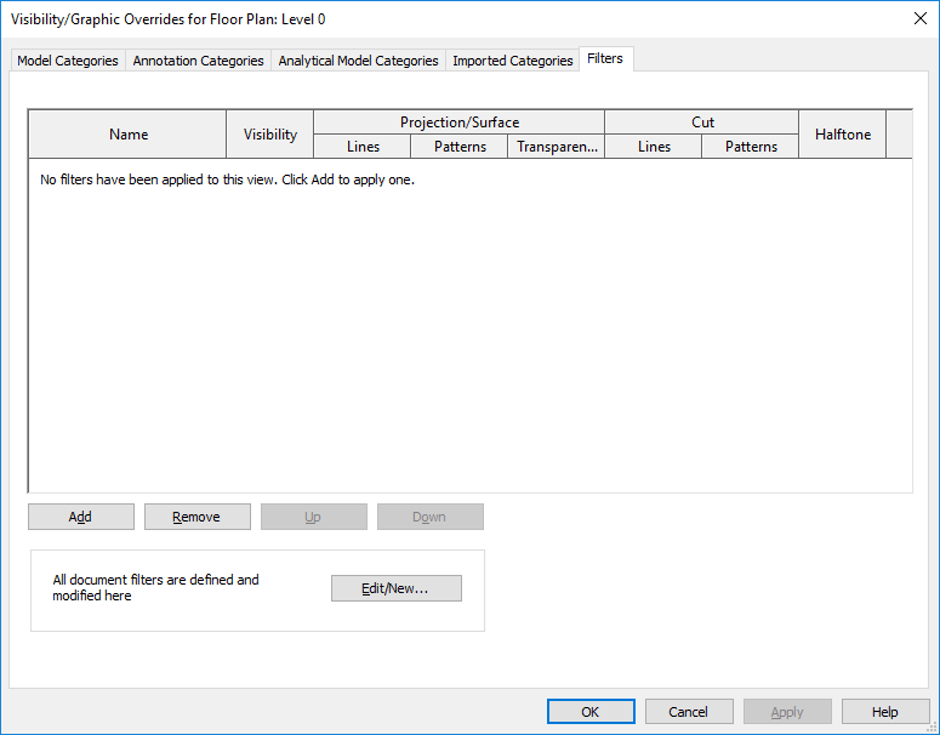
If there are no filters available, then you can Add one to the list by clicking on the ![]() button.
button.
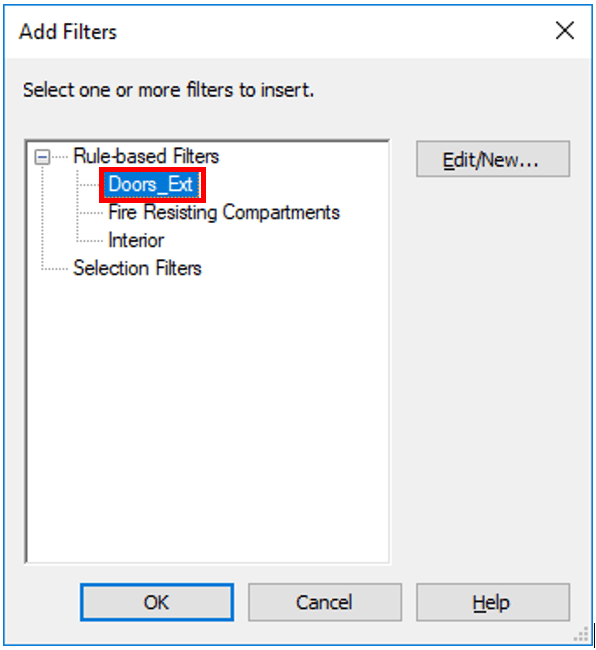
Select the relevant filter from the list of existing filters available. If the filter list does not contain the filter you need, you can create a new filter using the ![]() button, where you can go to create a new one.
button, where you can go to create a new one.
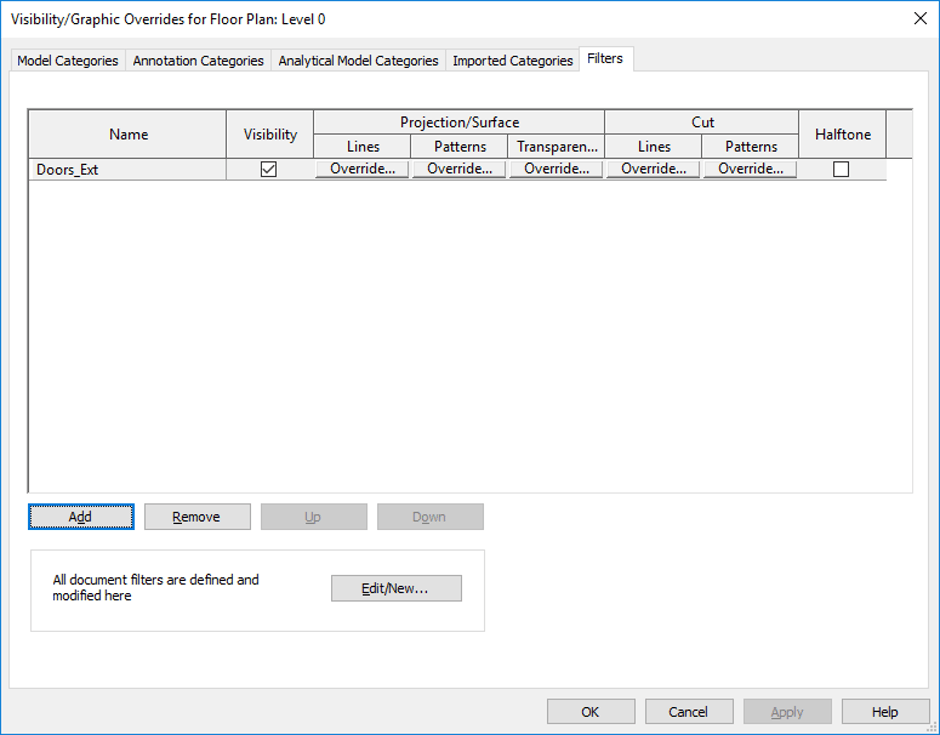
Once you have selected your filter, you can then add it to the Filters list in the Visibility graphic display area by hitting ![]() .
.
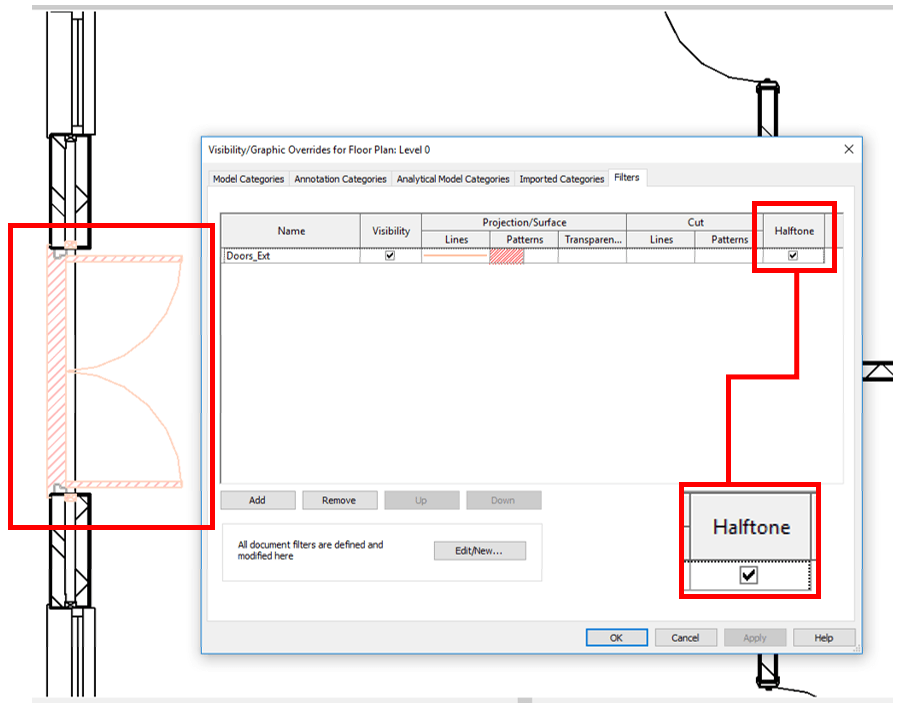
The new filter is added to the filters list. It is important to name your filter in a way that allows you to clearly identify it and understand its purpose. In this particular example I would like to filter all double doors that match the description of this family type.
I can set visual overrides for the following things:
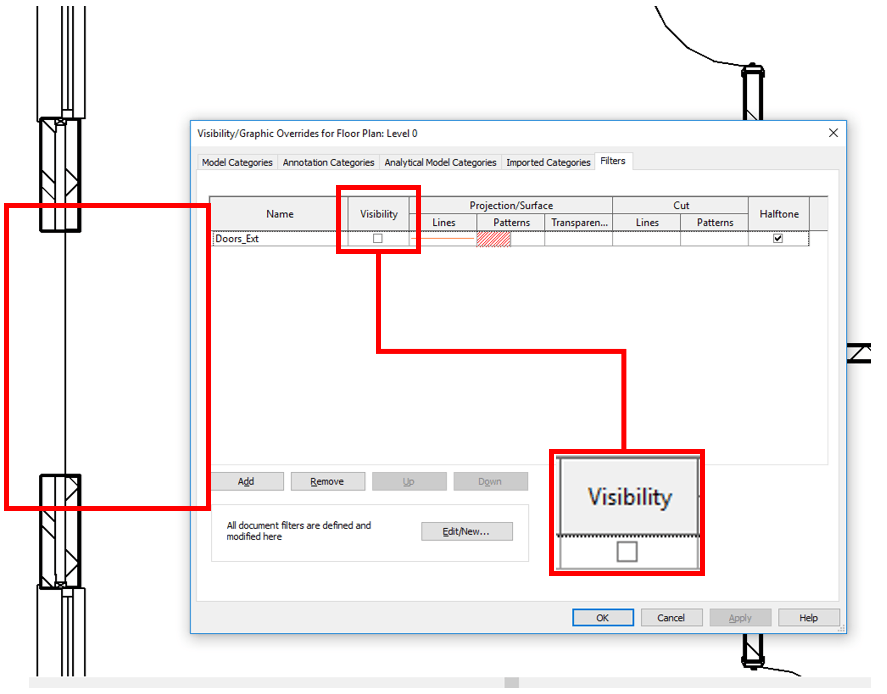
Visibility – used to determine whether the object will be seen in the view or not.
Projection/Surface – the appearnace of the objects outer surface when it has not been cut. For example in a 3D view when you see the surface of most objects.
- Lines: the lines that outline or show around the perimeter of the object.
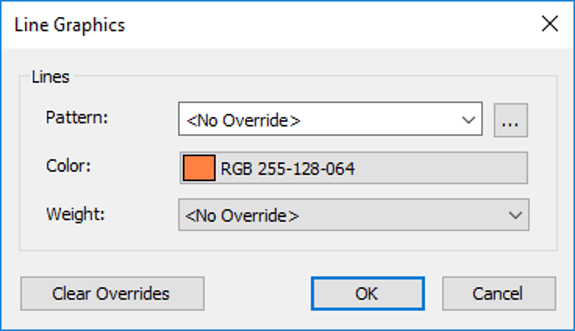
I have changed the line surface colour to orange for a noticeable difference.
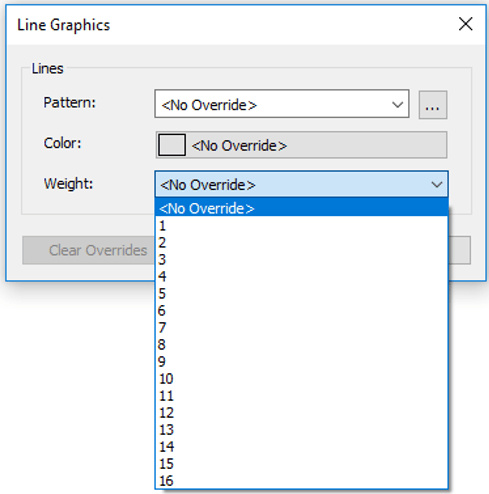
Change the Line thickness on screen between 1mm and 16mm.
![]() will clear any of the settings you have applied to the Line overrides.
will clear any of the settings you have applied to the Line overrides.
To confirm your settings hit ![]() .
.
Patterns: the pattern that will represent a surface texture or fill pattern used on the surface.
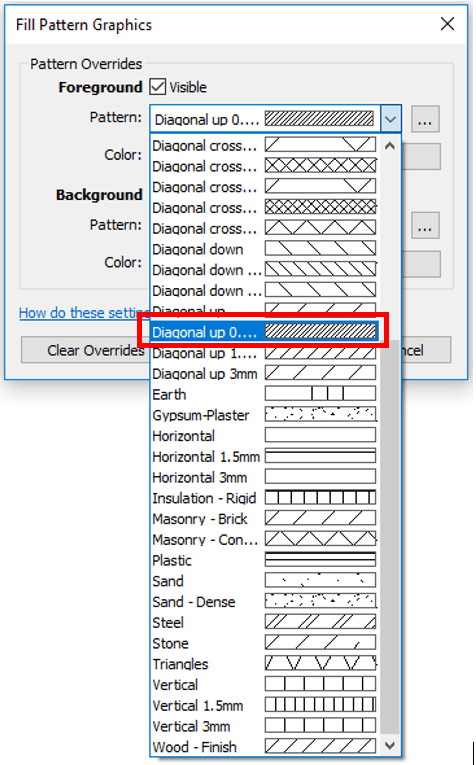
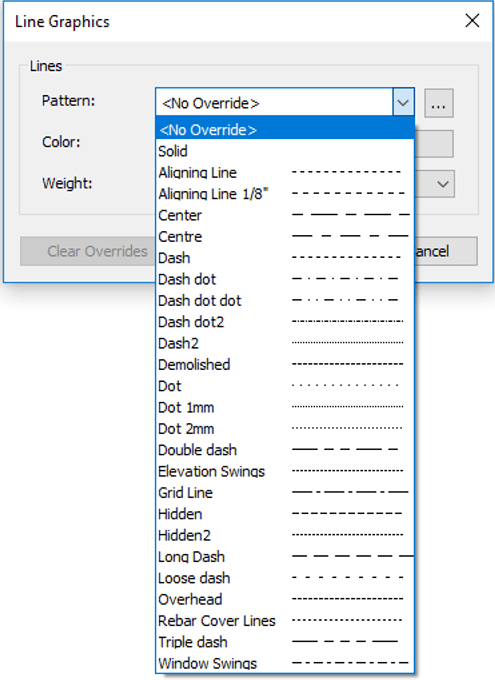
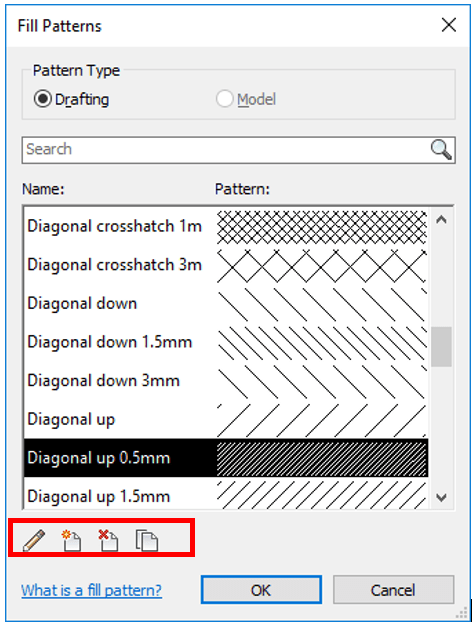
Choose from the list of pre-set patterns in the list or use the ![]() button. This will give access to additional options as well as the ability to create or modify an existing pattern in the list.
button. This will give access to additional options as well as the ability to create or modify an existing pattern in the list.
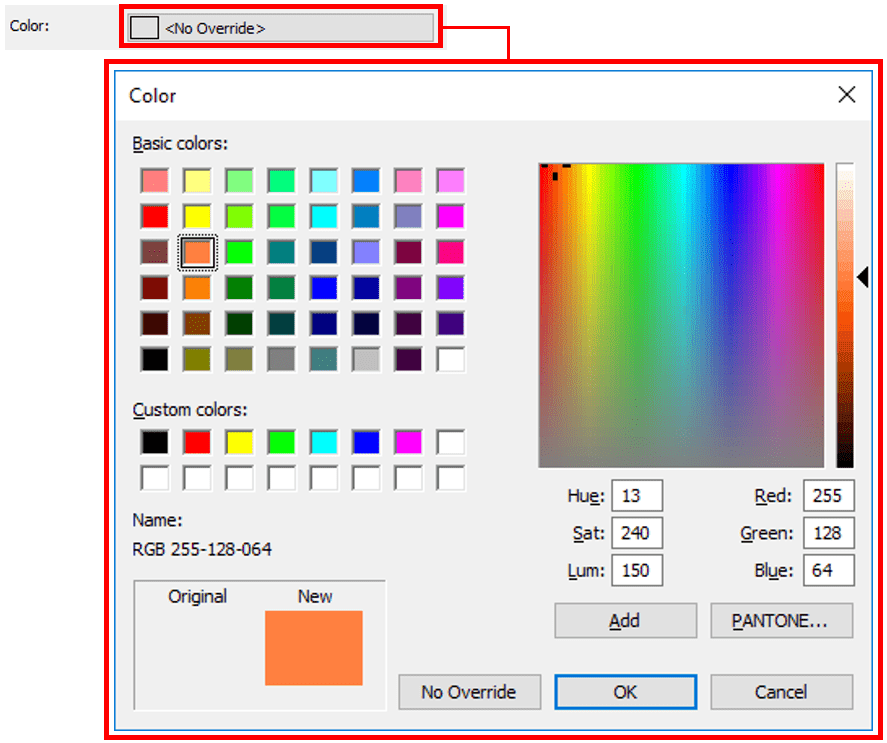
Set the colour for the line pattern.
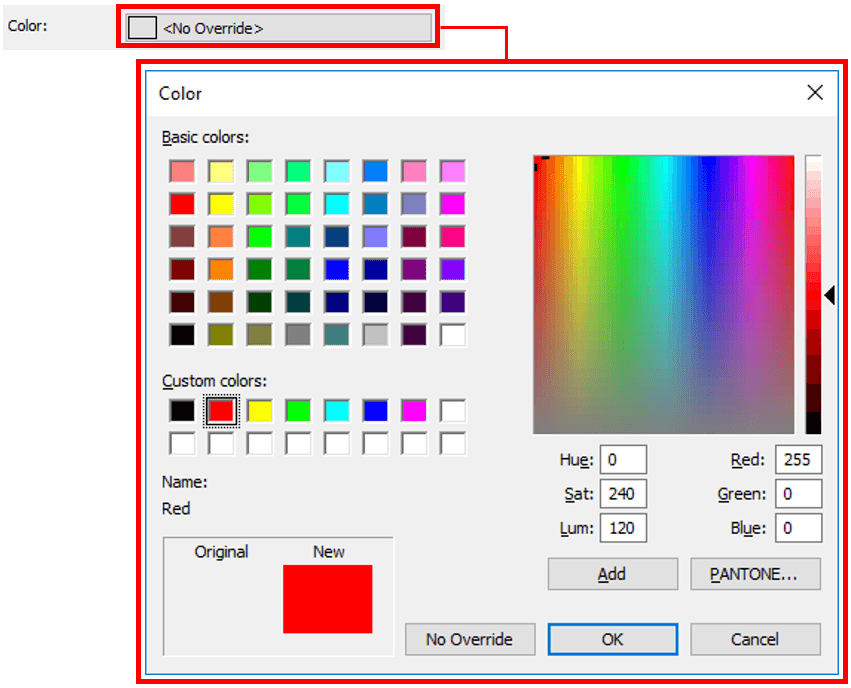

You can see a preview of the line colour and pattern appearance before you confirm the settings.
Hit ![]() to confirm the settings.
to confirm the settings.
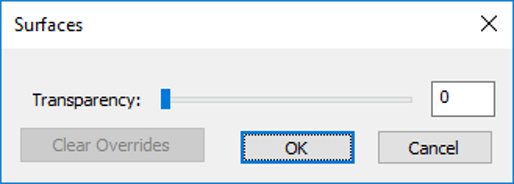
Transparency: set the transparency or opacity of the object between 0-100.
Cut – how the object will look when it is dissected. For example a wall in a plan view when the cut plane dissects the wall at a certain height or level.
- Lines: the linework used to define the
outer edge of the object when it has been dissected. - Patterns: the pattern that is used to
represent the inside of the object if it was cut open at a certain height.
The dialogue box for both projection and cut are the same with the same settings for both.

You will see previews of all the overrides set in the filter.
The pattern preview is only half of the box as there were both foreground and background areas that could have been adjusted with different settings.
Once you have finished adjusting the settings and applied the filter to a view, you will notice that any objects that meet the criteria will take on the appearance settings applied in the filter.
Settings such as Halftone are easier to see once the changes have been applied.
You can control the visibility of the object using the Visibility toggle.
If an object matches the criteria of 2 or more filters, the list order of the filters will determine how the object will appear. The top filter takes priority so the object will take on the properties of the highest applicable filter. This can be rearranged using the Up and Down buttons in the Visibility Graphics dialogue box, filters tab.

You can add as many filters as you need to control the visibility or appearance of multiple objects in a view or views. Filters can be applied to any view, but remember that they are view specific elements.
Still got Questions?
Book Training
Our Revit courses cover everything from the skills required to use the software, to design and share information between project teams, through to creating custom family elements.
Contact Us
We are here to ensure you receive a consistently high service and quality solutions for your business needs. We promise you won’t regret speaking to us, and if we can’t help you, we will try to find someone that can.