
Revit has a number of graphic and display settings which you can use to change the appearance of your views, such as adding shadows, jittery lines and visual style. Some of these you might be familiar with such as the visual styles, but the other options are less obvious to find and often missed. In this post I will show you where these settings can be found and a brief overview of them
Graphic Display Options
First of all we need to be able to access the Graphic Display Options. This can be found in the bottom left corner of your main workspace within Revit, on the display tool bar.
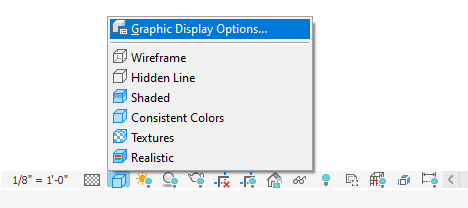
Simply click the Visual Styles button and at the very top we have Graphic Display Option.
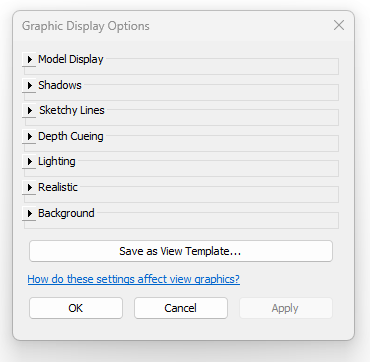
In here we have 7 different categories of display settings.
- Model Display
- Shadows
- Sketchy Lines
- Depth Cueing
- Lighting
- Realistic
- Background
We also have the ability to save our display settings as a View Template.
It is also worth pointing out at this time that these settings are view specific so it will only effect the view you are currently looking at.
Lets look at each of the 7 categories.
Model Display
In Model Display we can access the Styles, this is the same as the Visual Styles on the display bar.
We can also change the transparency of the model and choose a line type for Silhouettes.

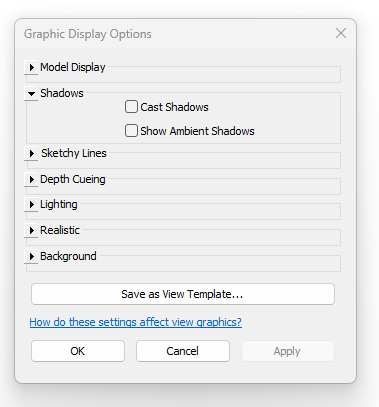
Shadows
As the name implies, this is where we can turn shadows on and off. There are two types of shadows:
- Cast Shadows
- Show Ambient Shadows
Sketchy Lines
Here we can turn sketchy lines on and off for that drawn concept sort of look. We can also change the jitter and extension amount too.
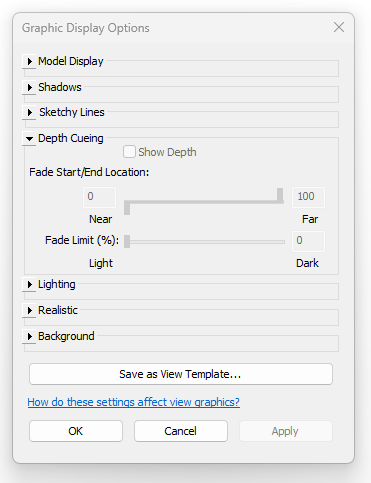
Depth Cueing
Again, as the name implies, we can give a camera depth look to the view, this is great if you ever want to create outdoor scene renders and want to focus the view on a particular part of the scene.
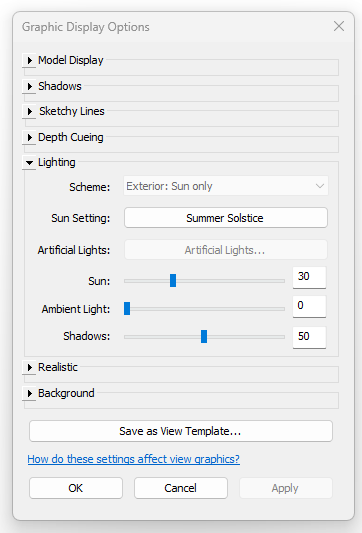
Lighting
Don’t forget to geolocate and rotate the project correctly to north, here we can customise the lighting we would experience from the sun. The time of year and time of day will effect how shadows are cast and how the project will be lit. Of course we can simply customise these settings to give us a nice render, but if setup correctly we can get a more true reflection of how the lighting will look.
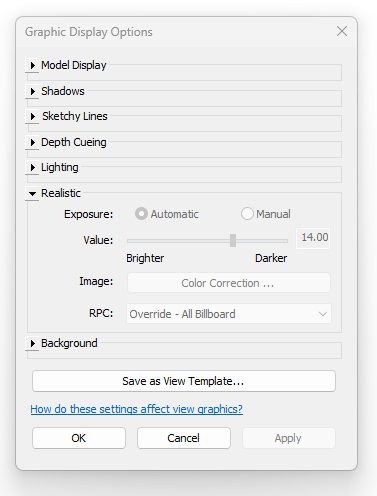
Realistic
The settings here will only take effect if you are using the Realistic visual style. Here we can customise the realistic visual style from exposure to colour correction.
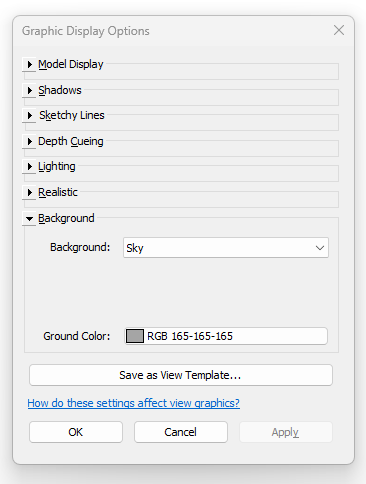
Background
Here we can change the background used in Revit. Most people don’t realise that the background within Revit can be customised from plain white, to adding a custom image to help set the scene.
Conclusion
Simply knowing these settings exist will allow you to customise and improve the appearance of your views, rather than going with the default settings on everything. Particularly of a 3D view, something as simple as adding shadows can bring the image more to life than without. Have a play around with these settings and remember you can always save to a view template.
You can find more information about Graphic Display Options on the Autodesk Help page.
Still got Questions?
Book Training
Our Revit courses cover everything from the skills required to use the software, to design and share information between project teams, through to creating custom family elements.
Contact Us
We are here to ensure you receive a consistently high service and quality solutions for your business needs. We promise you won’t regret speaking to us, and if we can’t help you, we will try to find someone that can.