
**Please note, as of 24th March 2026, the Autodesk Construction Cloud has joined the Forma industry cloud and has been rebranded as Forma. Find out more details here.**
It’s essential that you add the appropriate members to the hub and at the correct project level when using Autodesk Construction Cloud or setting up your project(s).
When adding members, there are two ways to add them: at the account level and at the project level when you are setting up the project. There is a third but they need to be added to the account member list before adding and that is within the project template.
The following are some do’s and don’ts.
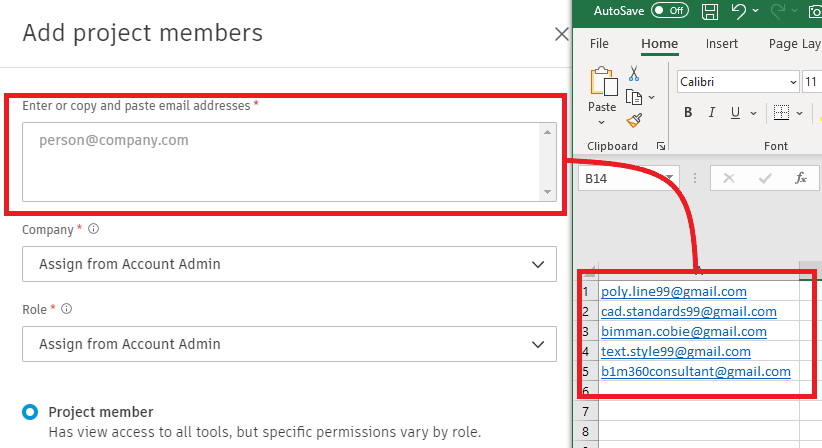
First off, you may have noticed that the Add Account/Project Members window only allows for typing or copying when you are adding members.
It could take some time to fill in the email addresses for each one. Yes, you may copy and paste each email address individually. Copying them into an excel spreadsheet and pasting them all at once into the add members field might be simpler (account or project). If they are already a part of the hub and have a company and role assigned to them, this will swiftly put them in. It should also add this information for each person for you… excellent time saver.
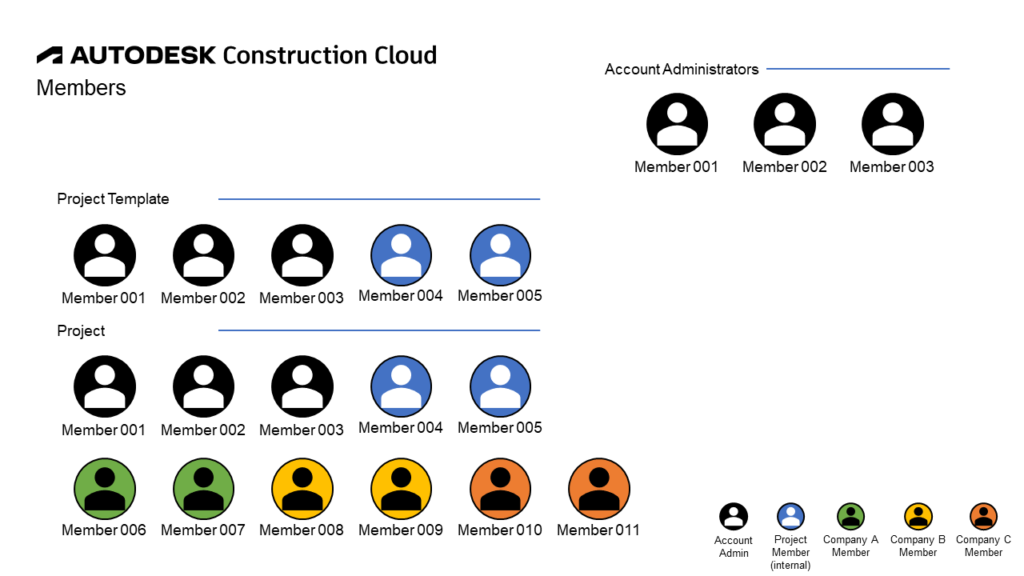
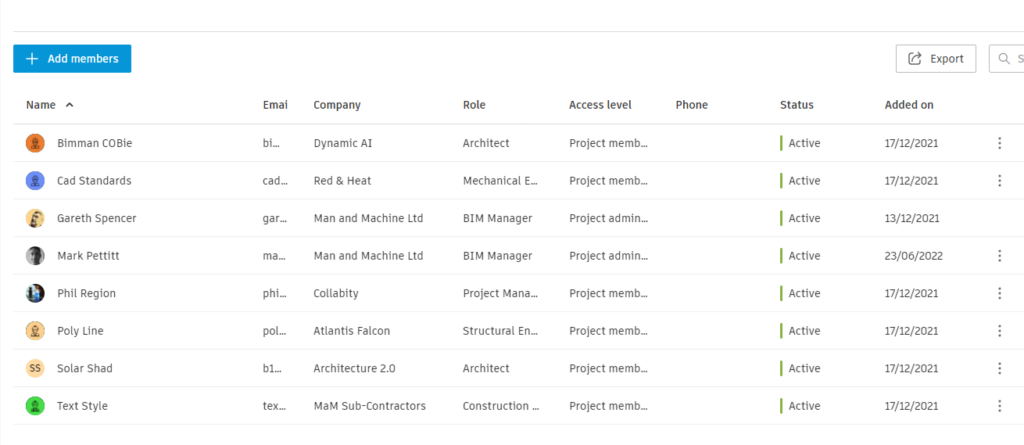
Account Members
You can add members at the account level, including the company, the default role, and the access level.
It is essential that you manage your account with more than one individual. At least 2/3 should be account administrators, in my opinion. One person could be assigned to each team, division, or office within the company. Never make all users account administrators since you’ll find that they’ll fiddle with settings or make unauthorised changes, which might lead to problems and probably will.
Project Template Members
You can add members to a project template when configuring your default project template(s). For some reason, this prevents you from adding members in bulk. As a result, in order to add members from the hub, you must choose from the list by using the search function.
If you are using it as a CDE or collaborative way of working, you often won’t be aware of the various companies that could work on the project at this stage.
You can at least manage your internal members by designating the appropriate organization for them, adding their jobs, determining their access level (project admin or project members), and deciding which project access they will need.
Once more, be sure to add two or three project administrators and specify the appropriate project members’ folder area permissions in Autodesk Docs.
Project Members
Ideally, you added the default internal project members to the project template when starting up a project so that they would be added automatically. The only thing remaining to accomplish is to add any members who are particular to the project.
Therefore, if you need to add several at once, you can quickly do it by adding their names to a list in excel and using bulk copy and paste.
You can choose the company or role if they are all from the same organisation or same job role on the project, but you might need to add these after they have been added. If they have already been added to the account and have a company or role specified, this should be added for you instantly.
Make sure you have at least two or three project administrators, just like with account and project templates. We don’t want unwanted project members making unauthorised changes, which could lead to problems and probably will.
Still got Questions?
Book Training
We have developed a robust set of onboarding and deployment services to ensure best-in-class implementation of Autodesk Forma (formerly the Autodesk Construction Cloud).
Contact Us
We are here to ensure you receive a consistently high service and quality solutions for your business needs. We promise you won’t regret speaking to us, and if we can’t help you, we will try to find someone that can.