
Parametric modelling is one of the biggest advantages Autodesk Inventor brings to engineering teams. When used well, it speeds up design changes, improves accuracy and creates models that behave exactly the way you intend. Whether you’re new to Inventor or refining your workflow, these quick 5 tips will help you build smarter, more adaptable designs.
Fully Define your Sketched Early
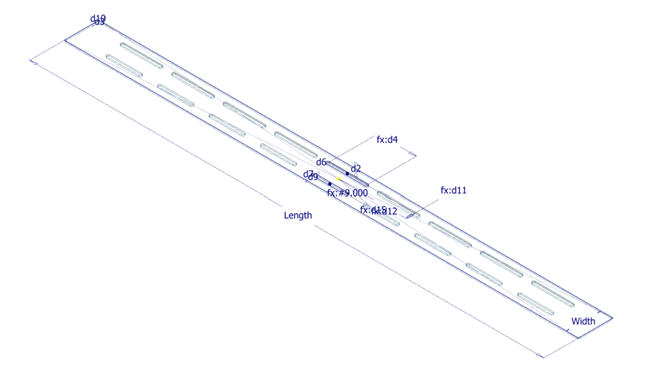
A stable model starts with a stable sketch. Apply dimensions and constraints as soon as you create geometry. Fully defined sketches prevent unexpected behaviour later and make your model far easier to update when requirements change.

Dimensions can be placed whilst dimensions are being created.
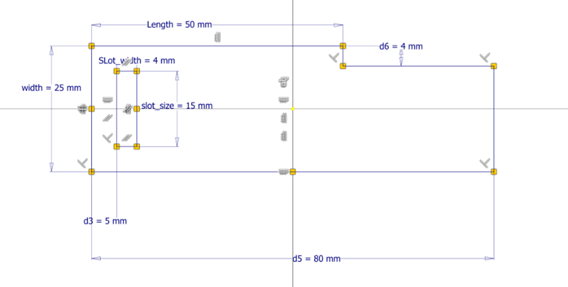
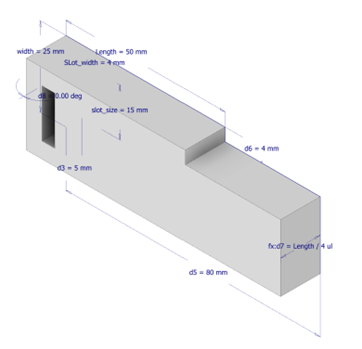
Sketch showing all named parameters, constraints and dimensions.
Use Parameters Directly in your 3D Features
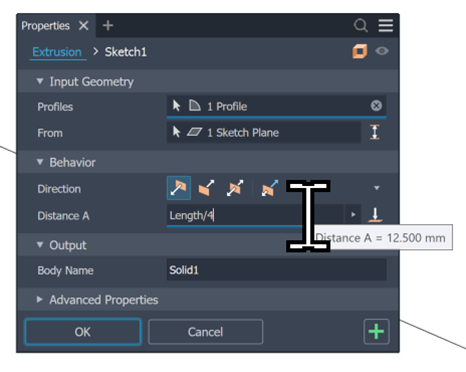
Anywhere Autodesk Inventor allows you to enter a dimension – whether it’s an extrude, revolve, hole or even a pattern – you can create or reference a parameter. When you’re already named parameters in your model, they appear in the drop-down list beside the dimension box. This makes it easy to reuse values, link features together, or build formulas that drive your design intelligently. It’s one of the simplest ways to ensure your model updates cleanly when requirements change.
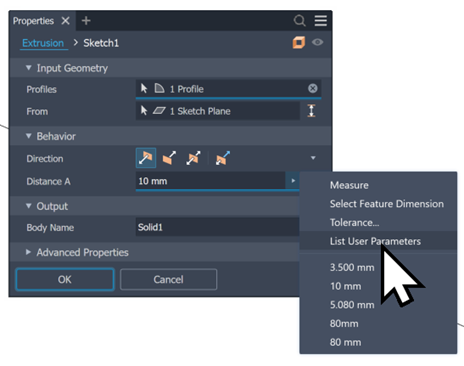
Using the Parameters Window (FX)
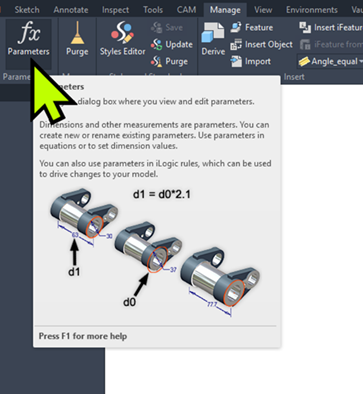
The fx button in Autodesk Inventor gives you direct access to your model’s parameters from within any feature dialog. Whenever you enter a dimension – whether you’re creating an Extrude, Revolve, Hole, Pattern or even sketch geometry – you can click fx to create new parameters or reference existing ones.
Inside the Parameters window, you can edit values, rename parameters, and build formulas that link features together. This adds real intelligence to your model, ensuring that when one parameter changes, the rest of your design updates automatically and consistently.

Link Parameters Between Parts
Linking parameters is one of the most powerful ways to make your Inventor models truly intelligent. By referencing one parameter inside another, whether through simple equality or formulas, you create relationships that keep your design consistent as it evolves. For example, a hole spacing value can be driven by an overall width parameter, or a wall thickness can automatically adjust based on a material selection parameter. When parameters are linked, a single change cascades through the entire model, reducing manual edit and ensuring every features updated predictably. This is the core of robust parametric design.
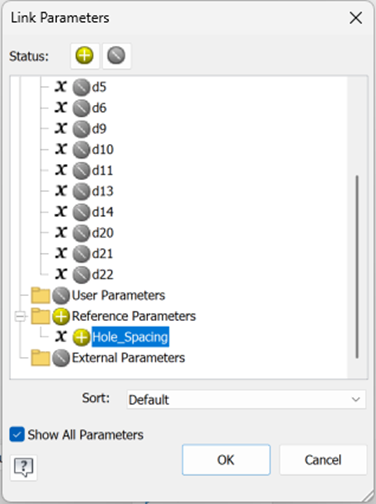
Image showing us parameters available to link.
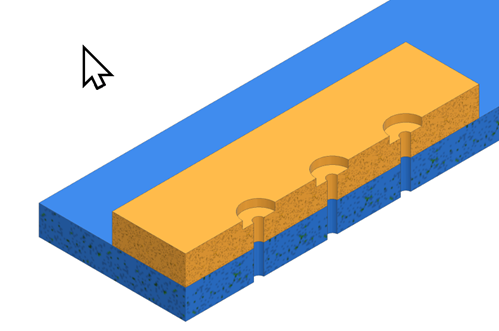
With the hole spacing parameter linked to the hole positions in this image will remain the same when the original part has changed in size.
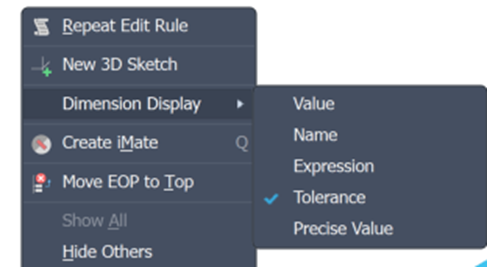
Change how Dimensions and Parameters are Displayed
At any point in Inventor, you can right-click a feature and choose to display the dimensions that define it. Before doing that, a helpful trick is to first right-click in the graphics window and adjust how dimensions and parameters are shown. You can switch between displaying the actual numeric values, parameter names or even expressions. This makes it much easier to understand how your model is driven, especially when working with linked parameters or complex relationships.
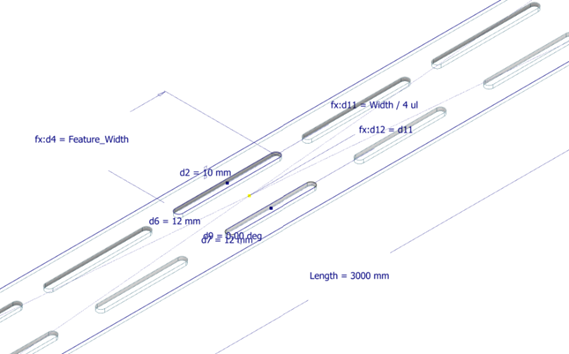
Changing to Expression will now show our parameters as their custom parameter name and the value that makes that parameter.
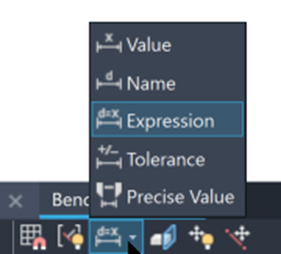
You can do the same thing in a 2D sketch using the Dimension Display toggle on the bottom toolbar, letting you quickly switch between showing parameter names, values or expressions right inside the sketch.
A strong parametric strategy is at the heart of effective digital prototyping. When your model is driven by well-structured parameters, every changes becomes faster, safer and more predictable. Instead of rebuilding features or manually updating dimensions, you can explore design variations instantly and with confidence. This flexibility is what makes digital prototyping so powerful: you spend less time fixing models and more time evaluating ideas, improving performance and getting to a production-ready design sooner.
Still got Questions?
Book Training
Our range of Autodesk Inventor training courses will teach you how to create production-ready parts and assemblies through hands-on learning experience. Make sure you contact us to find out which course is best for you.
Contact Us
We are here to ensure you receive a consistently high service and quality solutions for your business needs. We promise you won’t regret speaking to us, and if we can’t help you, we will try to find someone that can.