
Point clouds have become more and more common in the construction industry, with the addition of ever more affordable scanners such as the BLK 360 companies have taken it upon themselves to develop the processes they have for site measuring.
What I plan to do in this brief blog is to discuss the best practise for using Recap pro to clean noise or anomalous points from a scan in a room. While doing this I will also organise the scan into locations to be able to easily find places I am looking for in the scan using View states.
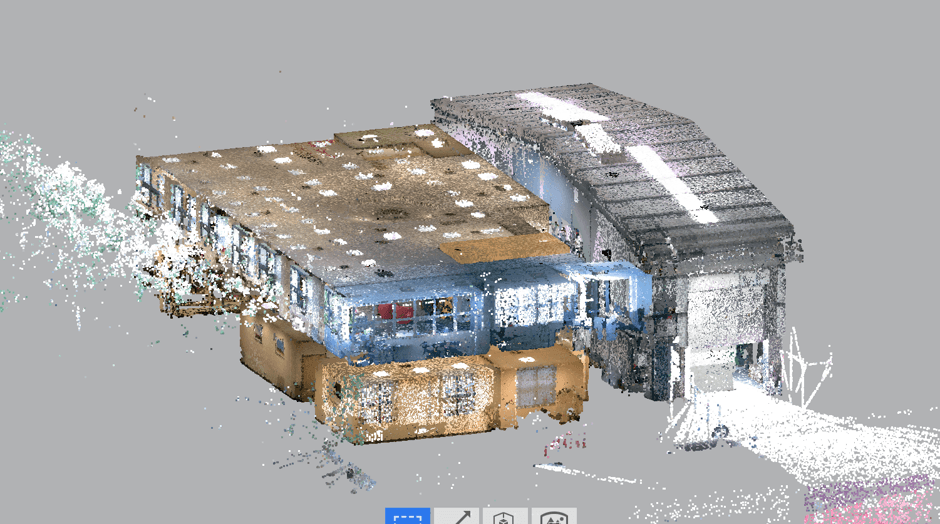
I will assume that the scan is in Recap and registered to within a good accuracy and will only be going through the step to clean out the rooms in the scan.
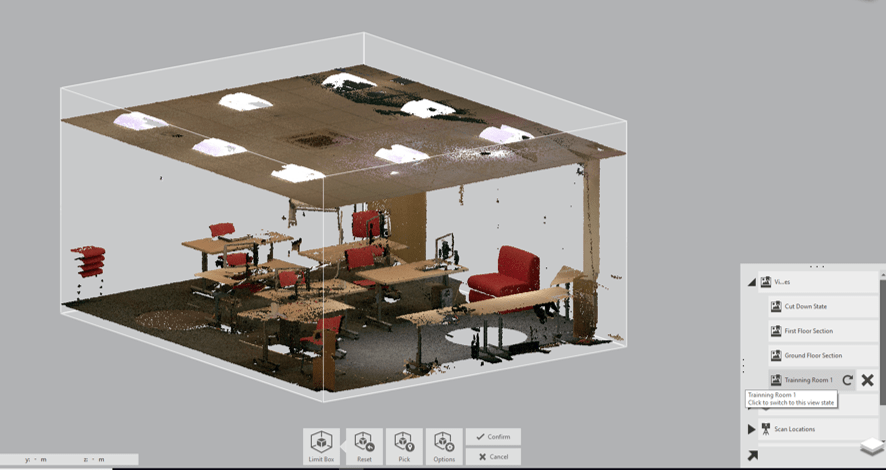
Step 1: We can use the limit box to cut down the a room to just past the walls then save the limit box as a view state so I can quickly go between the full view and the training room. It is not too common to scan rooms full of furniture but what can happen is rooms with mirrors or people wandering about can cause anomalies of points that may cause problems when the scan is used to measure from. Common in this scan are open doors.
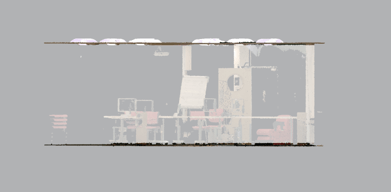
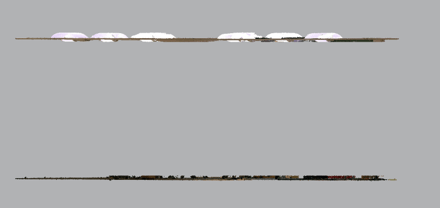
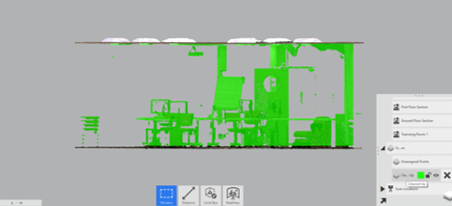
Step 2: In the Training room View state a side view can be obtained with perspective off so that I can see the perfect limits of the ceiling and the floor from the side and the problem points can be selected. Once selected you have two options, You can put the points on a region (maybe more commonly know as a layer “called cleaned” points) and this can then be turned off to hide them. You can also delete them. Be aware that if you delete them they are gone and would take a fair amount of time to gather the registered scans and reregister them to get them back. Once all the rooms are cleaned of anomalies a save can be made of the project with the region deleted and one with it saved in case they are required at a later date.
As well as mitigating any wrong measurements a good clean scan is lighter than one with lots of bits floating around in it which will save time when it comes to designing in software like Revit.
Hopefully this has given a good overview of cleaning a scan with some tid bits on the importance of a clean scan.
Still got Questions?
Buy ReCap
Autodesk ReCap Pro is a reality capture and 3D scanning software that allows you to transform the physical to the digital. It helps designers capture high quality, detailed models of real-world assets.
Contact Us
We are here to ensure you receive a consistently high service and quality solutions for your business needs. We promise you won’t regret speaking to us, and if we can’t help you, we will try to find someone that can.