
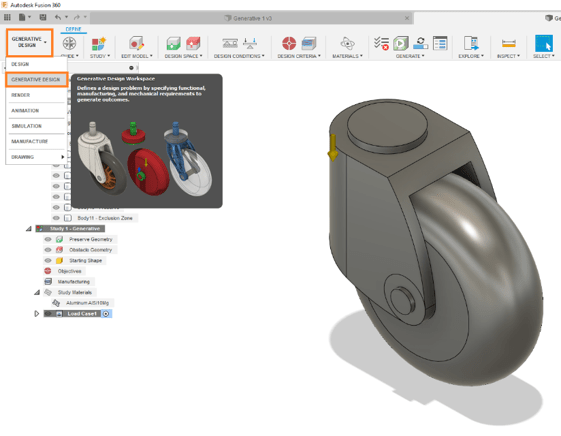
Today, Fusion 360’s generative design functionality allows us to take a top-down approach to structural design. Whereas traditional design has required us to start from scratch and build up our geometries, the generative approach invites us to specify the problem to the computer, then choose one of a plethora of calculated solutions. But what does this process look like in the real world? This blog will go through the steps for using generative design in Fusion 360.
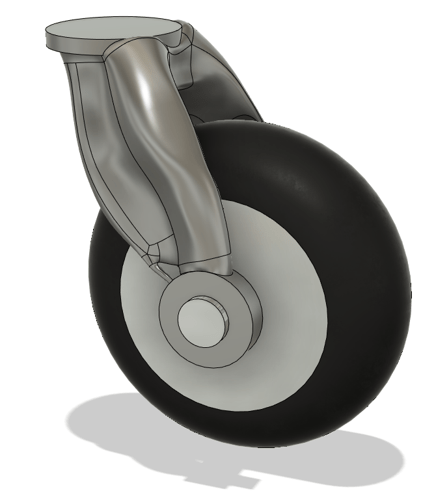
Goal: Optimise a Shopping Trolley Wheel
In this example, we will optimise the geometry of a shopping trolley wheel. Is it necessary? Probably not. Would it revolutionise the world of shopping-trolley racing? Absolutely.
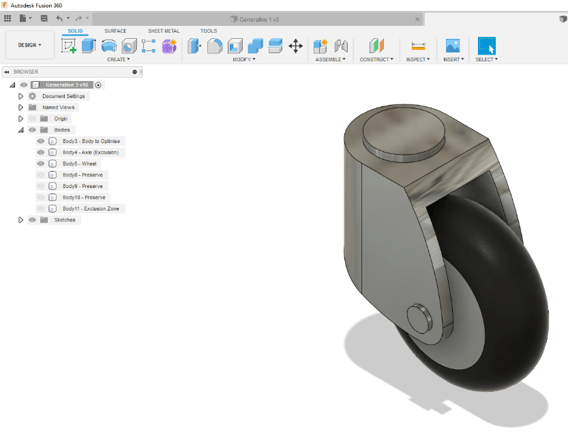
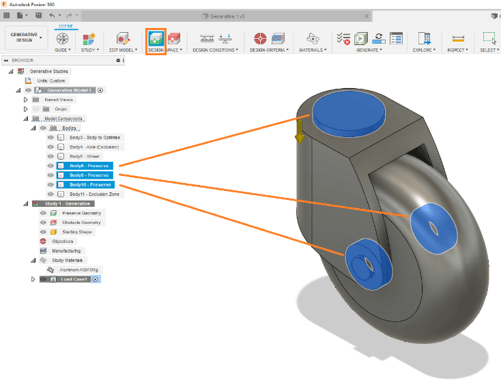
Step 1: Mark important regions in the model
The first step is to specify regions of interest in the model. By creating solid bodies, we can specify:
- The starting shape to be optimised,
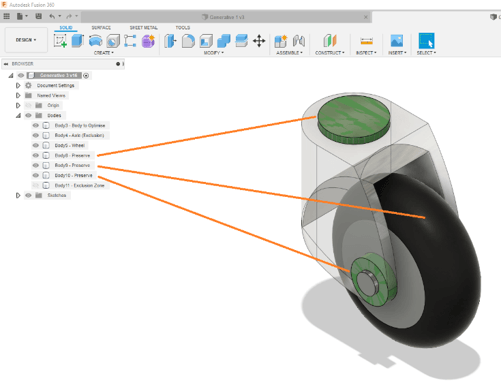
- Regions that are to be preserved (not modified)
- Often,
these regions are where the design interfaces with other components, such as a
round hole for a roller bearing,
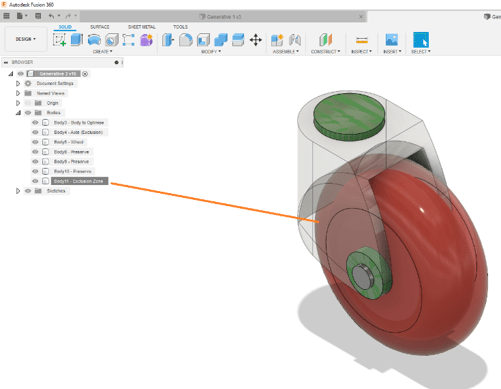
- Often,
- Regions where material is prohibited,
- Often,
these regions denote obstacles or accompanying components.
- Often,
Tip: Colour and/or rename solid bodies for clarity. In this example, we have coloured the ‘preserve’ regions in green, and the ‘obstacle’ regions in red.

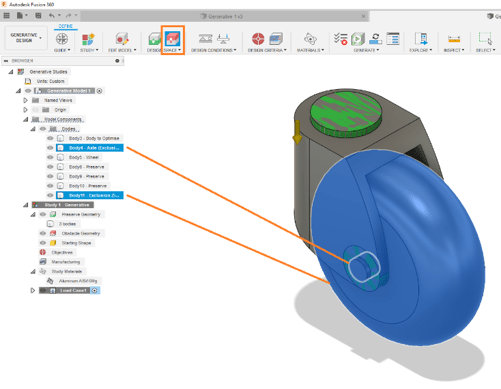
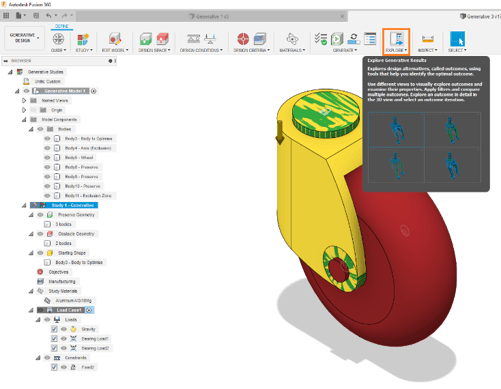
Step 2: Enter the Generative Design Environment
Enter the generative design environment by clicking on the top-left dropdown and selecting it from the list.
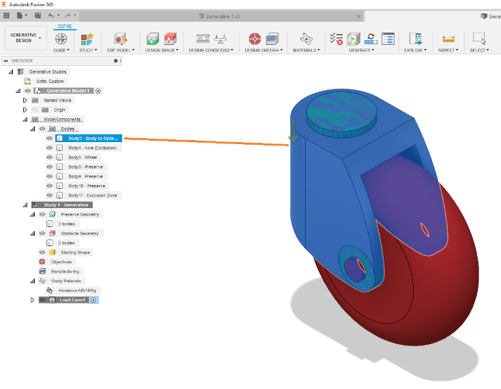
Step 3: Describe important volumes
In the generative design environment, our first task is to designate the special regions of interest. These are the solid bodies we modelled in Step 1. Specifically, we have to specify the:
- Starting shape to be optimised,
- Regions to preserve,
- Regions denoting obstacles.
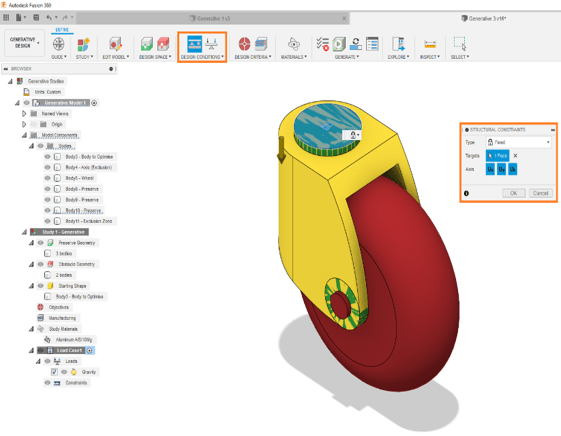
Step 4: Describe how the design will be used
Next, we must describe the load cases that the design will experience. In each load case, we must specify
- Structural Constraints
- Loads
Step 5: Specify generative design objectives
After the load cases, we must specify the design objectives for the solver. Presently, there are two options, either:
- Mass minimisation, or
- Stiffness maximisation
- We must also specify a factor of safety for yield.

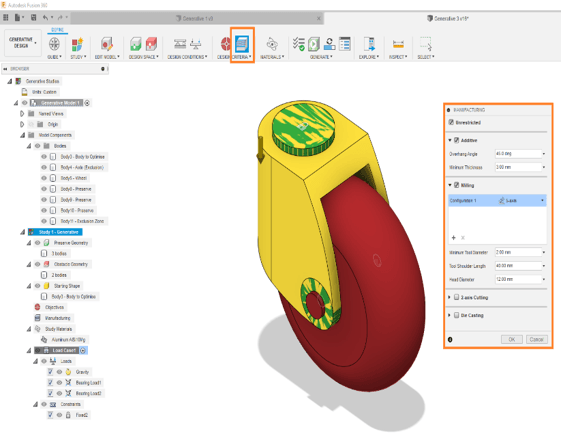
Step 6: Specify the manufacturing method
Next, we choose how the design will be manufactured. This is important as generative design will only prescribe designs that are manufacturable by these prescribed methods. Presently, the following processes are selectable:
- Additive
- Subtractive
- 2.5 Axis
- 3 Axis
- 5 Axis
- 2D Cutting
- Diecasting
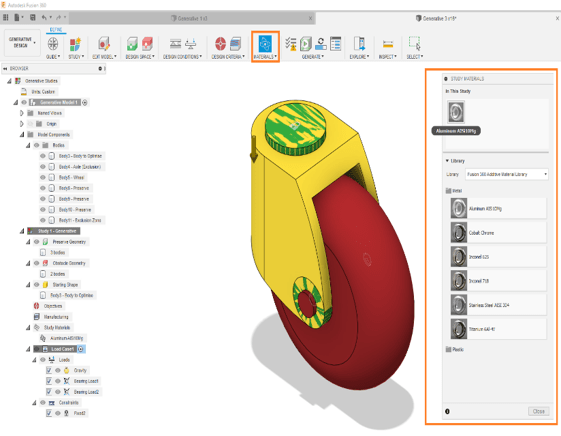
Step 7: Define materials
Lastly, we must define what candidate materials we are considering for the design. If multiple materials are selected, Fusion 360 will produce multiple solutions with each material.
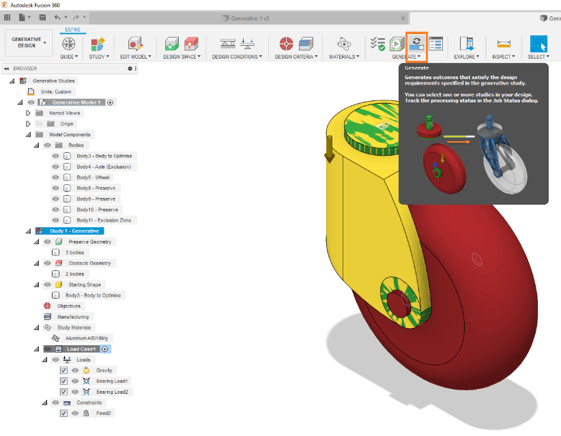
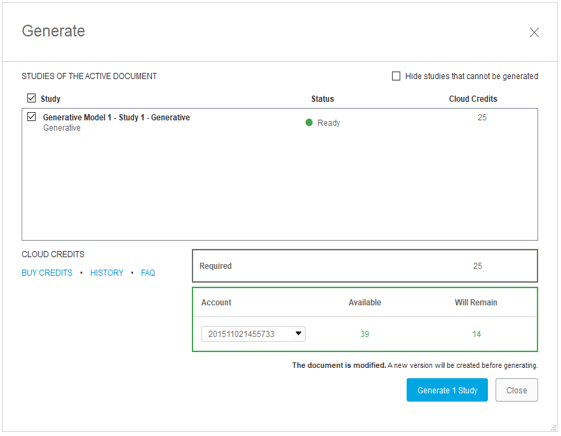
Step 8: Start generative design calculations
If your generative design study passes the pre-checking process, it can then be sent to the cloud for calculation. Generative designs must necessarily be computed on the cloud as the calculations involved are simply too much for a desktop computer to handle.
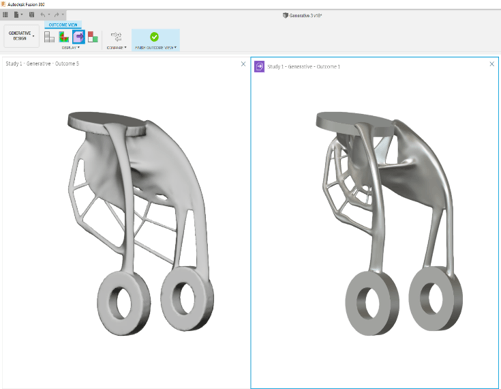
Step 9: Compare and select proposed designs
When the computations are done, Fusion 360 will propose many possible solutions to the generative design problem. Each solution may have its own virtues, such as mass minimisation, mass centralisation, cost-effectiveness, machining time, material quantities, stiffness, aesthetics, etc. Select which design would best suit your needs and download it.
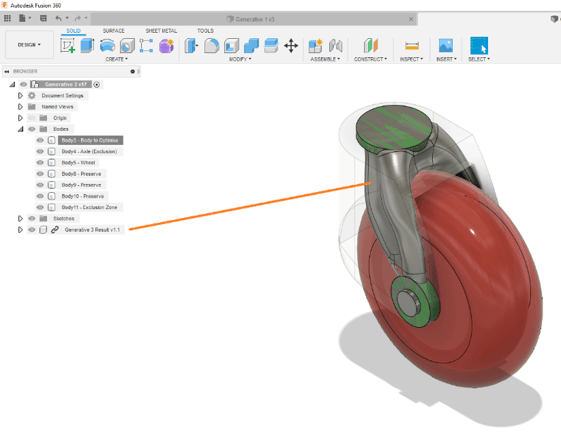
Step 10: Bring the output model into the original design
Once downloaded, the generative design can be brought back into your original design assembly, and replace the original body which we wished to optimise.
Conclusion
As you have seen, while the computations involved in generative design are simply heinous (necessitating a cloud of thousands of computers), the process of setting up and executing a generative design study are straight-forward.
As generative design tools continues to evolve alongside the advancements made in advanced manufacturing processes, we will continue to see evermore generative designs making their way into the real world.
If you want to be at the forefront of the generative design revolution, we at Man and Machine invite you to train with us in this exciting new tool.
Still got Questions?
Book Training
Through hands-on exercises, you will acquire the key skills and knowledge required to design models using Fusion. It will teach you everything from product development to simulation and fabrication.
Contact Us
We are here to ensure you receive a consistently high service and quality solutions for your business needs. We promise you won’t regret speaking to us, and if we can’t help you, we will try to find someone that can.