
Machining parts from multiple angles is key to most CAM processes. Sometimes (pretty much always) you want to be able to see how much stock is left after you’ve run a few toolpaths through. Maybe even in a separate part. In this blog I will take you through a few ways that we can reuse the stock from a previous Operation, Setup, or File inside of Fusion 360.
From Previous Operation
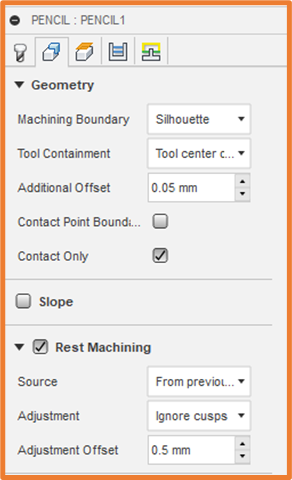
During the setup of your new operation, inside the Geometry tab we have the option of turning on REST Machining. This will allow Fusion to calculate a toolpath solely within the areas where stock remains (Remaining Stock). This therefore avoids machining air, and saves a lot of time during the toolpath, especially for the Roughing/Clearing strategies.
From Previous Setup
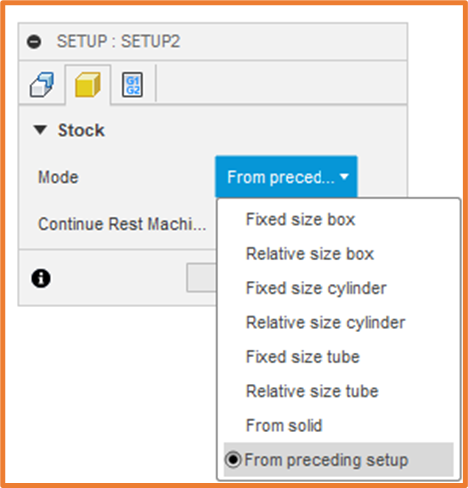
If you would like Fusion to pick up the stock from a previous setup, we can load this into our current Setup in the Stock tab. In the Mode dropdown, just select From Preceding Setup. This will allow Fusion to display the stock from the previous operation, and ticking Continue Rest Machining will ensure Rest Machining takes this same stock into consideration.
From Another File
With the reference model open in the Manufacture Workspace, enter the Simulation view of your complete setup. You can do this by right clicking on the Setup, then selecting Simulate, or with the setup selected, pick Simulate in the Actions Panel.
Once in the Simulation, you can right click in the window, from the right click menu under Stock select Save Stock…
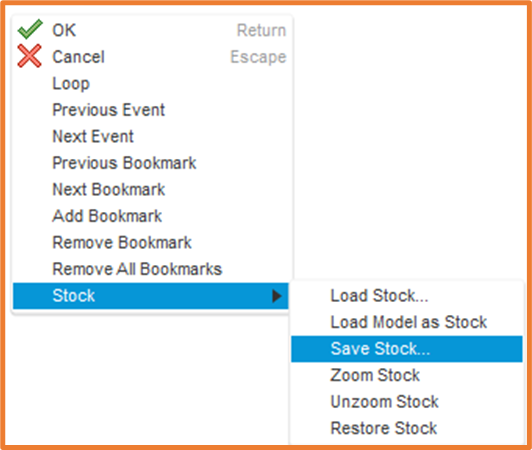
This will save your stock locally as an STL file.
This will save the stock as it currently appears. If you want the completed stock, you will need to jump to the end of the simulation and wait until the stock has loaded.
Once saved, you can import your model into Fusion using File>Upload, choose the location you want this saved to. To add this stock reference into the file you are machining, drag your stock part from Fusion’s Data Panel, into the file you are machining. You may need to Scale and Align it within the Design Workspace to ensure it is accurate.
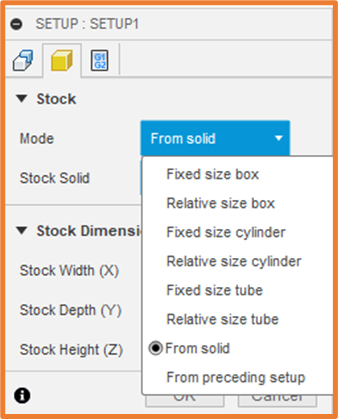
Now we are ready to add this to our setup. Use the Workspace dropdown to switch to the Manufacture Workspace. Create a new Setup, in the Stock Tab choose the Mode dropdown and select From Solid, then select your imported STl in the window.
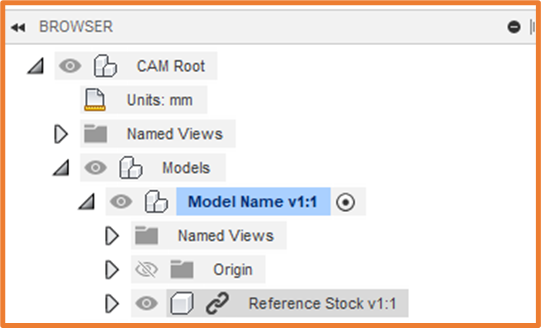
The last thing you may want to do is turn off the visibility of this Reference Stock, this will ensure it is not in the way during further simulations. To do this expand Models, your Model Name, in the Model Browser. Toggling the Eye symbol on the Reference Stock will toggle its visibility.
Still got Questions?
Book Training
Through hands-on exercises, you will acquire the key skills and knowledge required to design models using Fusion. It will teach you everything from product development to simulation and fabrication.
Contact Us
We are here to ensure you receive a consistently high service and quality solutions for your business needs. We promise you won’t regret speaking to us, and if we can’t help you, we will try to find someone that can.