
We often need to add new bolts into Fusion 360 but sometimes the options we find online aren’t quite what we’re looking for. One of Fusion’s lesser-known features is the add-ins tool which allows us to run Python scripts. One of these includes a Bolt sample script which we will look at today.

Inserting Library Files into Fusion
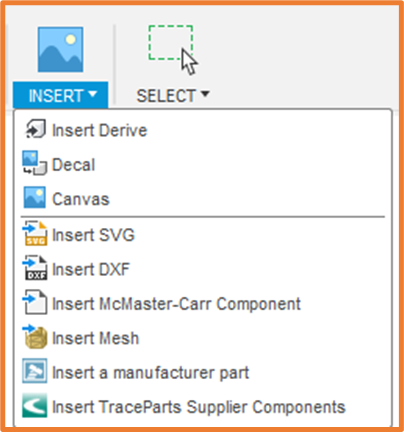
Before we get started making our own bolts, it is worth mentioning how we can drop standard part files into Fusion. Though this is not the main point of this blog, it is a feature that not too many people are aware of. To do this simply go to the Insert drop-down in the Design workspace. Here you will find Insert McMaster-Carr Component, Insert Manufacturer Part, and Insert TraceParts Supplier Components. These will take you to external websites which each have great libraries of standard parts which can be inserted into Fusion.
Creating Bolts
Now, the reason you clicked on this link…
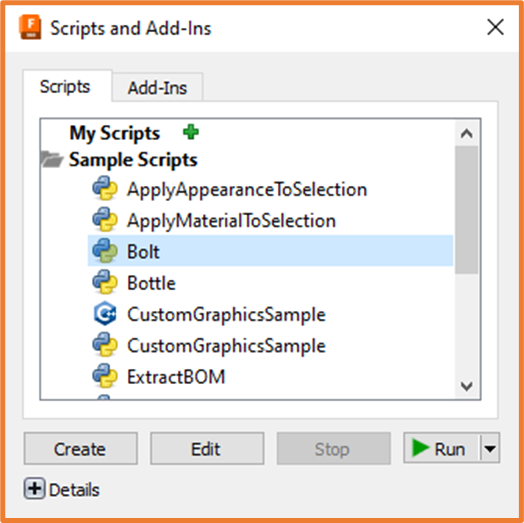
To get to the Scripts and Add-ins dialogue, we will need to be in the Design workspace, within the Utilities tab. In the Add-ins panel will be the Scripts and Add-ins button. This is also accessible by tapping Shift+S.

In the Scripts and Add-Ins dialogue > Scripts Tab > Sample Scripts, select the Bolt Script and choose Run.
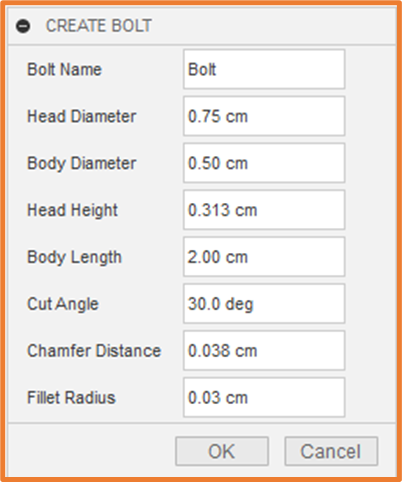
Once run, your timeline is populated with various features that make up your bolt. The bolt will also appear in your file.

From here we configure the bolt as we need. Entering the Name, Head and Body Diameter and various other inputs. These will drive various parameters in the component. Once you are happy with your bolt you can save it and place in an assembly.
Still got Questions?
Book Training
Through hands-on exercises, you will acquire the key skills and knowledge required to design models using Fusion. It will teach you everything from product development to simulation and fabrication.
Contact Us
We are here to ensure you receive a consistently high service and quality solutions for your business needs. We promise you won’t regret speaking to us, and if we can’t help you, we will try to find someone that can.