Autodesk Vault Professional has been able to synchronise to cloud based collaboration software for several years using an addon called Project Sync, although historically this was limited to Autodesk Buzzsaw. More recently, Autodesk have redeveloped Project Sync to enable collaboration with their newer cloud based platforms in both Fusion Team and BIM 360 platforms.
This process is extremely powerful for organisations who need to collaborate and coordinate with external parties who would traditionally not have access to Vaulted data. Project Sync works by configuring a synchronisation between the internal Vault and the cloud based platform of your choice, in this example we will be working with BIM 360 Docs. This synchronisation can occur at a number of different frequencies, from being completely manual to automated at certain points over the day – as well as being single or bidirectional.
Note, you will need to install Desktop Connector in order to configure and use Project Sync.
http://help.autodesk.com/view/CONNECT/ENU/?guid=GUID-847CE3FC-B26F-46B8-895E-5D825F4BD540
Configuration of Project Sync is relatively straight forward as follows:
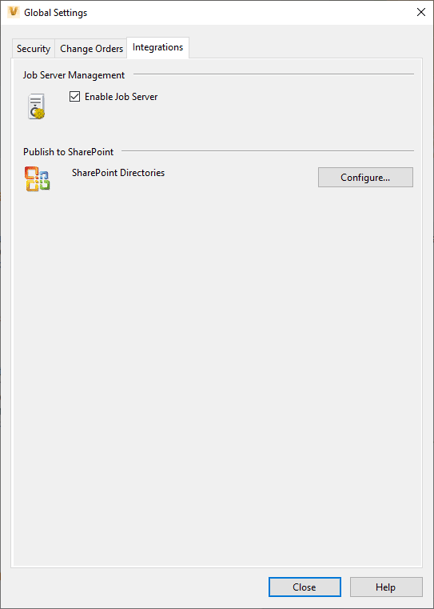
- Login to the Vault as an administrator and enable the Job Processor (Job Processor is required for Project Sync). This can be found under Tools > Administration > Global Settings:
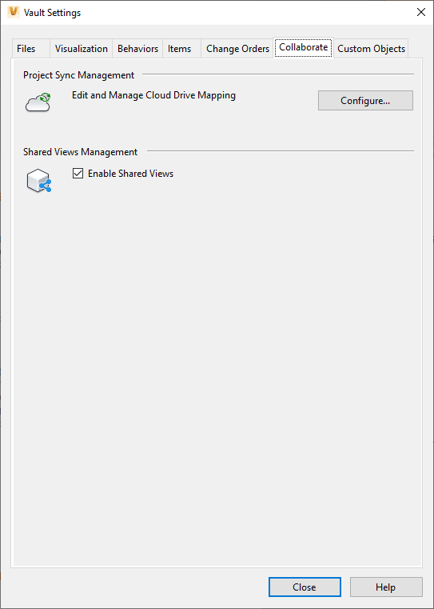
- Whilst logged in as the administrator configure your Project Sync settings in Tools > Administration > Vault Settings. Under the Collaborate Tab choose to Configure your Cloud Drive Mapping:
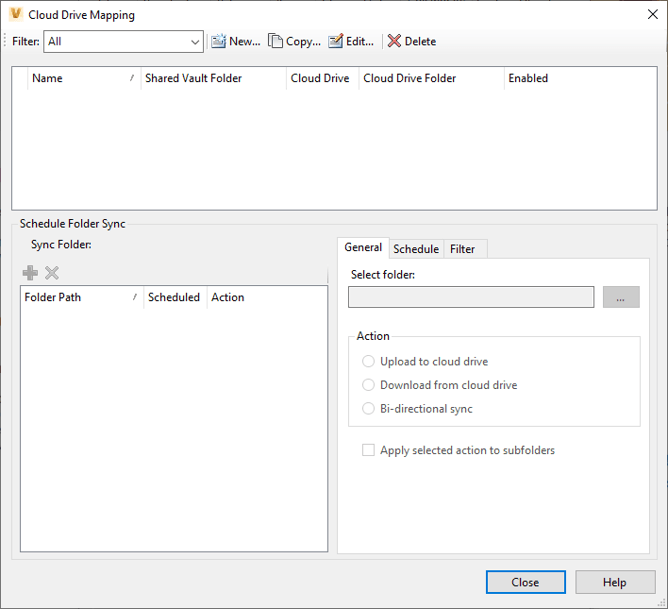
- Choose to create a new mapping, before defining the mapping details that you require. Simply put, give the mapping a name, a Vault location you wish to map from and a cloud location you wish to map to. The process is all GUI based and very straight forward to follow.
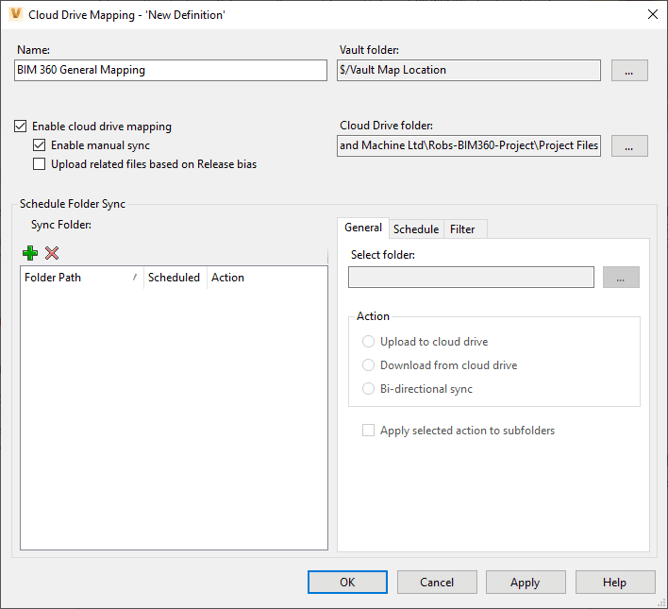
- If you want to setup some specific folder handling, or work of a given schedule, or only work with files that define a certain filter this can be configured at the bottom of the screen. In this example, we will manually push the documents to the cloud.
You can setup as many synchronisations as necessary.
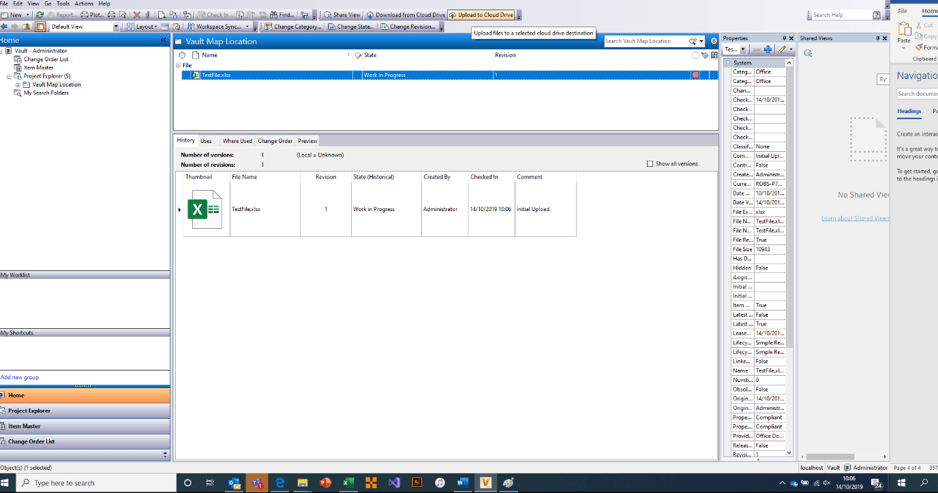
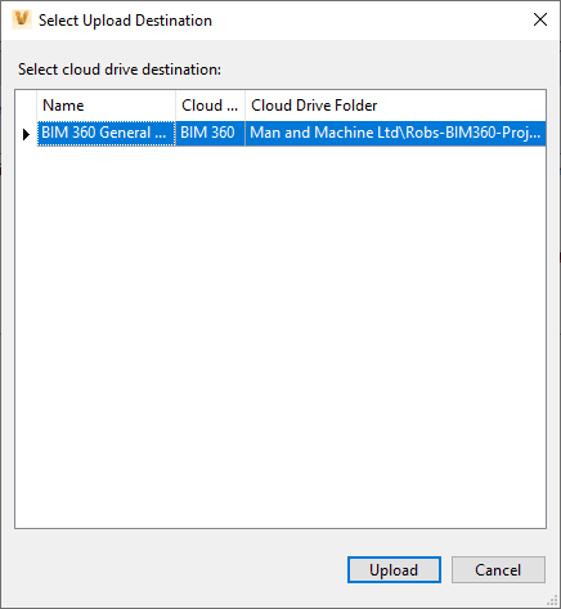
- We will now have the “Upload to Cloud Drive” and “Download from Cloud Drive” options available. In this example, we choose to Upload our TestFile.xlsx to the cloud. We then choose the sync options we wish to use for this upload:
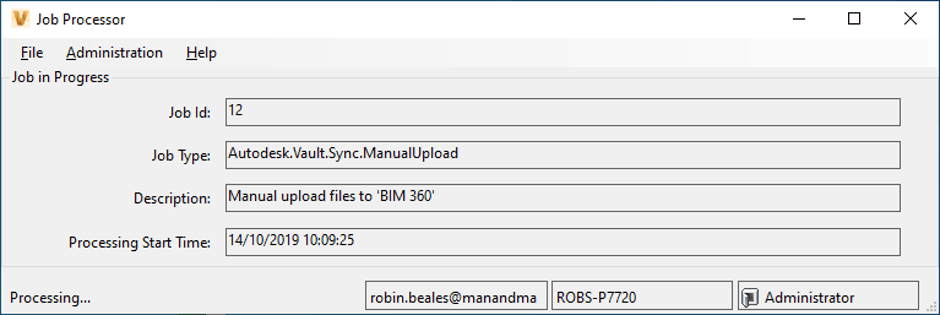
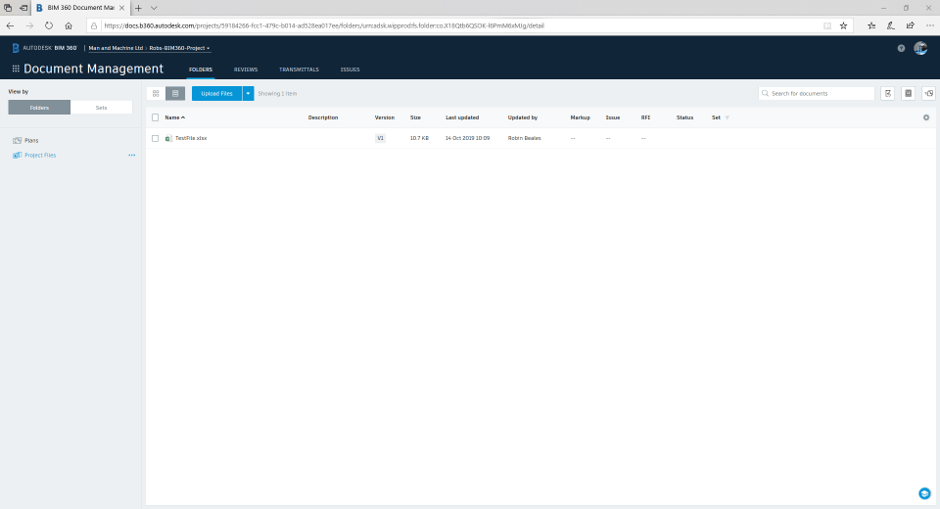
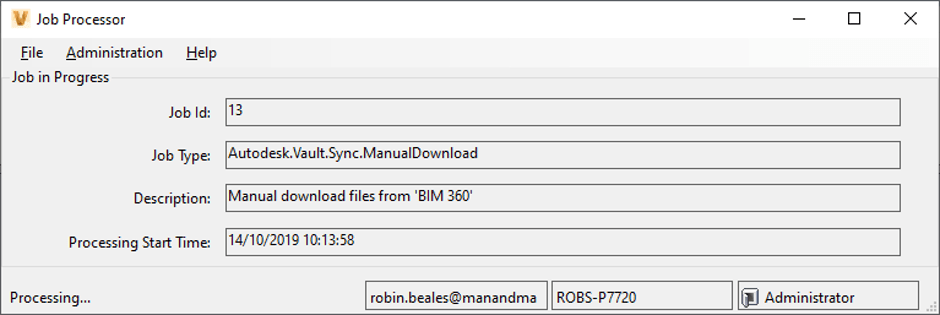
- Your Job Processor machine will then take ownership of this job and start the upload. The file will appear within BIM 360 once the upload is complete:
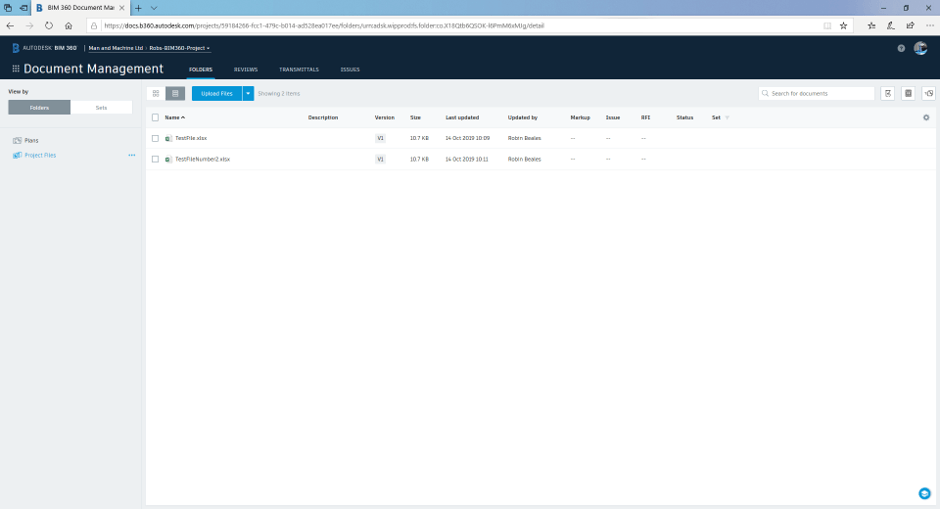
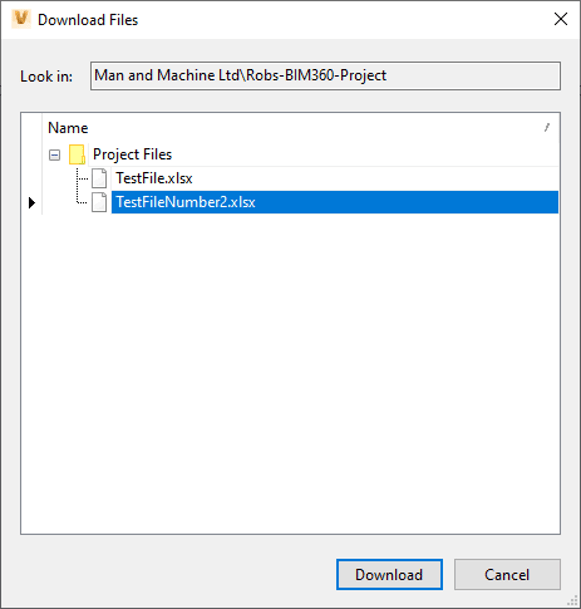
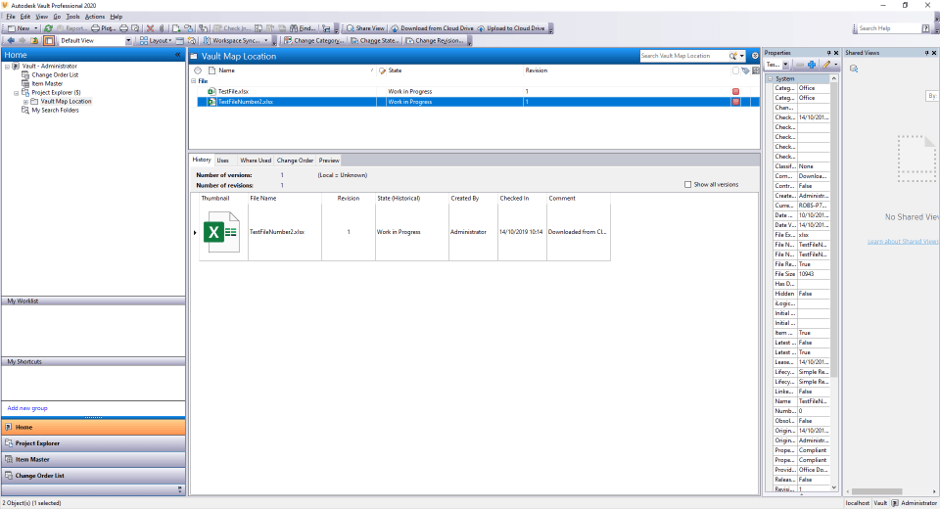
- For completeness, if you place a file into BIM360 we can download that file using the same synchronisation settings into Vault by pressing the “Download from Cloud Drive” functionality:
For more information on this blog post or if you have any other questions/requirements, please complete the below form:
Related Links
Autodesk Vault – Data Management Software | Man and Machine
Autodesk Vault Training – Authorised Trainers | Man and Machine