
What are AutoCAD dynamic blocks and why should we use them?
Well that is a very good question and I am glad you have asked!
The best way to think of a dynamic block is to consider an item that has multiple options; things like size, rotation and appearance. Take, for example, a standard exterior door; this could fit different size door openings, it could hinge to the left or right, open inwards or outwards and have a window or not.
In this situation you would have to have at least two blocks then stretch, rotate and flip accordingly to meet your requirements and sometimes you may even have to explode a block to make your changes.
A dynamic block can contain all these variants within the one block and allows you to edit them to meet your requirements using grips rather than commands. This dramatically speeds up drafting time along with minimizing the amount of blocks that you have to manage and maintain.
I like to think of a dynamic block as a family of items.
How to create a dynamic block
In this example I am going to show you how to create a plan view block that represents three different types of tables, (rectangle, oblong and circular), my ‘family’ of tables. I will create actions within this block that will allow me to stretch and rotate these tables where required.
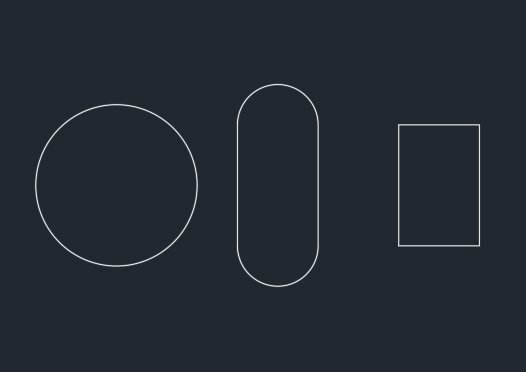
First of all, you will need to create the geometry required for your block, my three table shapes as shown below.
Use the BLOCK command to select your geometry and open them in the ‘Block Editor’.
In the block editor, align your tables so that they have the same base point. See below:
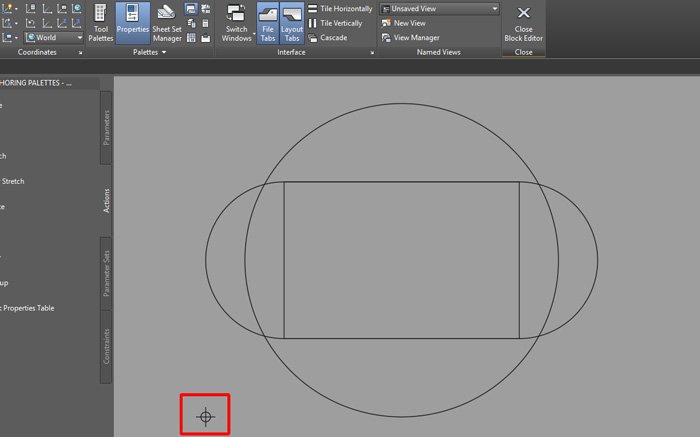
So now we have 3 different tables, all overlapping each other, contained within one block, which incidentally I have named ‘Table’. We are half way there already!
To decide which table geometry we would like to see at any one time we need to create something called ‘Visibility States’. In each visibility state we can decide which geometry we would like to see.
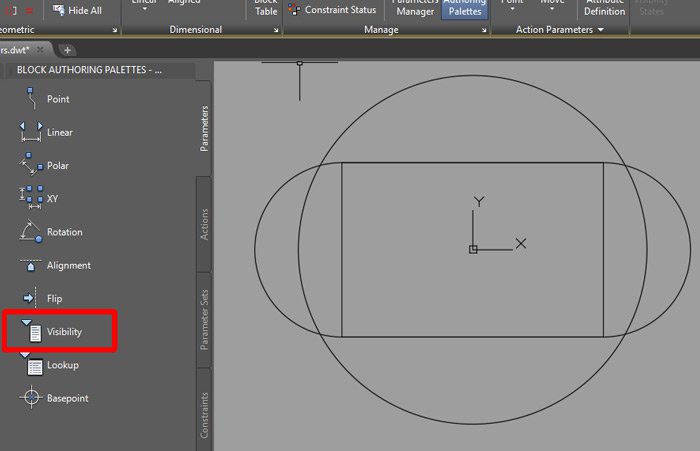
Select the ‘Visibility’ button on the ‘Block Authoring Palette’.
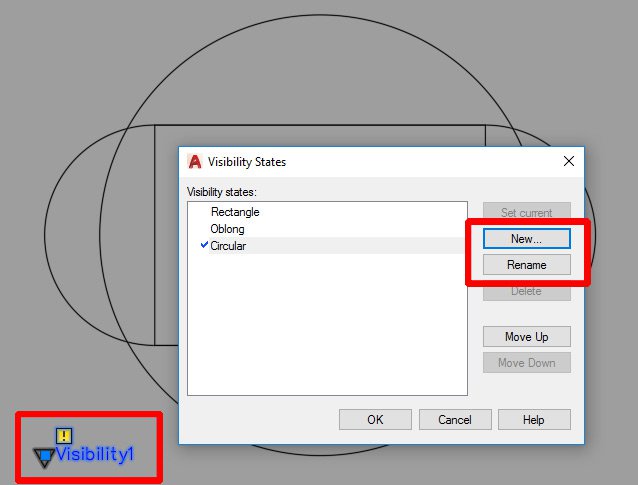
Create a visibility state list which represents your different items within your ‘family’.
Once you click OK to accept this list, you will notice in the contextual ‘Block Editor’ tab, a new panel has lit up.

- Opens the Visibility list to add new visibility states
- Shows and edits the current visibility state
- Tools to hide or show geometry objects.
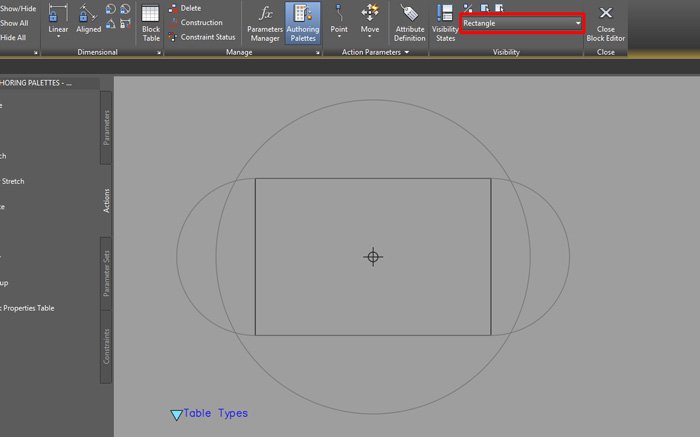
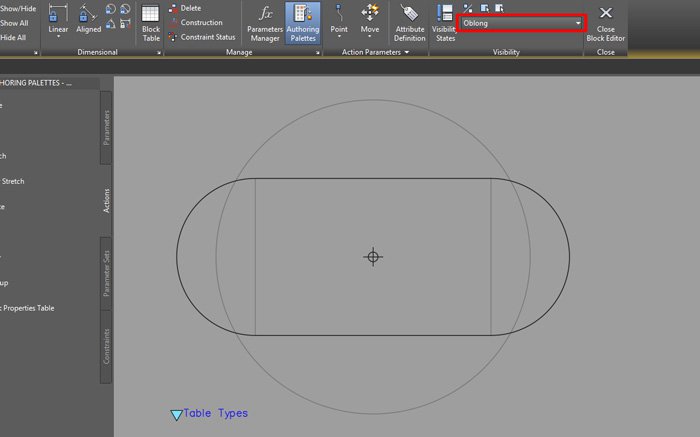
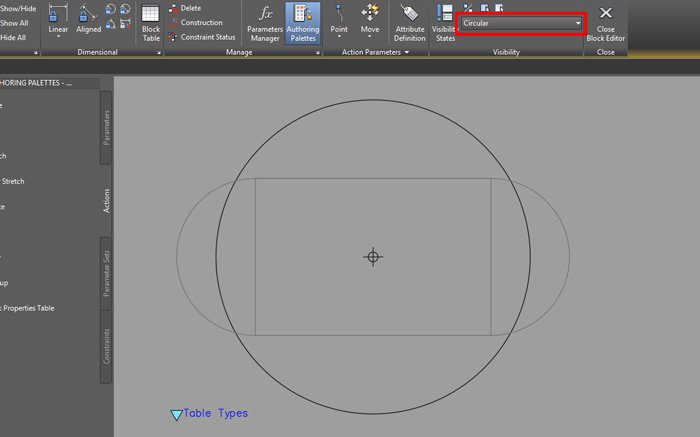
Use these tools to switch between the visibility stated hiding the geometry objects you do not wish to see when you are in the selected visibility state, for example in the ‘Circular’ state hide the rectangle and oblong shape.
This creates three options within the block, each option has different geometry visible when selected. When you place the block in a drawing you will see a grip which opens up a drop down list containing these three options.
The three states I have created are shown in the following images.
Finally, we would like to apply some actions to rotate and stretch these objects so that we can edit them on the fly as and when we need to.
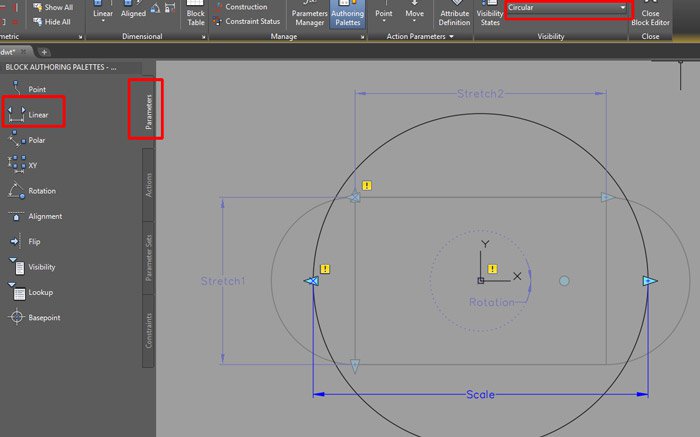
When we want to create actions, first we need to add parameters to the block.
I will add six parameters in this case, one rotation and five distance. This breaks down as follows:
- 1 x rotation visible in the Oblong and Circle
- 2 x distance in the Rectangle
- 2 x distance in the Oblong
- 1 x distance in the Circle
Use the parameter palette and follow the command line instruction to place these parameters onto the block.
In order to apply an action we need parameters which are associated with the geometry we wish to apply the action to, this gives the software something tangible to use in the action, along with the geometry.

I only want the stretch and rotate actions to apply to the Rectangle and Oblong table, it is not possible to stretch the circular shape and there is no need to rotate it.

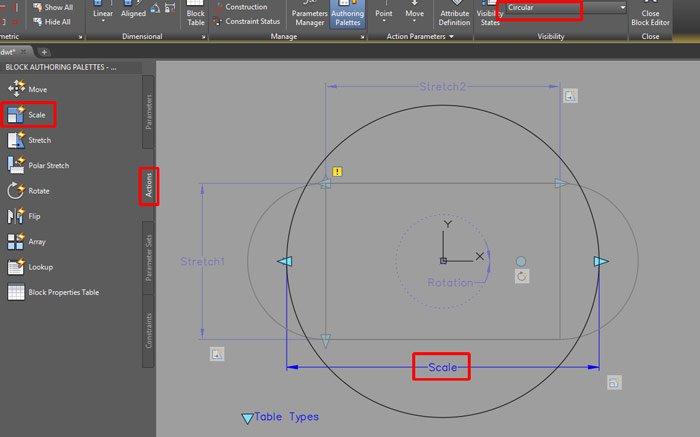
I have added a ‘Scale’ action to the distance parameter of the circle, this will allow me to edit the size of the circular table.
So what we have done is created some parameters that we can work with and apply actions to. You can see that the next tab down on the ‘Block Authoring Palette’ gives us actions. An action must first be applied to a parameter and then to the geometry you wish the action to control/edit.
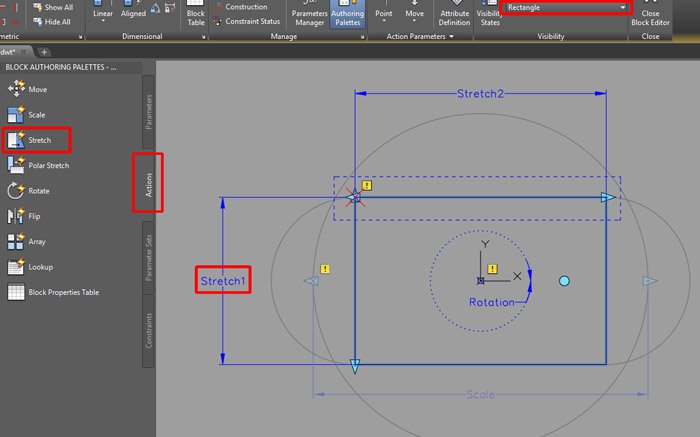
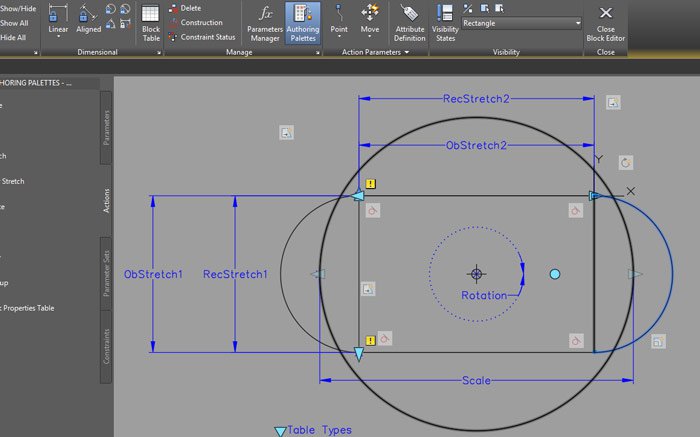
First I will apply the stretch actions.
Follow the command line instructions to select the items as shown below. The red X is the base point of the stretch, the blue dotted box shows the stretch selection box.
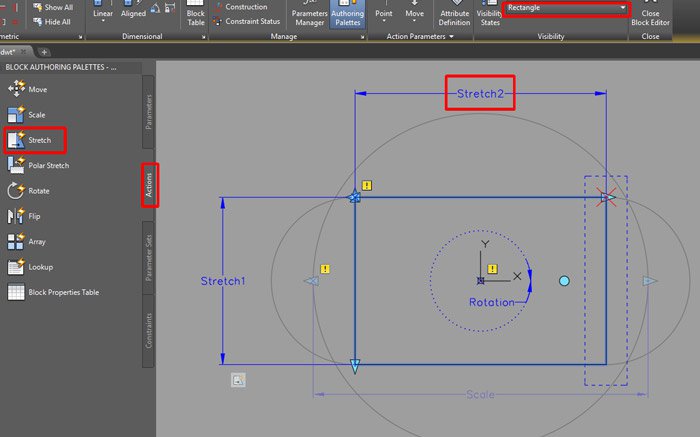
Do the same for the other stretch parameter.
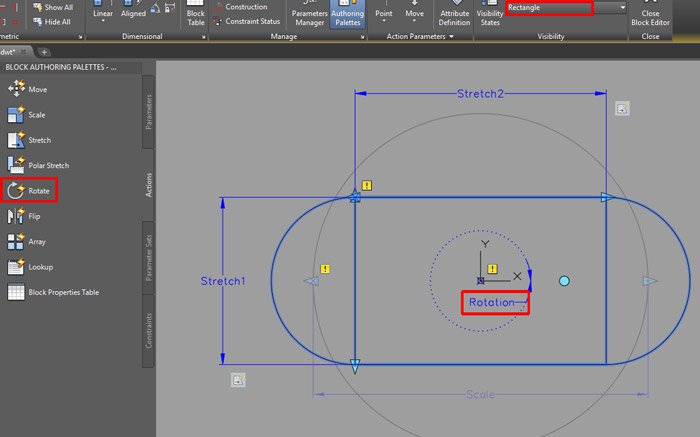
You can apply the Rotation action to both the Oblong and the Rectangle, providing you have made the parameter visible in both visibility states. Ensure you apply it to the parameters as well as the geometry so that they rotate with the geometry.
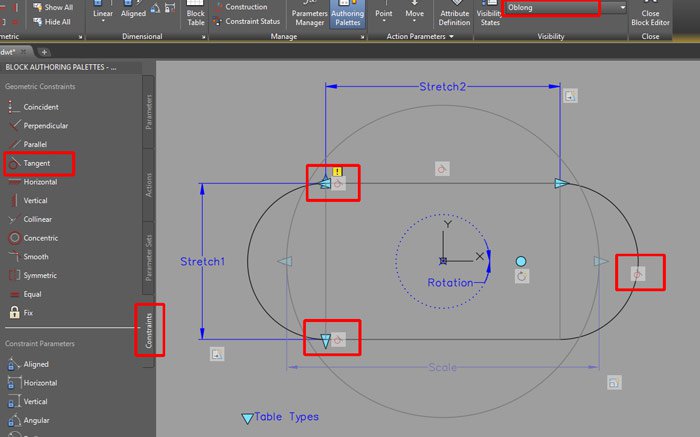
We can replicate these actions to the parameters on the Oblong shape. I am going to add some additional ‘Constraints’ to the Oblong to make sure that the arcs remain tangent to the lines.
To do this, select the ‘Tangent’ tool on the ‘Constraint’ tab. Following the command line, select the arc and line geometer. This will constrain the arc tangentially to the line so that is maintains the desired shape when we use the stretch grips.
The last action required is the Scale action, which we need to add to the Circular table shape.
Your final block should look similar to the image below.
Now it is time to test our block.
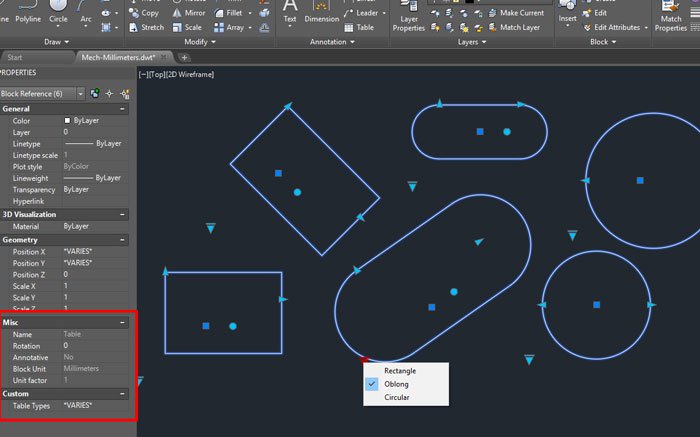
There you have it! Six different style tables, all different shapes and sizes and rotations all made from the same block.
Conclusion
Dynamic blocks can enable you to group items into families, keeping the amount of blocks stored and maintained to a minimum.
Dynamic blocks can enable you to quickly edit the block without the need to explode. You can create parameters within the block which limit these alterations to prevent drafting errors.
You can download a copy of this block from my A360 account using this link http://autode.sk/2gCsF0z
Also please check out my YouTube video which shows you how to create a dynamic block revision table!! https://www.youtube.com/watch?v=zF2V6Jh8Utk
Still got Questions?
Book Training
With our range of AutoCAD courses we can teach you best-in-class 2D and 3D design skills. This includes drawing, taking measurements, producing templates and everything required to create your designs.
Contact Us
We are here to ensure you receive a consistently high service and quality solutions for your business needs. We promise you won’t regret speaking to us, and if we can’t help you, we will try to find someone that can.