
With the April update of Fusion comes a new layer of logic in models; Configuration Rules. These build on the intelligence enabled by Configuration Tables in the Design workspace. Using a drag and drop interface, logic blocks can be combined to add low code rules into designs.
Workflow
Configuration Rules are only available in the Design Extension for Fusion. If you do not have the Design Extension, a free trial is available to test these features.
Prepare the Model
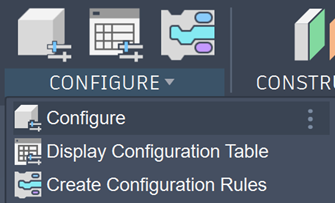
To get started using Configuration Rules in Fusion, the parameters you wish to drive will need to be in the model and included in the Configuration Table. This can be set up by activating the Configuration windows through the Configure Panel > Configure.
Then picking either the Parameters or Aspects you wish to configure.
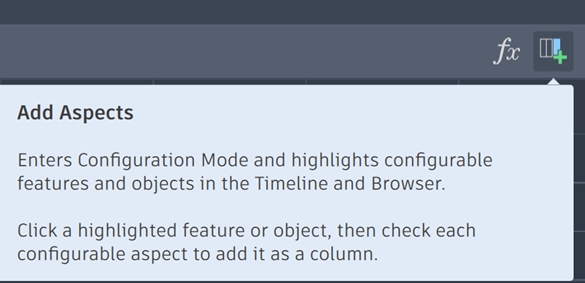
If selecting Parameters, it will open the parameters window. If choosing Aspects, each feature in the timeline or browser, which is supported by configurations, will be available for selection.
Create Rules
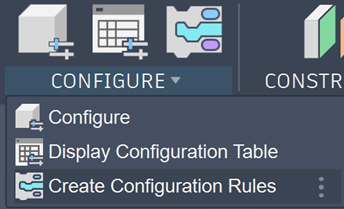
Once the relevant parameters or aspects are chosen, a Configuration Rule can be created. This is done through the same Configure panel, selecting Create Configuration Rules.
This will provide a window in which Rules can be created. Multiple Rules can be created, each with their own self-contained Logic, which in turn contain sets of Getters and Setters for applying the logic within rules. This logic will run from top to bottom in the respective rules.
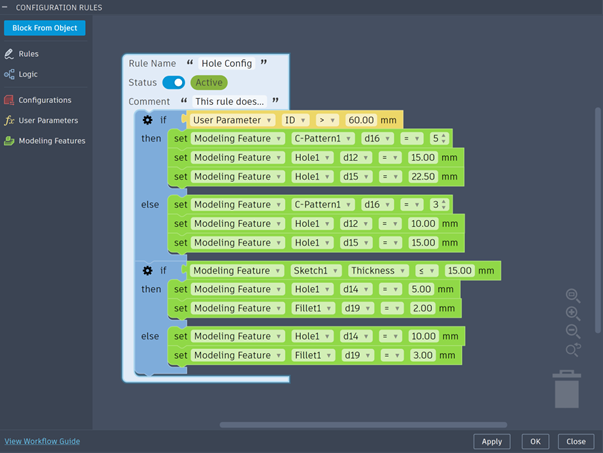
Interface
The interface is split into the Toolbox on the left-hand panel, and the Canvas where the rules are configured. Rules are built by left-clicking and dragging the blocks into their snap nodes to build the logic.
Toolbox
The Toolbox contains a list of tool categories which include Rules, Logic and a Prefilled area,
Rules
For ease of management, rules are created as containers for logic. This way the separate rules can be isolated or toggled during troubleshooting.
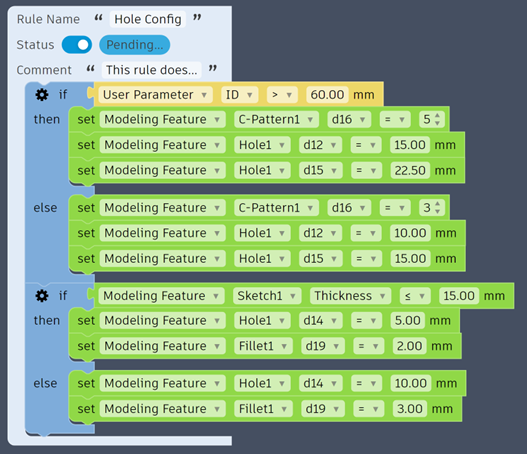
Each rule supports a Name, Status (Active/Inactive, Pending, Warning or Error) and Comment, before reaching the action area where the Logic is added in.
Additional comments can be added at any output location in a rule, this is handy for user engagement and notification.

Logic
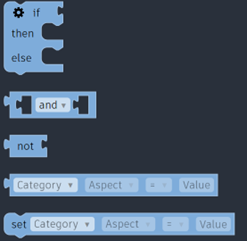
If statements are the primary logic used in Configuration Rules. This requires an input from a Getter, which could be combined with another Getter using And/Or, and Not logic.
If statements by default will take an input (if) and based on the output being true (then) or false (else) will drive parameters.
An output is generated by placing the appropriate Comments or Setters in the Then and Else sections.
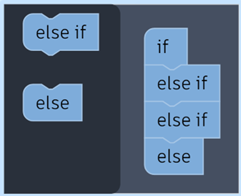
More outputs can be added by clicking on the Gear symbol next to the primary If. Each additional else if statement can be snapped into place to create additional conditions for the logic block.
And/or blocks feed into an If statement to provide a true/false value. Where an And statement requires both values to meet the requirement, an Or only requires one requirement to be met.
Not will return the opposite of a True/False value. This is predominantly used to invert an And/Or statement, it can also be used to invert the result of a Getter.
Getter will query the parameter for a value and return a true or false value.
These are structured by Category>Feature>Parameter or Category>Parameter depending on the category. We query the parameter against a value to identify whether it is equal to (=), more than (>), less than (<) the required value. The result of these returns either a true or false value, which is used determine whether or not to change another parameter.

Getters are identified by a Tab shape to the left of the block which snaps into an If or Else If input.
Setter will apply a value to the appropriate parameter if the logic passes.
A Setter block is also structured by Category>Feature>Parameter or Category>Parameter depending on the category. This is then able to set either the Exact (=), Minimum or Maximum value of a parameter.

Setters are identified by a Notch in the top left corner, which snaps into a Then or Else output slot.
Prefilled
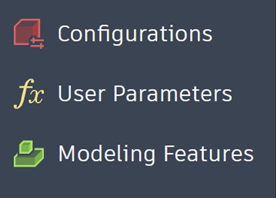
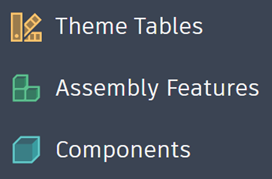
This contains prefilled Getter and Setter blocks for each of the categories supported by your current design; Configurations (Red), Theme Tables (Orange), User Parameters (Yellow), Modelling Features (Light Green), Assembly Features (Dark Green) and Components (Blue). This colour scheme is continued in the canvas.
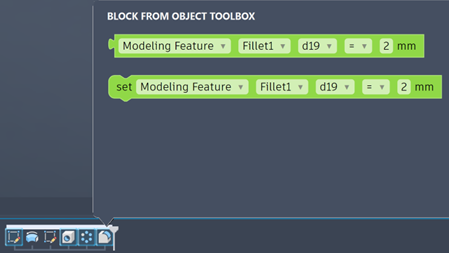
From Object
This will allow the selection of Features or Objects in the Timeline or Model Browser to show available blocks for each aspect.
Still got Questions?
Book Training
Through hands-on exercises, you will acquire the key skills and knowledge required to design models using Fusion. It will teach you everything from product development to simulation and fabrication.
Contact Us
We are here to ensure you receive a consistently high service and quality solutions for your business needs. We promise you won’t regret speaking to us, and if we can’t help you, we will try to find someone that can.