
What is an iPart?
An iPart is a family of parts that are defined by a set of parameters that control key features such as size, shape, material and other design aspects. These variations are stored in a single file, and each part in the family can be configured based on user-defined parameters. This means you don’t need to create separate files for each variation of the part, which can save time and reduce the potential for errors.
In this blog, we’ll walk through how to create an iPart in Autodesk inventor, step by step. Whether you’re a seasoned user or a beginner, this guide will help you understand the process and get your started on creating your own iPart designs.
Let’s look at creating an iPart!
- Start a new standard mm.ipt
- Save your file with a relevant name so you can easily identify it as the base for your iPart (my iPart creation).
Define Parameters for Variations
Before you can create different variations of the part, you’ll need to define parameters that will control the changes in geometry.
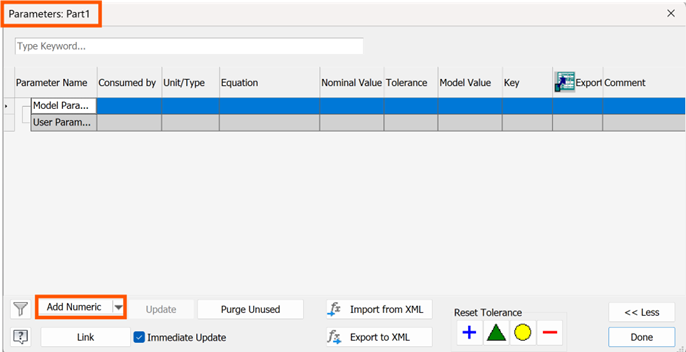
- Go to the Manage tab in the ribbon and select Parameters. Here you can add custom parameters that will drive the size and shape of your part.

- To add a Use Parameter, click on Add Numeric.
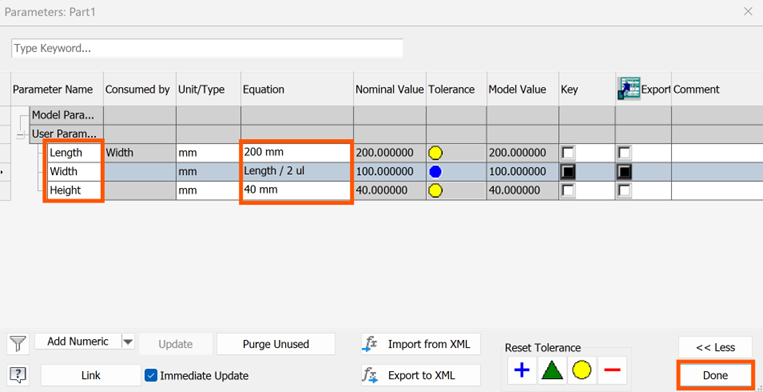
- Type Length, hit the enter key and in the units column, select mm if not already there. Under Equation type 100 and enter.
- Repeat by selecting Add Numeric to add:
- Width = Length/2 (we will use an equation here, so the width will always be half of the length).
- Height = 40
- Click done.
Create the Base Geometry
- Start by designing the basic geometry to the part that you want to create variations of. We are going to use a simple ‘box’ with various sizes for the length, width and height.
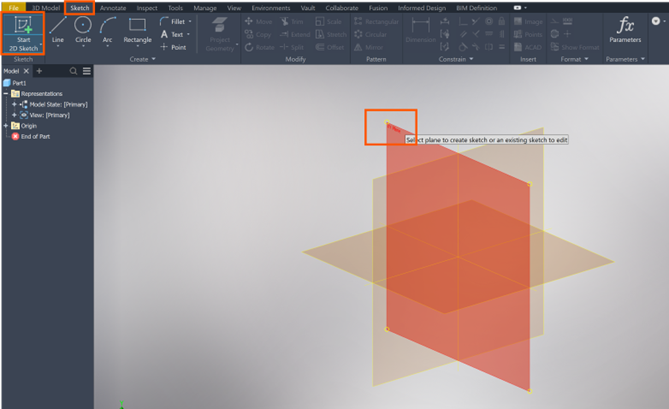
- Use the Sketch tool Start 2D Sketch, and select the XY Plane.
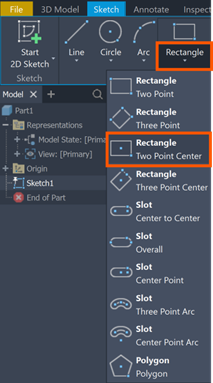
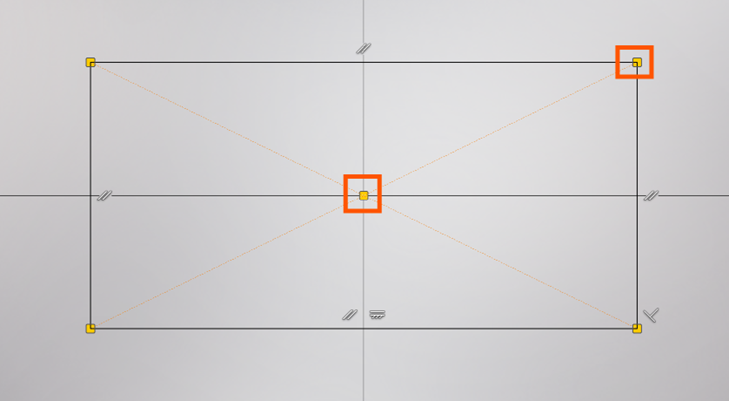
- Select Rectangle and from the dropdown choose Rectangle (two point centre).
- Select the origin as you first point and move out to select your second point.
- Now we will add dimensions using the parameters we have created.
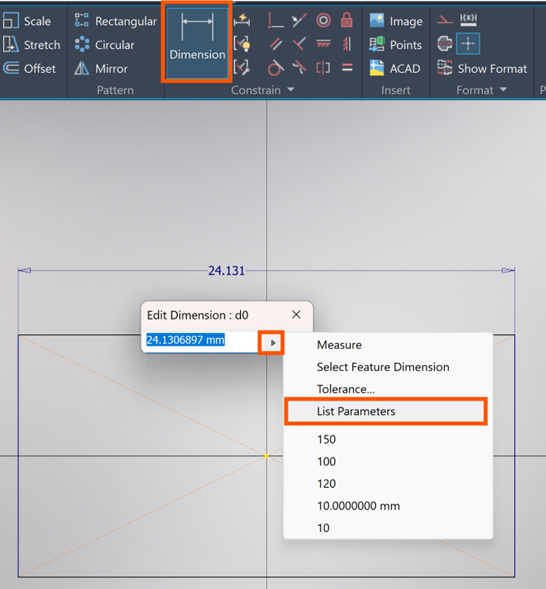
- Select the Dimension tool, select the top line of the rectangle and in the Dimension pop-up, click the arrow and click List Parameters.
- Select Length and then the green tick. You may need to zoom out to see your geometry.
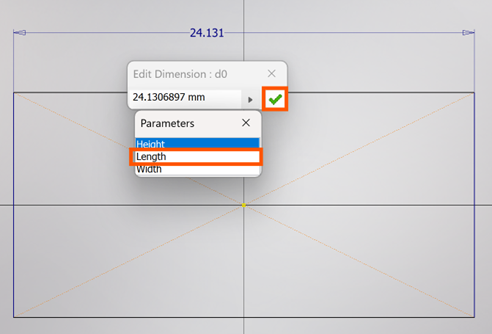
- We have now assigned our Length parameter to the top edge of the rectangle.

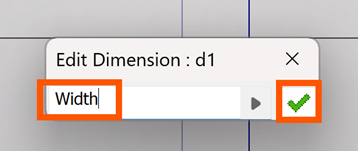
- Repeat the process for the left side of the rectangle to assign the Width parameter.

- Click Finish Sketch on the right of the ribbon.
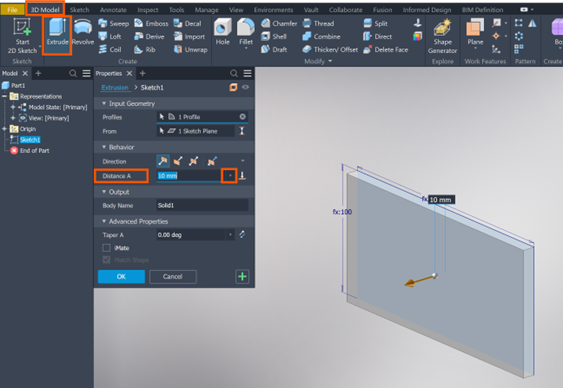
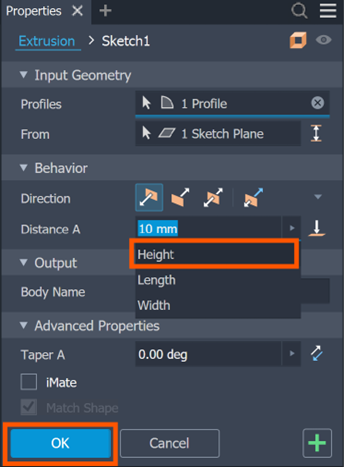
- In the 3D Model Tab on the ribbon, select Extrude and the face will automatically be selected. By Distance A in the extrude properties palette, select the arrow and click list parameters.
- Select Height and then ok.
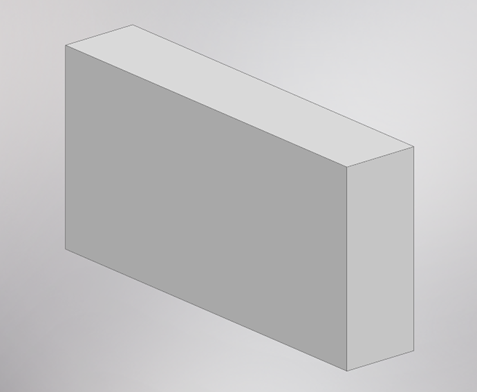
Now that the base geometry and parameters are set up, it’s time to create the iPart.
Create the iPart Family
- On the ribbon, go to the Manage tab and in the Author panel, click on Create iPart.

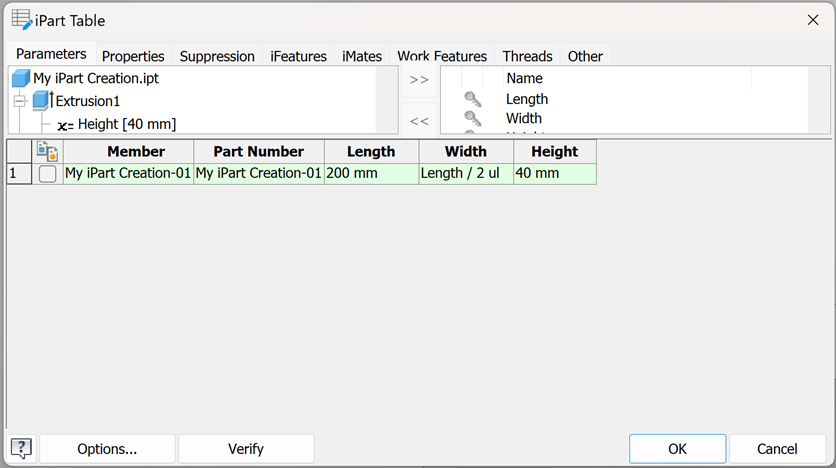
In the iPart Table, you’ll see options for defining the various iPart Members. A member is a specific variation of your part based on the parameters you’ve set. For each member, you can specify values for your parameters.
We want to create 1 part with 2 different sizes:
– 200mm x 100mm x 40mm
– 300mm x 150mm x 60mm
– 400mm x 200mm x 80mm
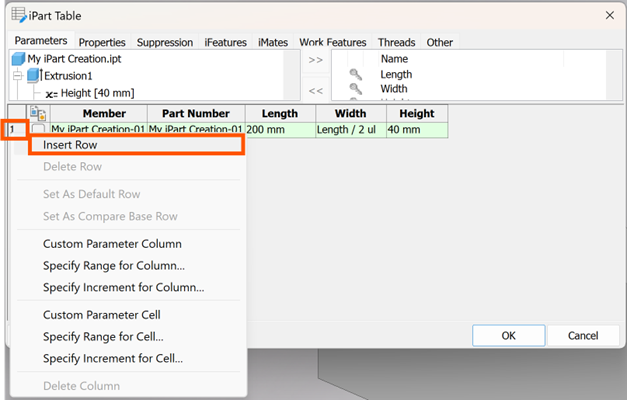
- In the iPart Table dialog box, right click on row 1, and select Insert Row. Repeat this until you have 3 rows.
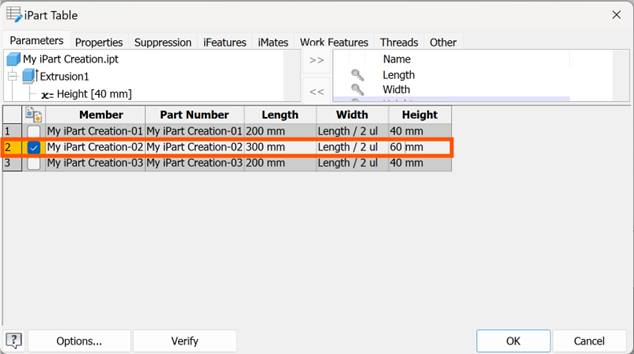
- Tick Row 2 and change the length to 300mm and the height to 60mm.
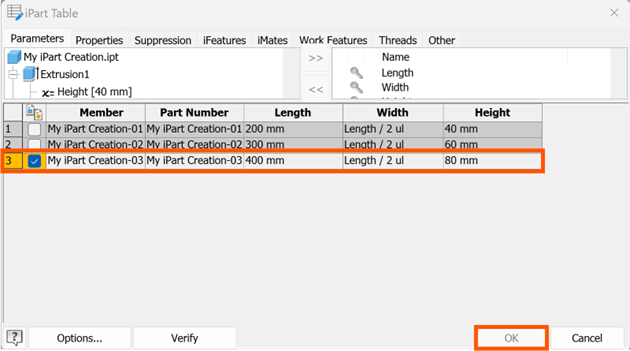
- Tick row 3 and change the length to 400mm and the height to 80mm.
- Then select ok.
- In the model browser, expand the table and click on the +.

- Here you will see the 3 variations you just created.
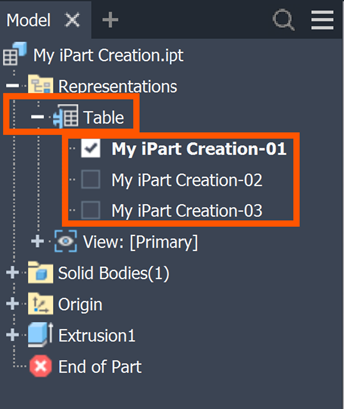
- Double click on each one and watch how the ‘box’ changes according to the sizes defined.
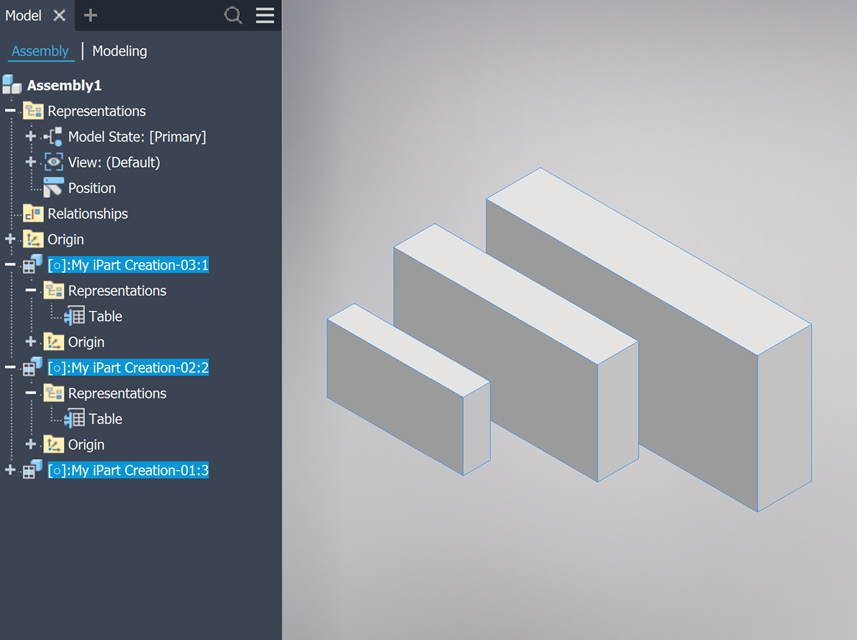
- You can open a new assembly and place this component, with each size variable.
Creating an iPart in Autodesk Inventor can significantly boost your productivity, especially when working with parts that have multiple variations. By defining parameters, creating different part members, and using the iPart functionality, you can maintain a clean, organised design workflow while minimising the complexity of file management.
We hope this guide has helped you understand how to create an iPart in Autodesk Inventor! Happy designing!
Still got Questions?
Book Training
Our range of Autodesk Inventor training courses will teach you how to create production-ready parts and assemblies through hands-on learning experience. Make sure you contact us to find out which course is best for you.
Contact Us
We are here to ensure you receive a consistently high service and quality solutions for your business needs. We promise you won’t regret speaking to us, and if we can’t help you, we will try to find someone that can.