
Managing users effectively is the foundation of any successful PLM (product lifecycle management) implementation. In Autodesk Fusion Manage, administrators can control access, responsibilities and security by organising users into users, groups and roles. When set up correctly, this structure ensures the right people have the right access: no more, no less.
In this blog, we’ll walk through:
- What members, groups and roles are.
- Why they matter.
- How to create and manage them step by step.
Understanding Users, Groups and Roles
Before diving into configuration, let’s clarify the differences.
User: users are individual members in Fusion Manage. Each user represents a real person, such as an engineers, project manager, or quality analyst, who logs into the system.
Groups: groups are collections of users. Instead of assigning permissions to users one by one, groups let you manage access at scale (for example, Engineering, Quality or Procurement).
Roles: roles define what actions users are allowed to perform in Fusion Manage. Roles control permissions such as viewing, editing, approving or administering data.
Creating Users in Autodesk Fusion Manage
Users must exist before they can be added to groups or assigned roles. Steps to create a user:
- Login into Fusion Manage as an Administrator.
- Navigate to Administration.
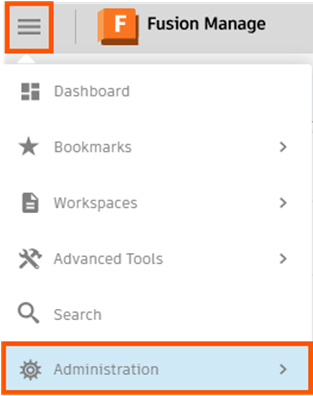
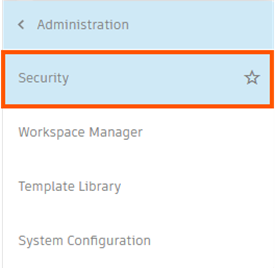
- Select the Users tab.

- Click New User.
- Enter required details:
- Name
- Last name
- Email address
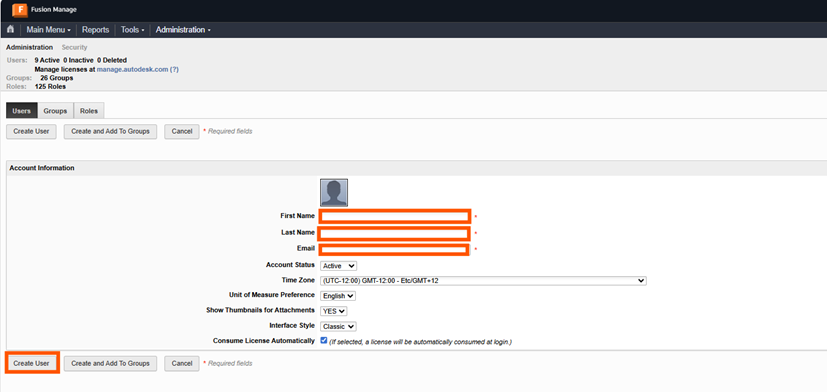
- Save the user – click Create User.
- Once created, the user can login and be assigned to groups for broader access.
Top Tip: Use consistent naming conventions for usernames and email to simplify administration.
Creating Groups for Better Organisation
Groups help streamline permissions and workflows assignments. Steps to create a group:
- Go to Administration, as per the images in the previous steps.
- Select Groups.
- Click New Group.

- Enter details:
- Group name (eg, Design Engineers).
- Description (recommended).

- Either select Create Group or select Create and Add Users.
- After creation, groups can be:
- Assigned to workflows.
- Linked to roles.
- Used in permissions and approvals.
Best practice: Organise groups by function rather than individual projects for long-term scalability.
Creating and Managing Roles
Roles control what users and groups can do in Autodesk Fusion Manage. Steps to create a role:
- Navigate to Administration, as per the images in the previous steps.
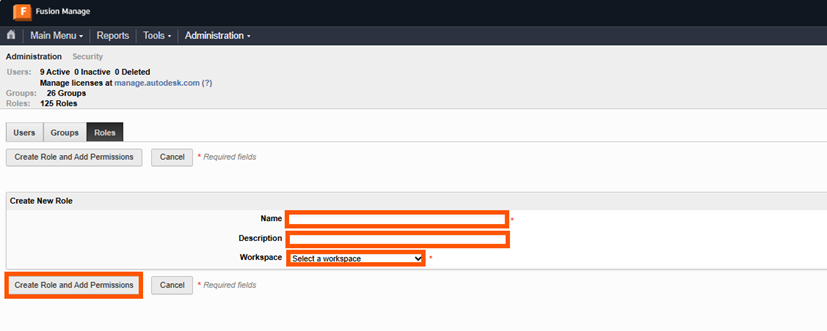
- Select Roles.
- Click New Role.

- Enter details:
- Role name (eg, ‘Change Orders’).
- Description (eg, ‘Access Change Orders’).
- Workspace (eg, ‘Change Orders’).
- Manager Permissions for Role.
- Save.
- Once created, roles can be assigned directly to:
- Individual users.
- Groups (recommended).
Tip: Assign roles to groups rather than individuals to simplify future maintenance.
Assigning a Role to a Group
After creating roles you need to apply them:

- Open the Group settings.
- Select Roles.
- Add the appropriate role, select from the left, use arrow key in dialog box to move to the right.
- Save.
Assigning a Role to an Individual User

- Open the User profiles.
- Select Roles.
- Assign the required role, select from left, use arrow key in dialog box to move to the right.
Save.
This flexibility allows fine-grained access control when needed.
Properly managing users, groups and roles in Autodesk Fusion Manage is critical for security, efficiency and scalability. A well-structured access model not only protects data, but also keeps workflows running smoothly as your organisation grows.
If you invest time upfront in thoughtful setup, Fusion Manage becomes far easier to administer and far more powerful for your users.
Still got Questions?
Book Training
Through hands-on exercises, you will acquire the key skills and knowledge required to design models using Fusion. It will teach you everything from product development to simulation and fabrication.
Contact Us
We are here to ensure you receive a consistently high service and quality solutions for your business needs. We promise you won’t regret speaking to us, and if we can’t help you, we will try to find someone that can.