
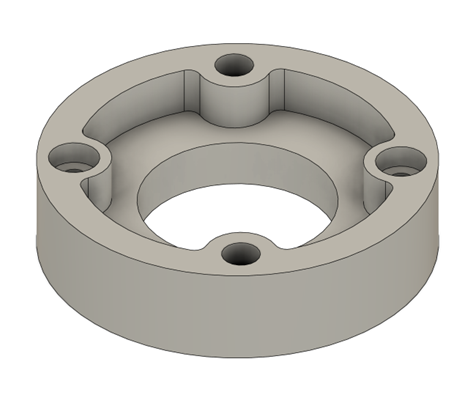
Creating die casts in Autodesk Fusion is made a lot easier with the Fluid Volume tool. In this blog we will go through the steps required to create them, and the options we have within the tool.
Getting Started
The Fluid Volume tool is only available within the Direct Modelling Mode. Meaning the design will need to be outside of a Captured Design History, or in a simplification environment found in either Simulation or the Machining environment.
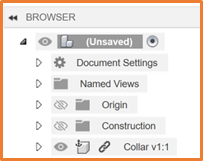
If your file already has the Design history turned off, you can go straight to the Creating a Fluid Volume step. Otherwise, it may require a few extra steps to get into the Direct Modelling.
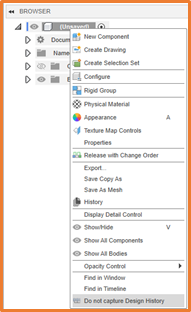
This can be done by Right-Clicking on the component name in the browser and selecting ‘Do not capture Design History‘.
If this option is greyed out, it is likely because you already have features added to your component. To get around this, Insert the component into a new design as a subcomponent. From here, turn off Design History against the newly created assembly file.
Creating a Fluid Volume
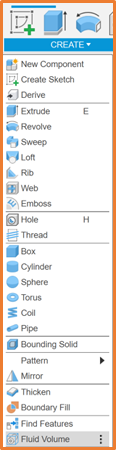
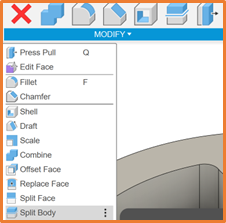
Once your design is in Direct modelling mode, the Fluid Volume tool is available in the Create menu.
This will require a Tool body, for this select your component. Once selected, Fusion will create a volume around the body. You can then drive whether the required volume should be created Externally, or Internally from the shape.
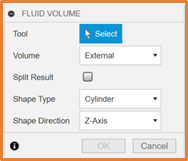
The Split Result option allows the volume to be split if 2 or more bodies have been selected. This will create a Volume encompassing both bodies, split at the point they come in contact.
The Shape and Direction (Orientation) of the volume can be defined, the Shape options include Box, Cylinder and Hemisphere. You can then align the volume to one of the Axis within the model.
There is also an option to add an Offset around the body to ensure a bit more volume to work with.
Creating a Fluid Volume
Once the Volume has been created, it can be tweaked by adding or removing material from the volume.
If a single body was used for the creation of the volume, the Split Body tool may be required. To get the model set up for this, you can create a Construction plane to position the split, or use one of the Origin planes is they are located where the desired split needs to take place.
To create a Construction Plane, select one of the Plane options from the Construct menu, most commonly Offset Plane or Midplane.
This will require a Body to Split (The Fluid Volume), and a Splitting Tool (Construction Plane).
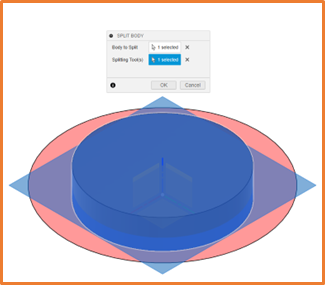
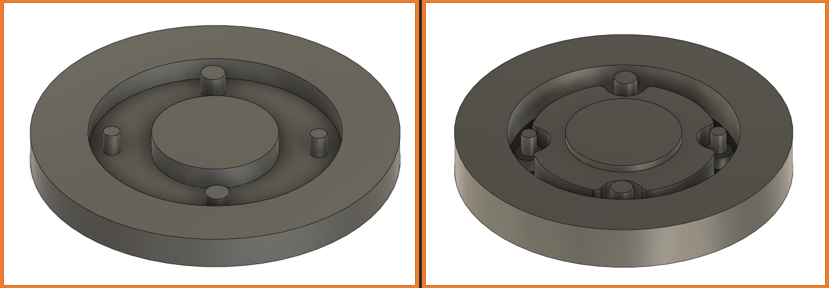
This will divide the component into two, or more bodies. The visibility of each body can be toggled, and the bodies themselves can be edited separately. From here, you can add any additional detail, and export the bodies as their own components if required.
Still got Questions?
Book Training
Through hands-on exercises, you will acquire the key skills and knowledge required to design models using Fusion. It will teach you everything from product development to simulation and fabrication.
Contact Us
We are here to ensure you receive a consistently high service and quality solutions for your business needs. We promise you won’t regret speaking to us, and if we can’t help you, we will try to find someone that can.