
In this blog I will detail how to work with Inventor models inside BIM 360 Design.
Setting Up the Desktop Connector
To work with Inventor inside a BIM 360 model first you must install the BIM 360 Desktop Connector, this will give you a space on your local computer that will allow you to work on and save files directly which automatically sync to the BIM 360 project.
Download the desktop connector from here: https://www.autodesk.com/adsk-connect-64?_ga=2.123829900.76963924.1602754314-819413262.1589783221
Once downloaded run the installer. The default install location for Desktop Connector is “C:\Program Files\Autodesk\Desktop Connector”.
Once installed you must then configure a folder in the BIM 360 project to store all the Inventor files. You will need a folder for your Designs, Content Center files and Libraries.
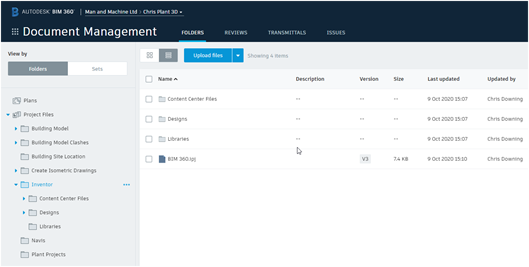
Make sure that your folders are synced locally.
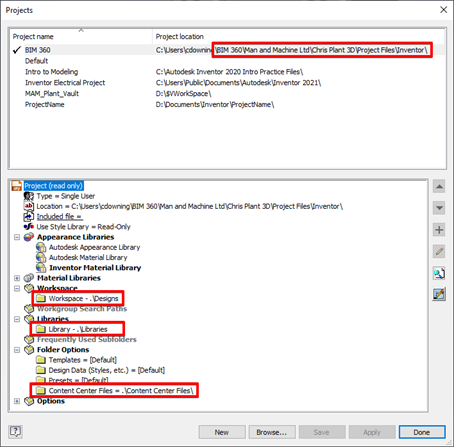
Create an Inventor Project for BIM 360
Open Inventor and create a new project to copy to the Inventor folder in BIM 360 as shown in the images above.
The new Inventor project will utilize the folders in BIM 360 as shown below.
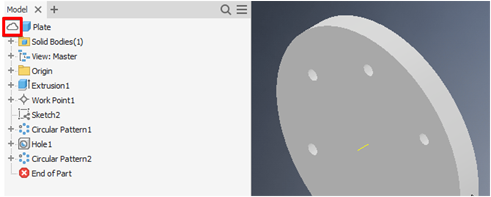
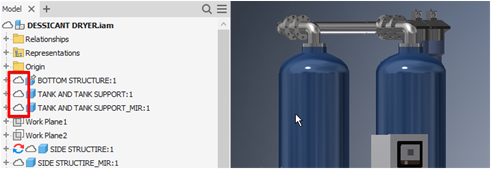
You can use this project file to create parts and assemblies directly in the BIM 360 project environment. A cloud symbol in the model browser shows that the file is synced into the cloud.
Add Existing Model to BIM 360
To add an existing model to the BIM 360 project first you must decide whether to copy the existing model or move it.
Create a sub-folder in the BIM 360 Inventor environment to store your existing model, ensure that you sync this folder to your local workspace.

Copy the Inventor files to the folder as required. The Inventor ‘Pack and Go‘ tool is usually the best method for this. Once you have created a Pack and Go pack, copy the relevant files to the BIM 360 Inventor folder.

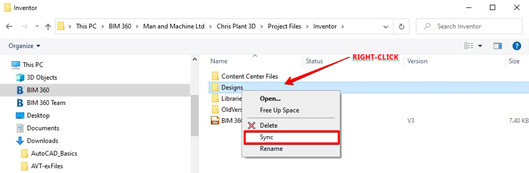
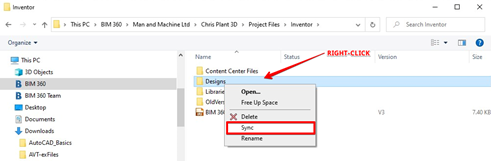
Once uploaded ensure that they have synced locally, use the right-click sync tool to sync the files if required.
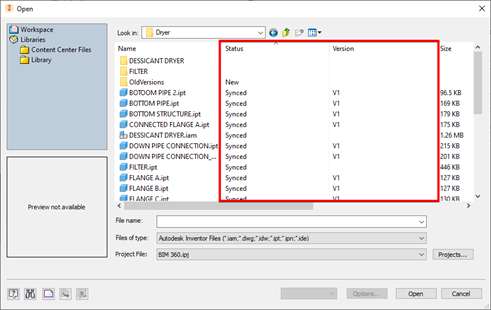
If the files are fully synced they will display the following:
You can work on these files as normal using the BIM 360 Inventor project file.
When an Inventor file is successfully synced with the BIM 360 environment you will see a cloud icon next to each file in the model browser as shown below.
To conclude, it is very simple to work on Inventor files stored within the BIM 360 umbrella. The key is to have the folder structure and project file referencing this structure all set up correctly before getting to work!
Still got Questions?
Book Training
Our range of Autodesk Inventor training courses will teach you how to create production-ready parts and assemblies through hands-on learning experience. Make sure you contact us to find out which course is best for you.
Contact Us
We are here to ensure you receive a consistently high service and quality solutions for your business needs. We promise you won’t regret speaking to us, and if we can’t help you, we will try to find someone that can.