
This is the third and last part of the guide on creating an Inventor drawing template. This part will show you how to create a title block for an Inventor drawing template.
NOTE: The golden rule still applies in this step but acts more as a best practice. In case you missed part one the rule is, never edit a default standard, ALWAYS duplicate the standard first to avoid errors.
If you are following the guide step by step the title block will already have been removed. If not, right click the title block instance under the active sheet and delete it. Once the title block has been removed, you can either edit the existing title block (duplicating it at the end) or you can create a new title block from scratch.
To start by editing the existing title block, expand Drawing Resources folder and expand Title Blocks folder. Right click on the title block (ANSI, ISO, DIN depending on your standard) and select Edit. You will be taken to the Sketch environment with the existing title block and text. Notice there are extra lines that you don’t see when the title block is placed in the drawing. You can create sketch only geometry by selecting the Sketch Only button on the format panel. The title block can be sketched anywhere in the window as it will align to the border according to your document settings.
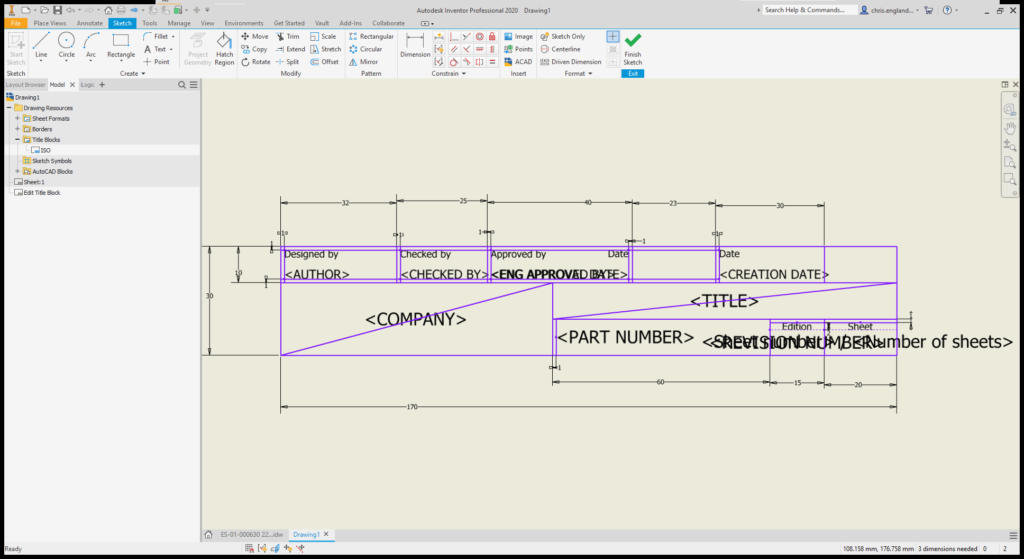
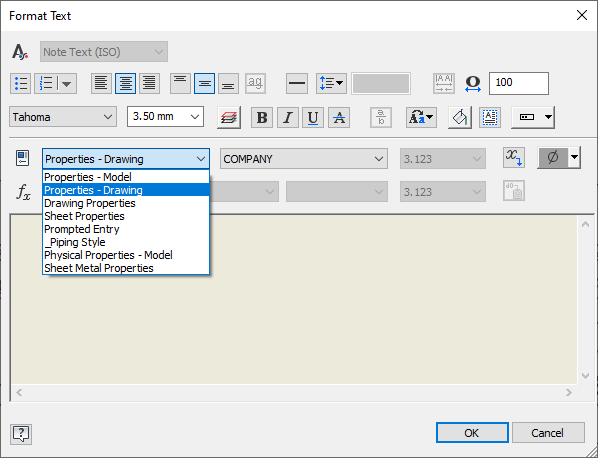
Edit the title block as required, you can add a company logo by selecting the Image button on the Insert panel or edit the text field to pick up on properties. Properties can be referenced to model properties or drawing properties. The first model placed in a drawing view will be the model that has its properties referenced. If you prefer the AutoCAD style of editing attributes, you can use the prompted entry option to allow the fields to be typed in manually on drawing creation.
Creating a title block from scratch is the same process with the exception that the actual title block geometry will need to be drawn from scratch and the text fields will need to be added and constrained in place. Remember to use the left, center, right, top, middle and bottom settings to move the text node to your requirements.
The last step for the title block creation will be to select finish sketch where a prompt will appear to save or save as. I recommend save as to follow the rule of not overwriting the standard.
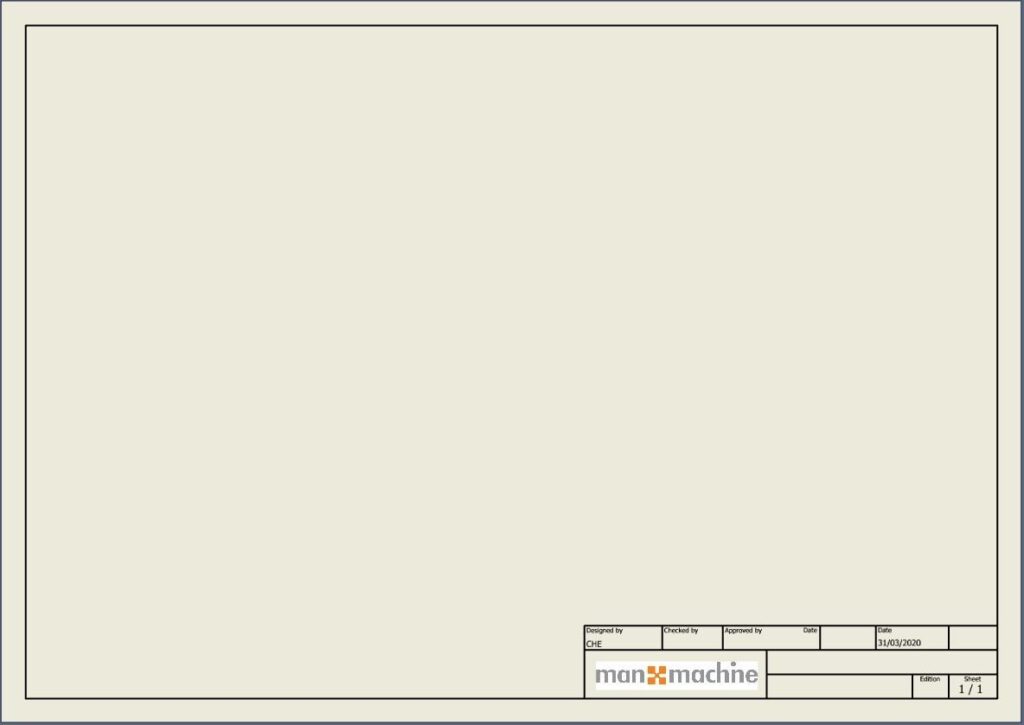
The final step of this three-part guide is to save this drawing as a template. Select File and hover the mouse over Save As and then select Save Copy As Template. This will take you to the location of all the standard templates where you can save the template and use it for new drawings.
Still got Questions?
Book Training
Our range of Autodesk Inventor training courses will teach you how to create production-ready parts and assemblies through hands-on learning experience. Make sure you contact us to find out which course is best for you.
Contact Us
We are here to ensure you receive a consistently high service and quality solutions for your business needs. We promise you won’t regret speaking to us, and if we can’t help you, we will try to find someone that can.