Didn’t you ever think it’d be great to create a grate? Maybe throw in some diamond plate? Well this isn’t clickbait; this spate will help you navigate textures in Autodesk Inventor, so you can generate great and computationally lightweight grates, plates and gates!
Beautiful poetry aside, it is easy to create and apply complex colours and textures to geometries in Inventor. Why might we want to do this? Colours and textures help us to:
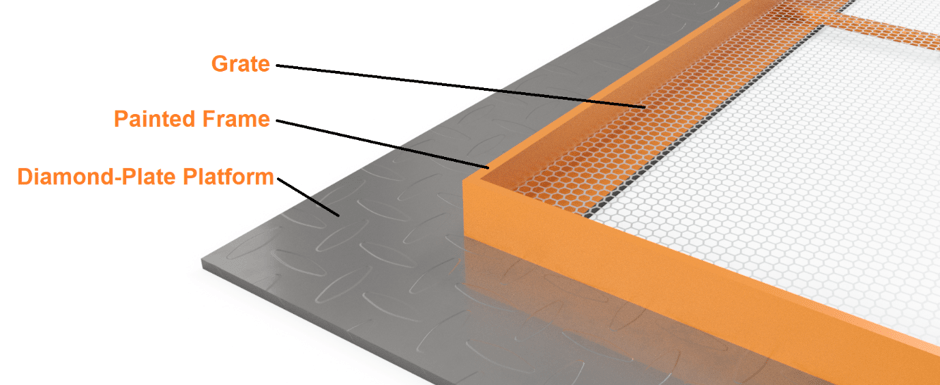
- Differentiate components: E.g. different surfaces, parts and subassemblies.
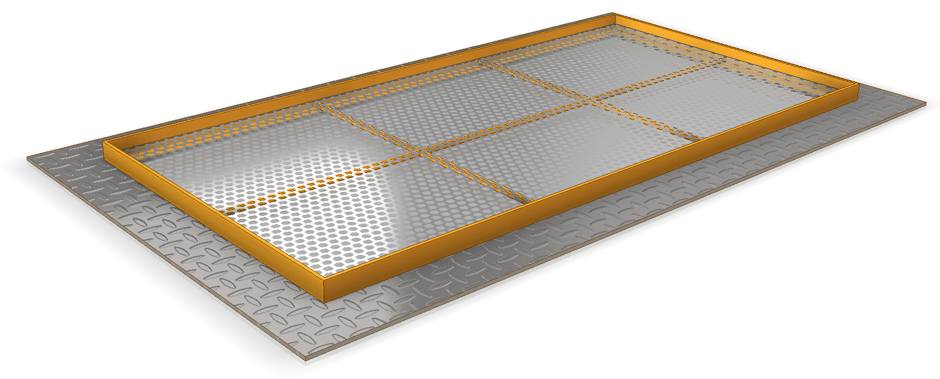
- Represent the actual finish of the components: E.g. the glossy yellow paint finish on the frame above.
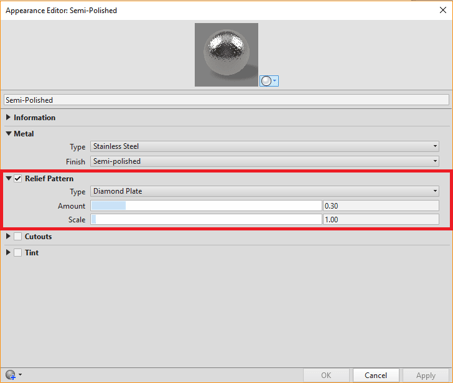
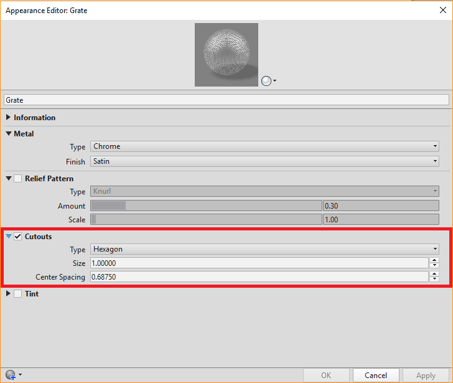
- Convey complex geometries and patterns: E.g. the diamond patterning on the plates above, or the hexagonal holes in the grate above.
- While it is certainly possible to create the necessary patterns for both the diamond plate and the grate, it adds considerable complexity to the model. By using textures instead of true geometry, you can dramatically improve the performance of your models.
- Warning: Textures will not produce geometry dimensionable in drawings, so keep this in mind when using textures.
How do I assign and modify an appearance?
To modify a component’s appearance in Inventor, perform the following steps:
- Click the colour wheel in the top-most menu of Inventor.
- Right-click the appearance you wish to modify.
- Click edit.
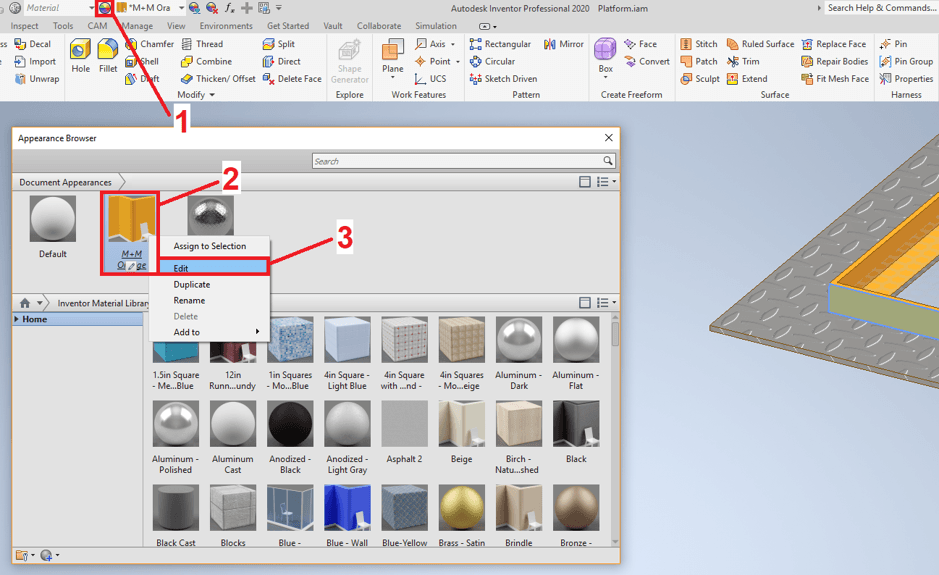
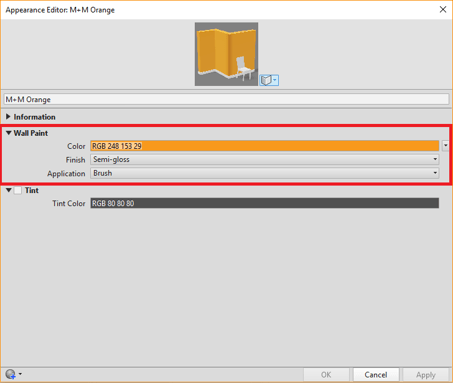
- Edit the properties of the appearance. Depending on the appearance type, the following can be modified:
- Generic
- Modify the colour, image and glossiness of the surface. This is useful for paint finishes.
- Reflectivity
- Transparency
- Relief pattern
- Apply a relief pattern to a surface. This is useful for creating diamond plates.
- Cutouts
- Apply a hole map to a surface. This is useful for creating grates.
- Self-illumination
- Allow the surface to emit its own light.
- Bump-map
- Tint
- Generic
By assigning appearances and textures in Inventor, not only can we make our models prettier and more representative of the true design, but we can also reduce the geometric complexity and file size!
For more tips and sagely wisdom, please don’t hesitate to contact Man and Machine. Our experts will have you up to speed in Inventor in no time!
For more information on this blog post or if you have any other questions/requirements, please complete the below form:
Related Links
Autodesk Inventor – Autodesk Platinum Partner | Man and Machine