In this blog I will show you how you can split a single enclosed region in Revit to contain multiple rooms using the Room Separator. This is useful if you have an open plan space which may contain multiple rooms such as a kitchen/diner or an open office with admin, accounts and sales all in the same space.
Rooms
Rooms are quite intuitive in Revit in that you can move the Room tool over any enclosed region and Revit will create a room in that space. There is no need to have to draw the border of the room as a room can be created with a single click.
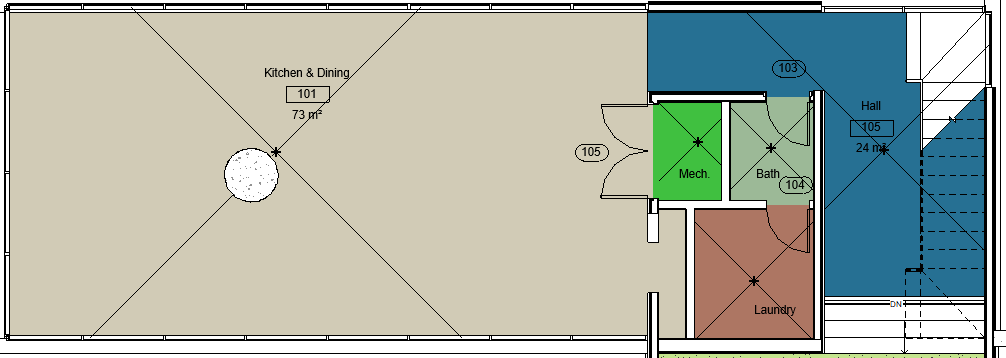
In the below screenshot you can see the kitchen and dining room occupy the same space:
But what do you do when you don’t want your room to occupy the full space?
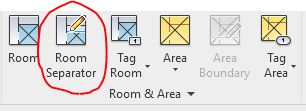
Room Separator
Revit has a tool called the “Room Separator” and can be found next to the “Room” button:
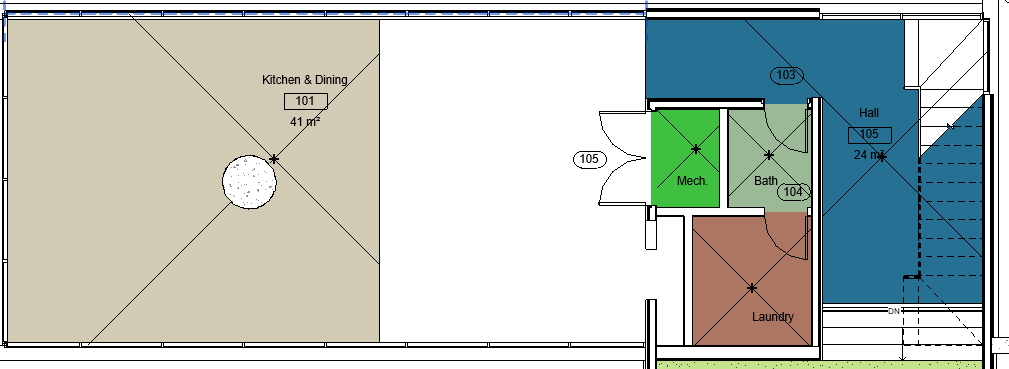
This allows you to draw an invisible line which will act as a boundary, now when you try to place a room it will be confined with the walls and the room separator line:
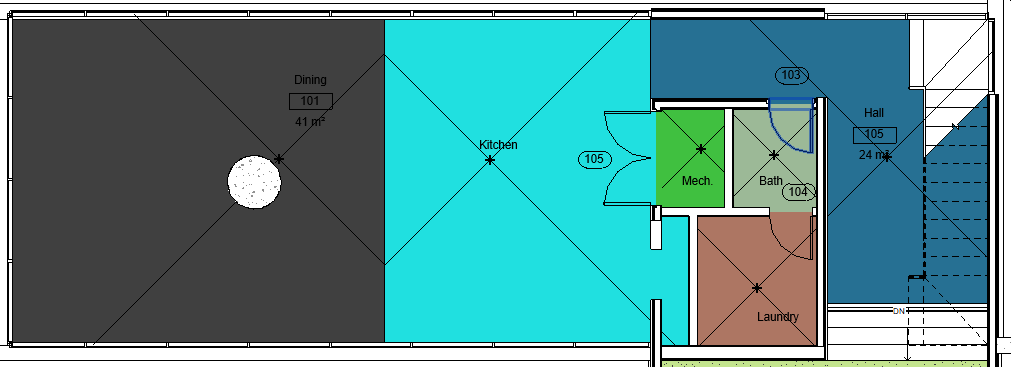
With the space now split in half with the Room Separator line we are free to create two separate rooms within the same space:
Conclusion
There are many reasons why you would want to split a space into multiple rooms, the room separator tool gives us more control while still being very intuitive and quick to use.
For more information on this blog post, or if you have any other questions/requirements, please complete the below form:
Related Links
Autodesk Revit – Man and Machine
Autodesk AEC Collection – Man and Machine
Autodesk Revit Training – Man and Machine
Autodesk Revit Demonstrations – Man and Machine
Autodesk Revit – Autodesk Platinum Partner – Man and Machine
Autodesk Revit LT – Autodesk Platinum Partner – Man and Machine
Autodesk Revit LT Suite – AutoCAD & Revit LT – Man and Machine
Revit Architecture Training – Platinum Partner – Man and Machine
Autodesk AEC Collection – Platinum Partners – Man and Machine