When working on large projects with a lot of data, you may need to isolate specific elements within a model to easily identify them based on criteria that they do or do not meet.
Filters allow users to change the appearance of particular objects that match certain conditions. This enables us to easily identify those objects that match specific properties or criteria based on definitive rules.
Create a Filter
To create a filter, you can access the Filters dialogue box directly from the view tab, graphics panel.

Once activated, the filters dialogue box will show.
Any existing filters will show on the left of the dialogue box under the filters heading. From here you have some options that will allow you to create, edit or remove filters.
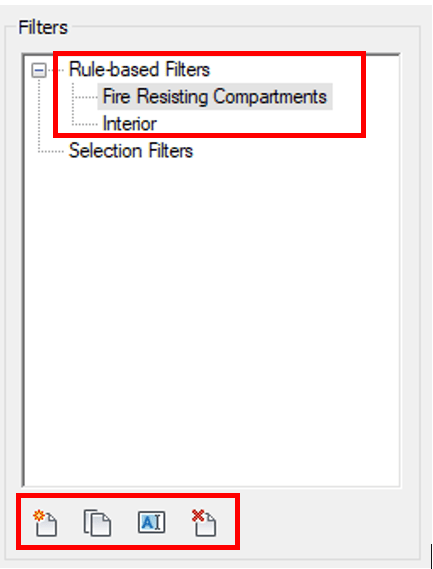
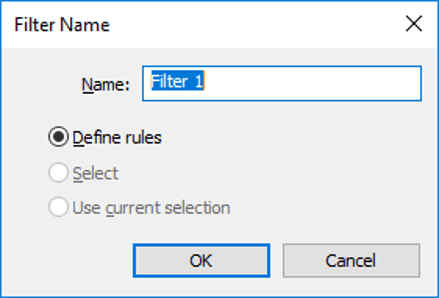
Create a new filter from scratch using the ![]() button. Choose a name for the filter that will correspond with its purpose.
button. Choose a name for the filter that will correspond with its purpose.
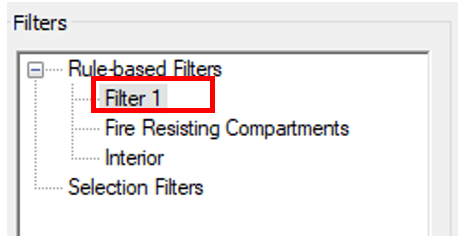
Once created, it will be added to the list of available filters.
If you have an existing filter that you want to copy, you can duplicate an existing filter by selecting the ![]() (Duplicate) button. This will create a copy of the existing filter and any rules associated with it.
(Duplicate) button. This will create a copy of the existing filter and any rules associated with it.
You may need to rename a duplicated rule or an existing rule. This can be done using the ![]() button.
button.
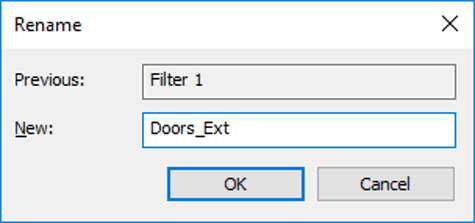
You will see the existing name for the filter next to previous. Rename it using the box below.
You can delete any filters you would like to remove from the list using the ![]() (Delete) button.
(Delete) button.
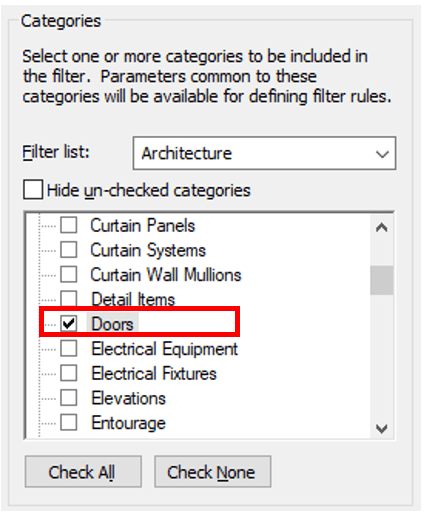
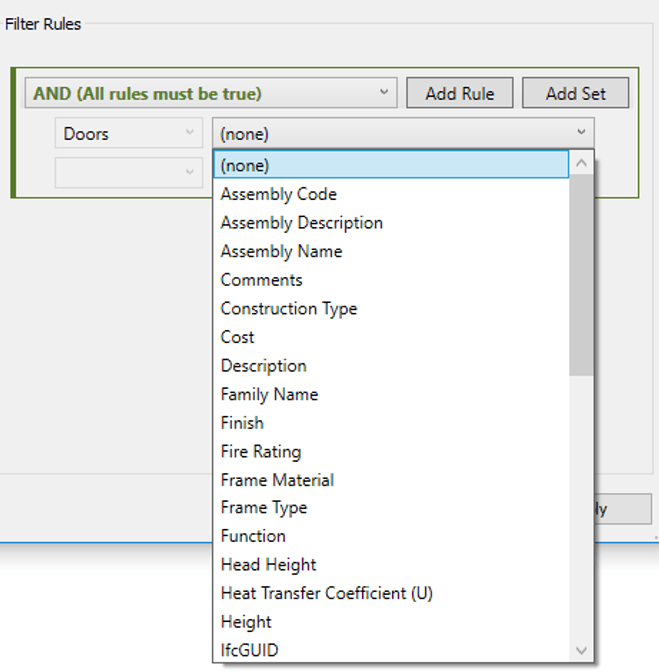
Once you have created a new filter you will need to choose the categories for the filter to be applied to.
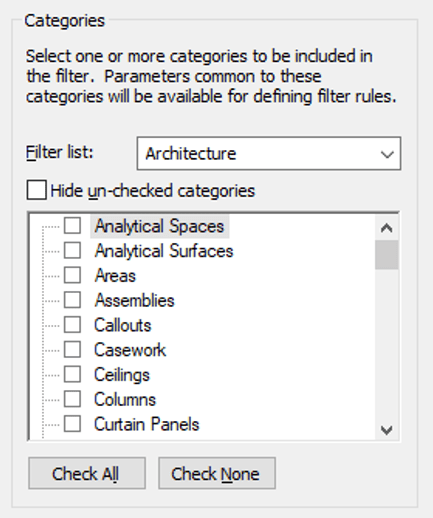
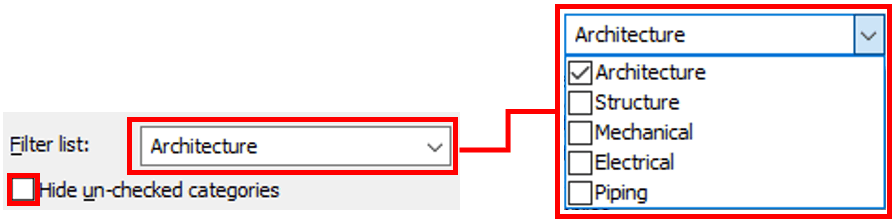
You can control the available categories shown in the list by selecting 1 or more disciplines using the filter list option and also by using the hide un-checked categories box.
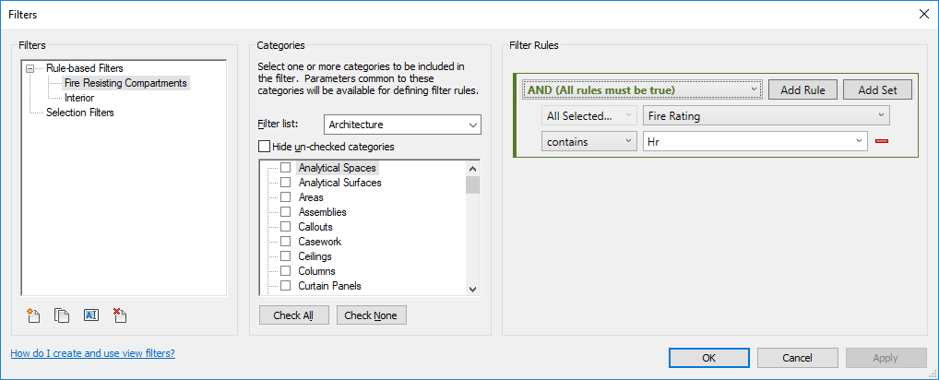
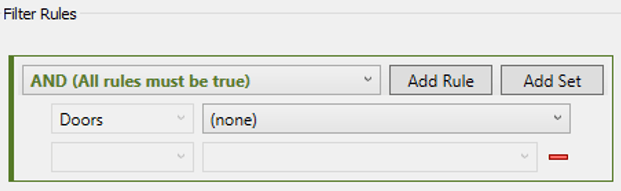
Once you have selected 1 or more categories for the filter then you will need to set the rules or conditions that must be met for the filter to be applied.
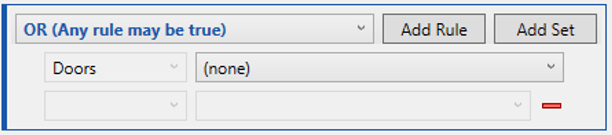
You can choose to add AND as well as OR conditions to your filters. AND rules must be true and OR rules are optional.
You can use AND with OR conditions applied to the same filter by using the ![]() button. You can choose whether to use an AND or an OR condition in the added set.
button. You can choose whether to use an AND or an OR condition in the added set.
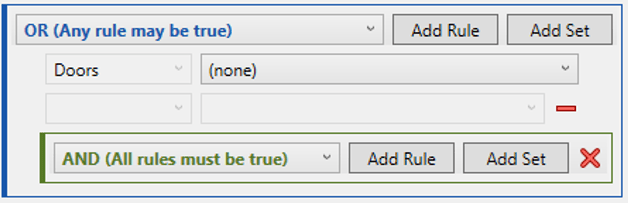
Remove any additional sets from your filter rule using the ![]() button.
button.
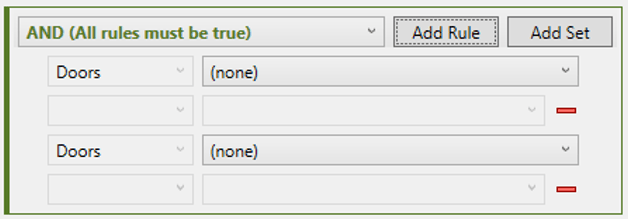
Additional rules can be added to the filter using the ![]() button. And removed using the
button. And removed using the ![]() button.
button.
Rules help to add additional definition to the filter so either all the criteria must be met using the AND condition, or using the OR condition where it could meet the criteria for the rule or an alternative option.
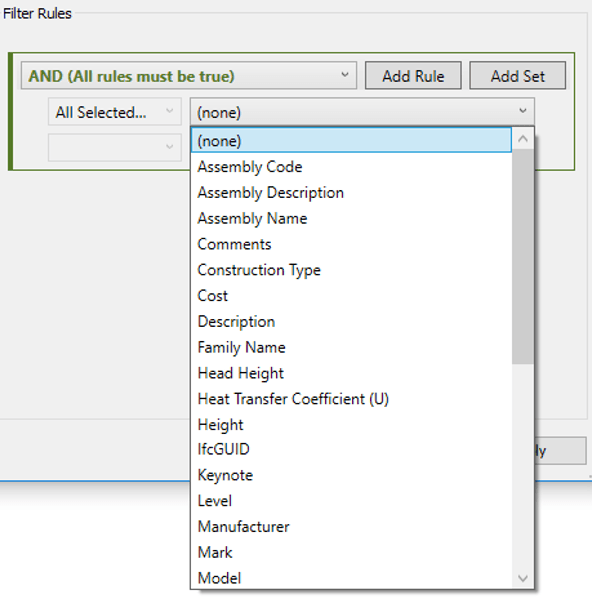
Once you have chosen the condition, you need to choose rules for the filter. A list of parameters related to the chosen category will display to the right of the category name.
When multiple categories are chosen using the AND condition, only parameters related to both categories will show. If the OR condition is used, you can decide which category to specify for each rule.
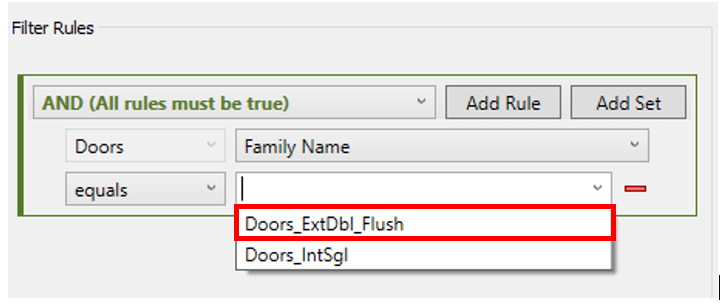
After you have chosen the parameter for the rule you need to select an operator to refine the conditions. These are needed to set specific conditions for the rule.
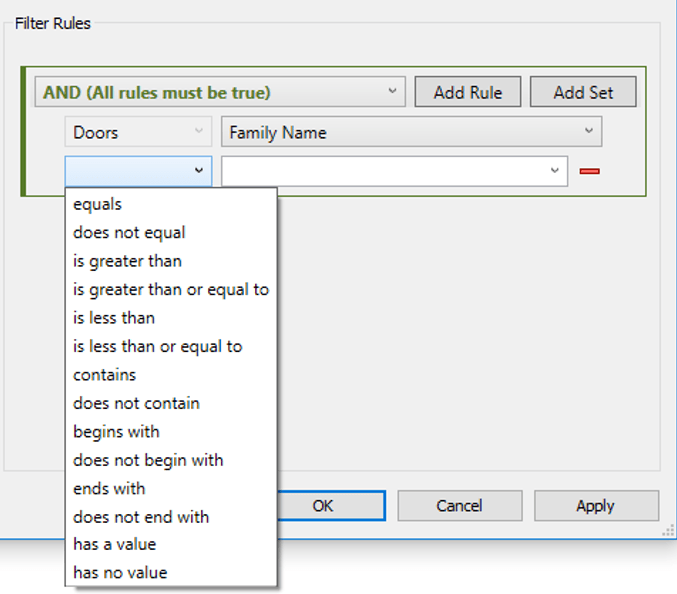
Only objects that are available in your project will be shown in the parameter value box.
Once you have specified all the rules and criteria that must be met for the filter then you can confirm the rule by clicking on ![]() or
or ![]() . If you want to cancel the process then use the
. If you want to cancel the process then use the ![]() button.
button.
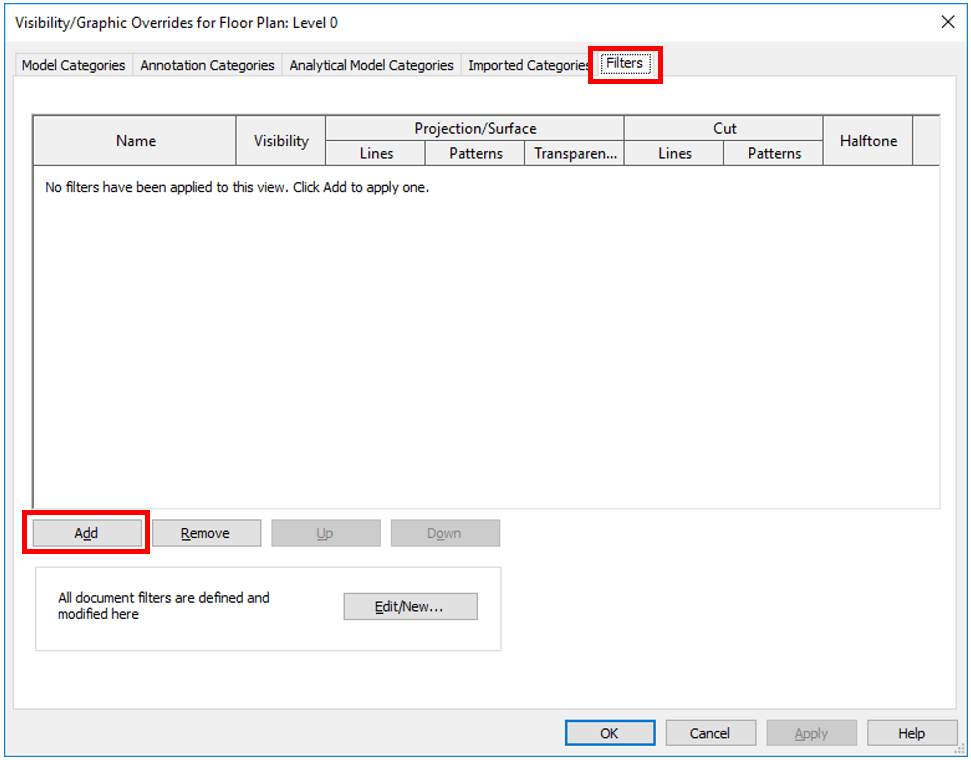
To define the appearance settings for the filter you have to go to the Visibility graphics dialogue box via the view tab, Graphics panel.

Go to the Filters tab on the right where you will see any filters currently in use in the current view.
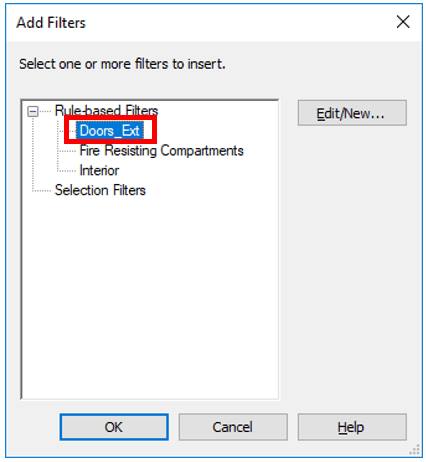
Click on the add button to add a filter from the list of available filters.
Select the filter you want to use then click ok to confirm.
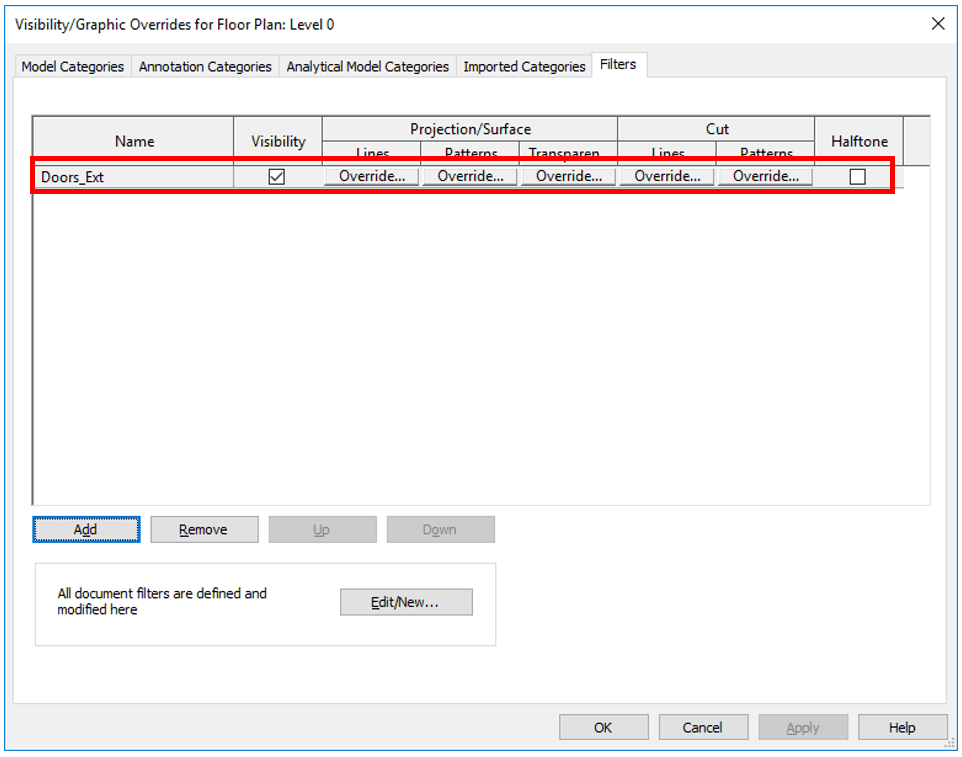
The new filter is added to the filter list in the visibility Graphics dialogue box where you can set the appearance settings for the different options available.
For more information on this blog post or if you have any other questions/requirements, please complete the below form:
Related Links
Autodesk Revit – Autodesk Platinum Partner | Man and Machine
Revit Training Courses – BIM Modelling Skills | Man and Machine
Autodesk AEC Collection – Platinum Partners | Man and Machine