Inside of Revit, whilst we are typically working to a given Level of Definition (Level of Detail) which defines exactly how complex our models should be, certainly in architectural designs we have the need to make the models look that little bit nicer, especially for visualisation purposes.
One way we can really improve the look and feel of our model is adding carpentry detail to our rooms, namely in this example skirting board and coving detail.
Revit has functionality to support this out of the box, with the ability to use custom profiles if necessary. I will talk you through an example using Wall Sweeps.
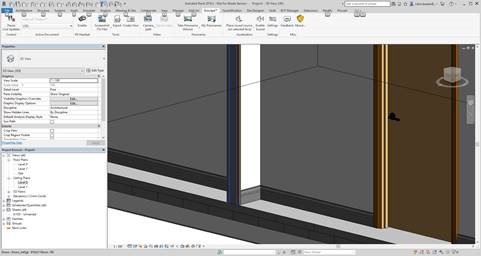
For this example, I have placed a section box onto my 3D view to give better visibility of the result.
Using Wall Sweeps for this method is by far the quickest solution, but you have to be careful of clashes. As a wall sweep will run the length of a wall, but where walls cross the skirting will continue through any crossing wall. With this in mind, creating an in place family using a manual wall sweep would give you a better option, but is slightly more time consuming. We are focusing on this for visualisation purposes, so clashes are not problematic here.
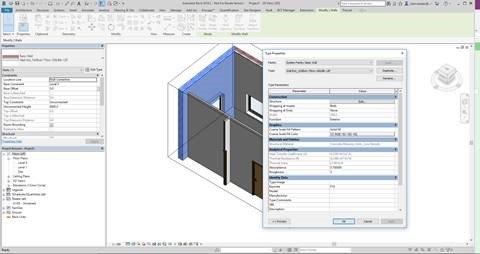
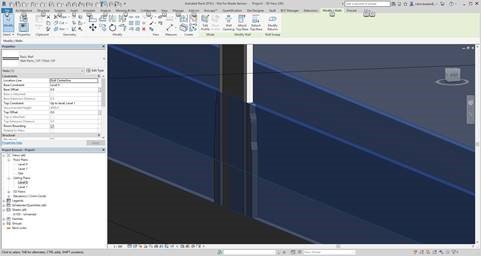
Select a wall in the model that you would like to add carpentry to, I will use my external wall to begin with before repeating the process on my internal partitions. With the wall selected, go into Edit Type:
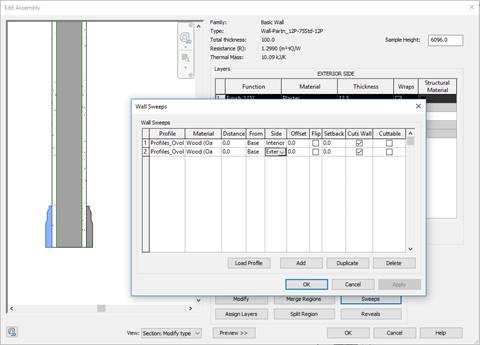
Head over into the Edit Structure window, and ensure you can see the wall preview in Section mode on the left. Check out the lower left hand button and drop down list on the screen to turn this on/off and change between plan and section:
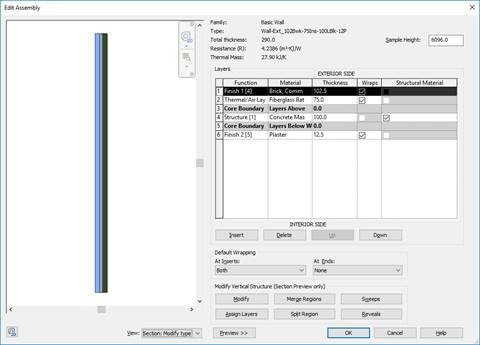
From here, select to add sweeps to the vertical structure of the wall. Select Load Profile and browse to the following default location that comes preinstalled with Autodesk Revit:
C:\ProgramData\Autodesk\RVT 2018\Libraries\UK\Profiles\Second Fix Carpentry\Skirting
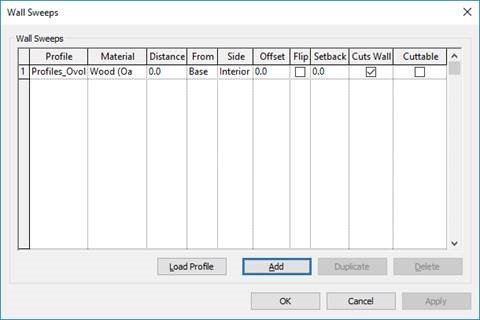
Choose one of the default skirting profiles, I have chosen Profiles_Ovolo.rfa for this example. Once that has been loaded in, choose to add a sweep onto the wall, and select the previously loaded profile from the dropdown. Define any other relevant options to give the profile a material (in my case, Oak) and a base level and location (interior):
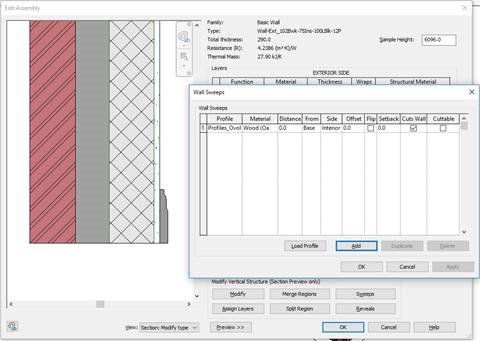
If you hit Apply, you will see your preview updating in the background:
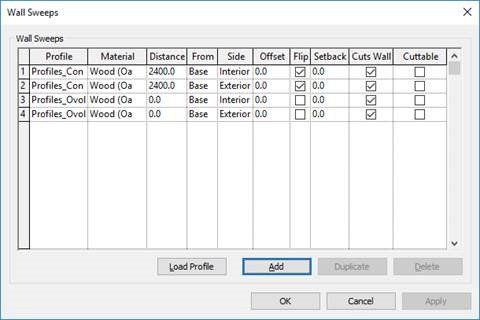
I am going to repeat the same process for my internal partitions. Remember, you will likely need to duplicate the sweeps for internal walls to have an ‘internal’ and ‘external’ facing sweep:
You can also use exactly the same functionality to add coving around the ceiling of the rooms, or architrave detailing. Just remember to add these profiles from the base, with an offset that matches your ceiling heights:
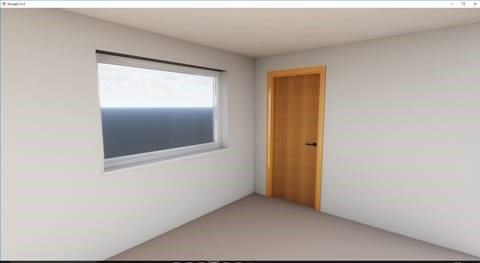
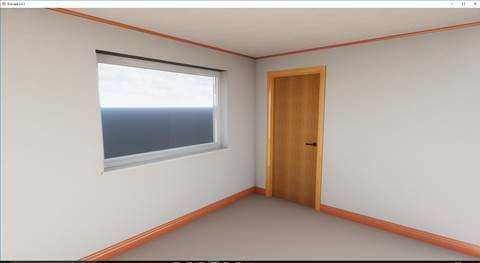
Taking a look at the finished result, for this example inside of Enscape, we get a nice visual look and feel for the detail in the building:
Before:
After:
Just remember the above mentioned point, following this method you may well see clashes in the model at wall crossings, so this process should only be used for visualisation purposes:
If you need to add this level of detail into the model in general, you will need to use in place families with a sweep. The functionality is essentially the same, but it is a little more long winded as you will have to do each room or section as a separate sweep.