If you already have a piece of material that you are wanting to machine to create the final part needed, you can use a Starting Mass. This is also great if you know the area that the part can reside in.
To use a Starting Shape, you will first need to create it as a separate body within the project. I have included the Obstructive Geometry from the previous blog as a guide for this, but you do not need to include it. To simplify the object as much as possible, try to use the same sketch, this will ensure that it remains in the correct location and you do not have to project it to another plane or sketch.
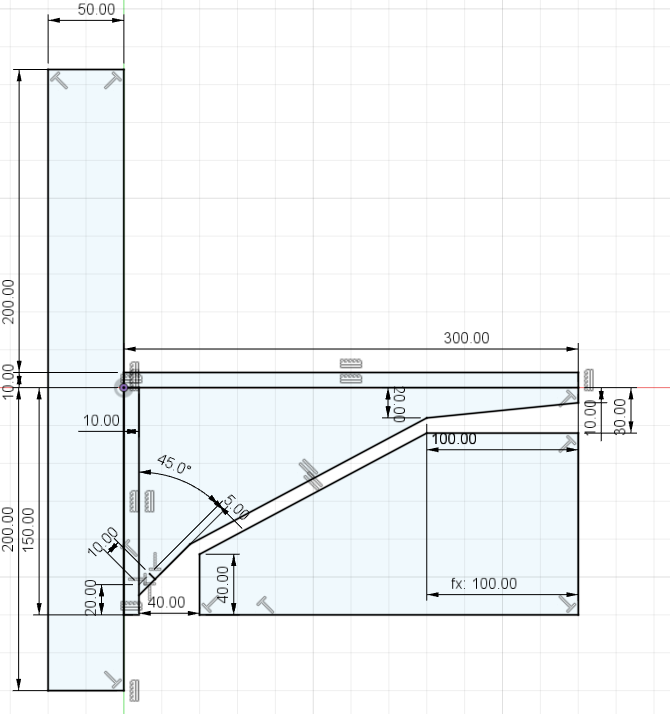
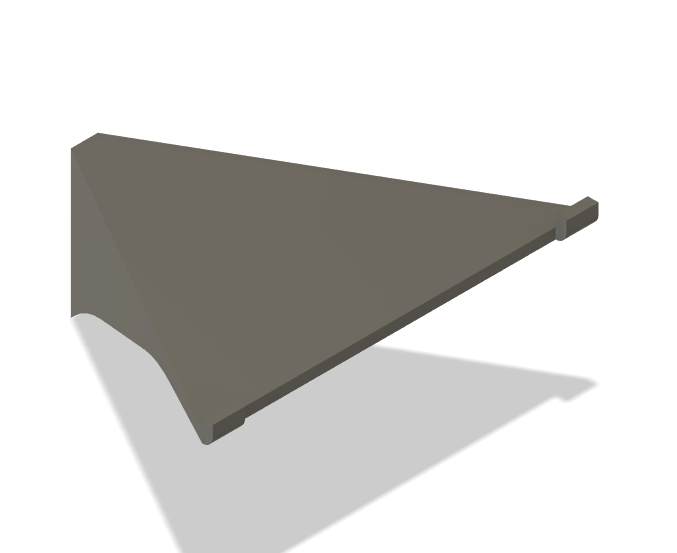
You can then extrude as a new body and adjust the shape as you wish. In this example I have drafted the sides to create a V shape and included the brackets at the end to ensure the frame can hold the shelf.
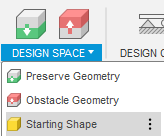
You can then go back into the Generative Design workspace, add the starting shape by selecting the Starting Shape option within the Design Space, selecting your starting shape or shapes, and clicking OK. They will then turn Yellow.
If you have created a new study, you will have to select the Preserve and Obstacle Geometry again.

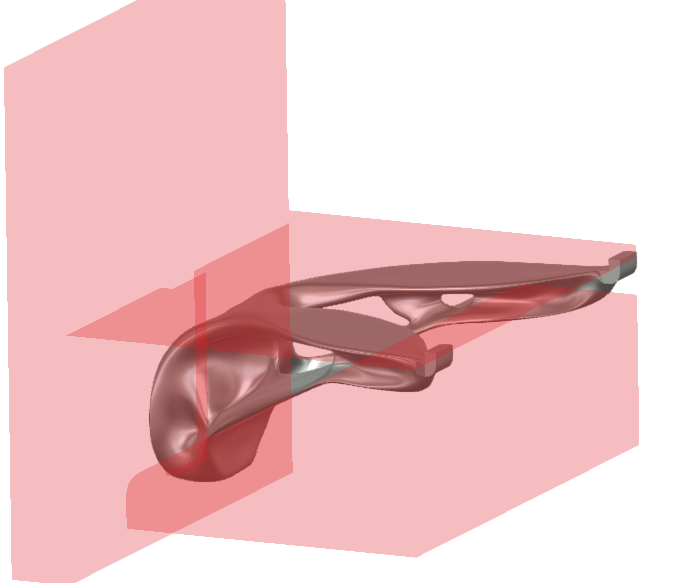
You can preview the design again and see that the yellow Starting Shape is replaced by the preview blob. If you are happy with this, you can proceed with the study. You can see that the preview extends beyond the limit of the starting shape, this will depend on whether you use additive or subtractive manufacturing.
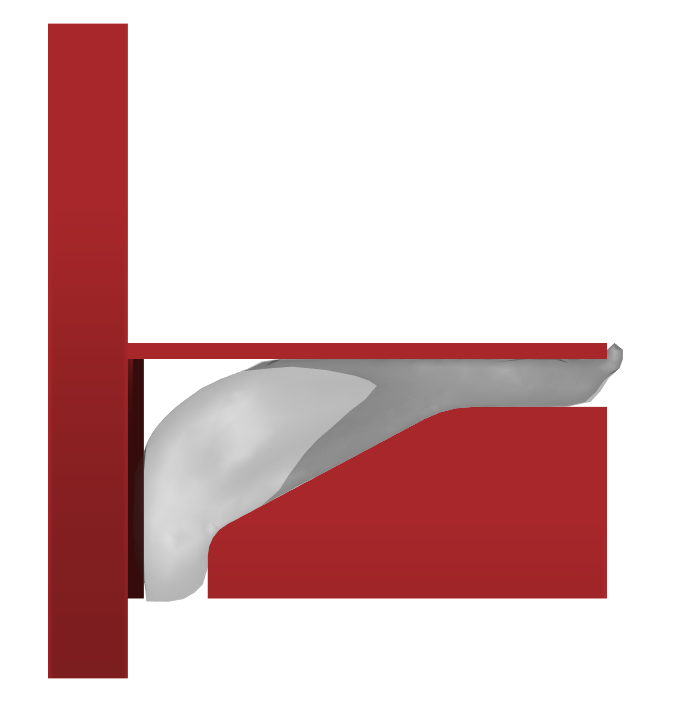
Looking at the completed study we see that by adding the starting shape, the frame no longer extends beyond the shelf and fills a bit more space below the shelf compared with the study using just the obstacle geometry.
For more information on this blog post or if you have any other questions/requirements, please complete the below form:
Related Links
Fusion Training – Autodesk Authorised Trainers | Man and Machine